Step 1 / 7
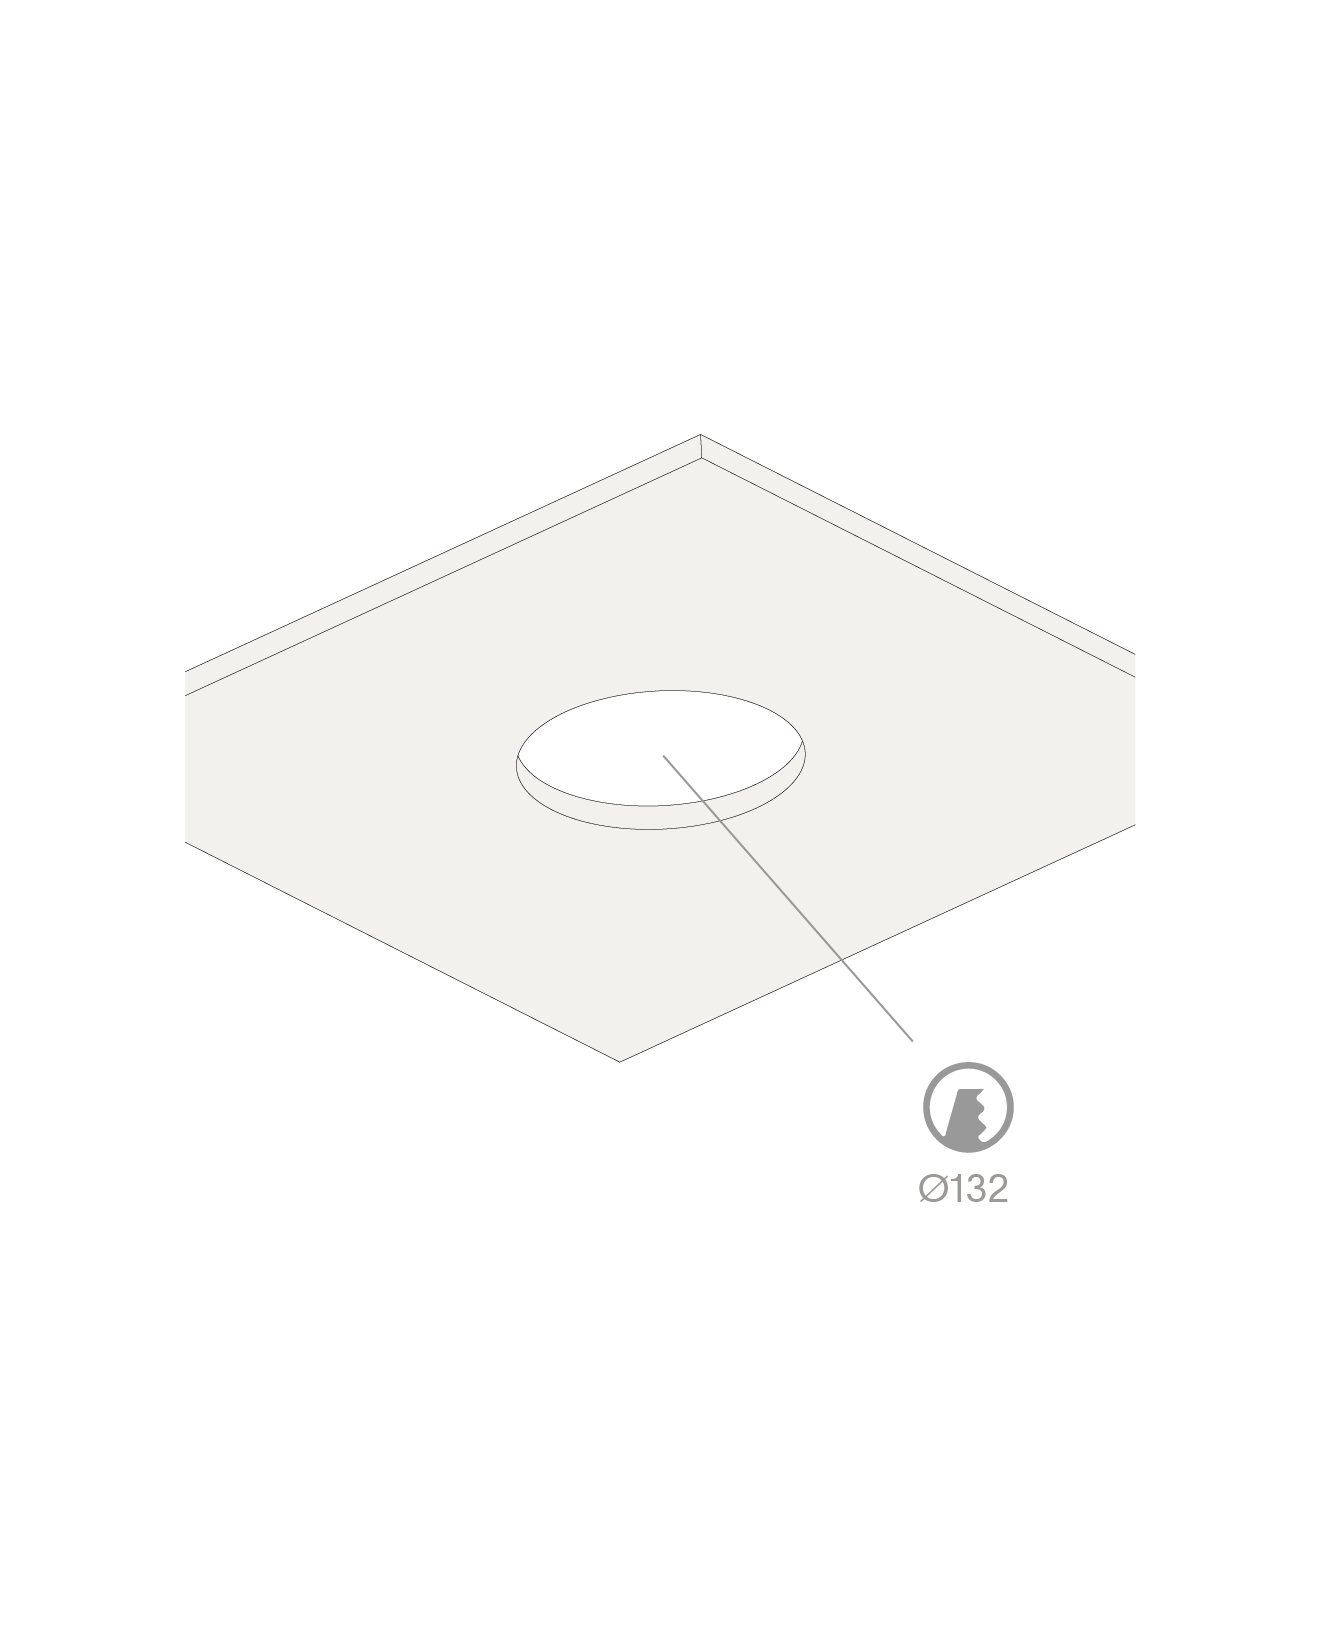
Cut a Ø132 hole.
Step 2 / 7
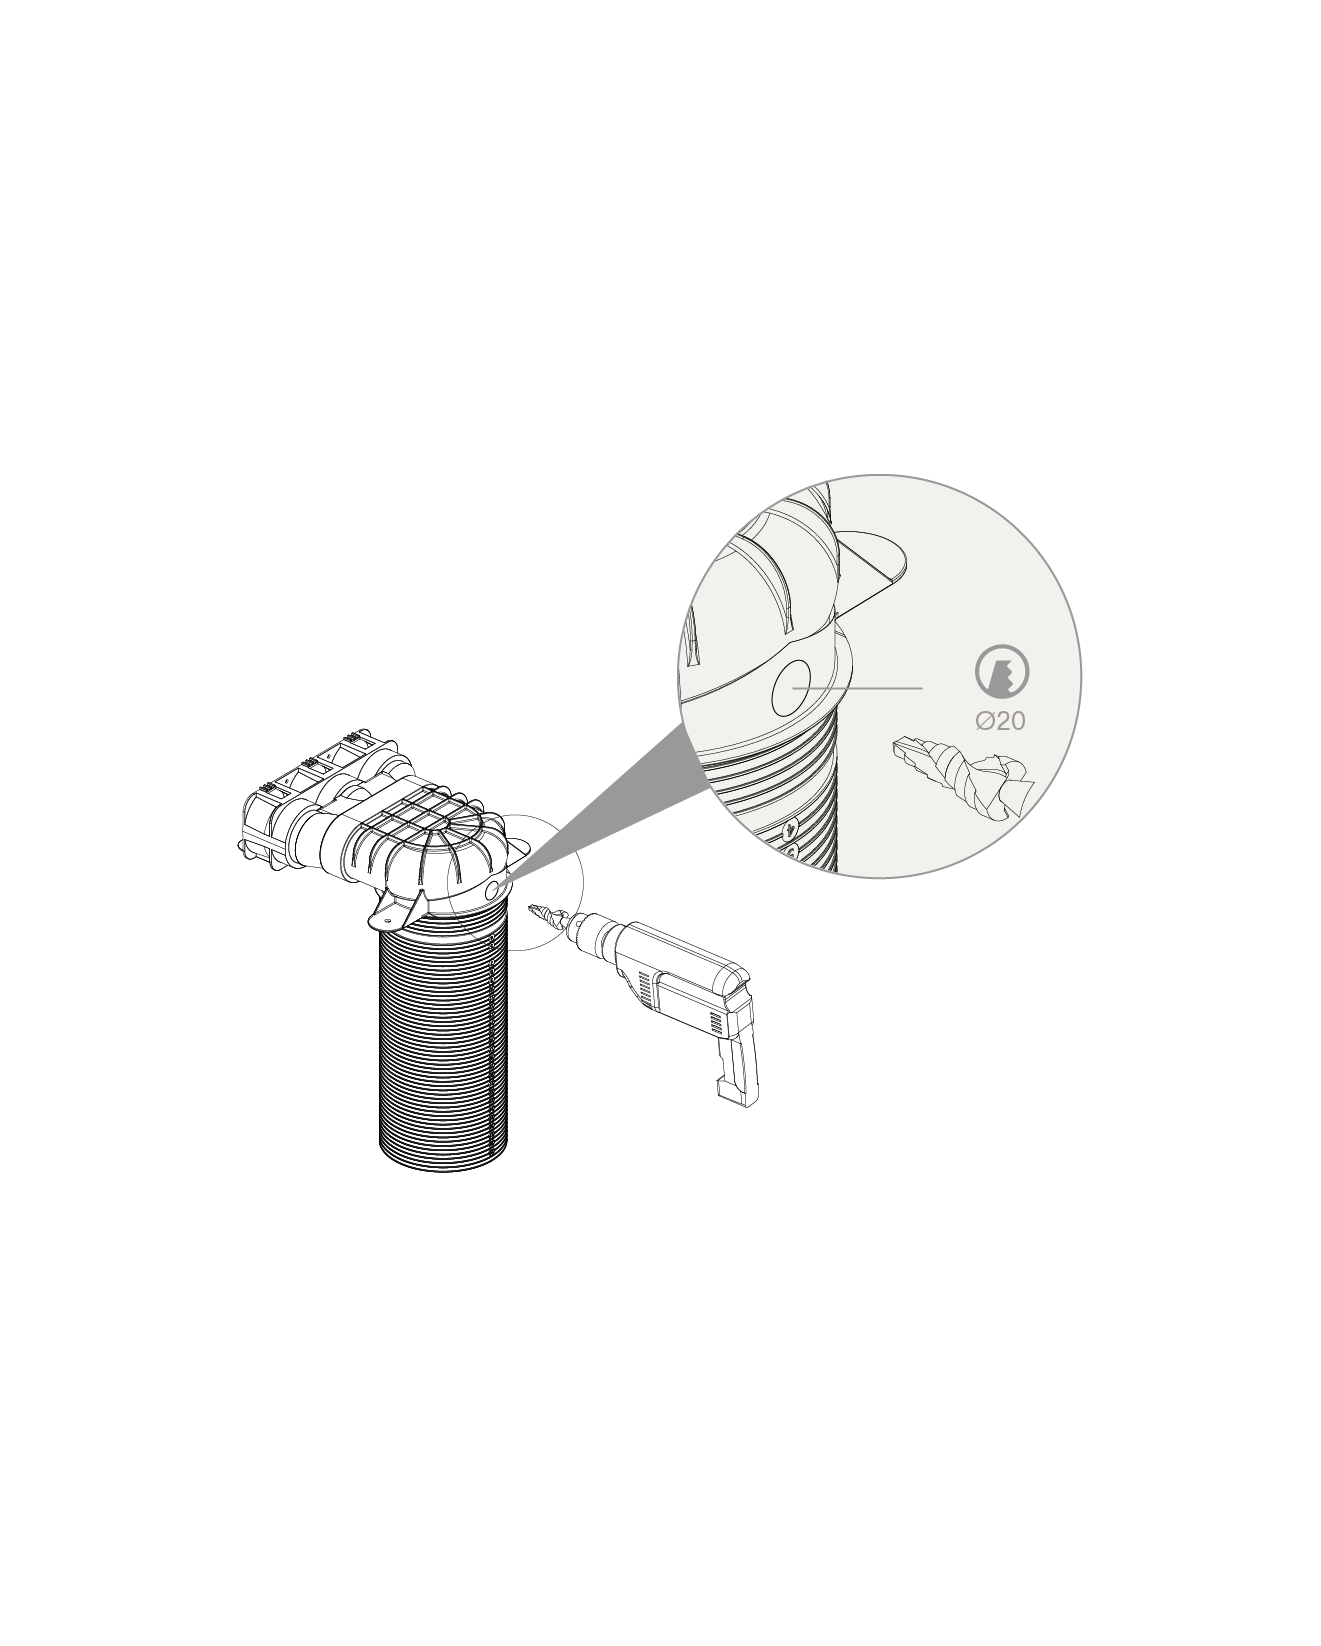
Use a step drill to cut a Ø20 hole into the Ø125 ventilation duct of your choice. A hole can be drilled in any type or brand of Ø125 ventilation duct.
Step 3 / 7
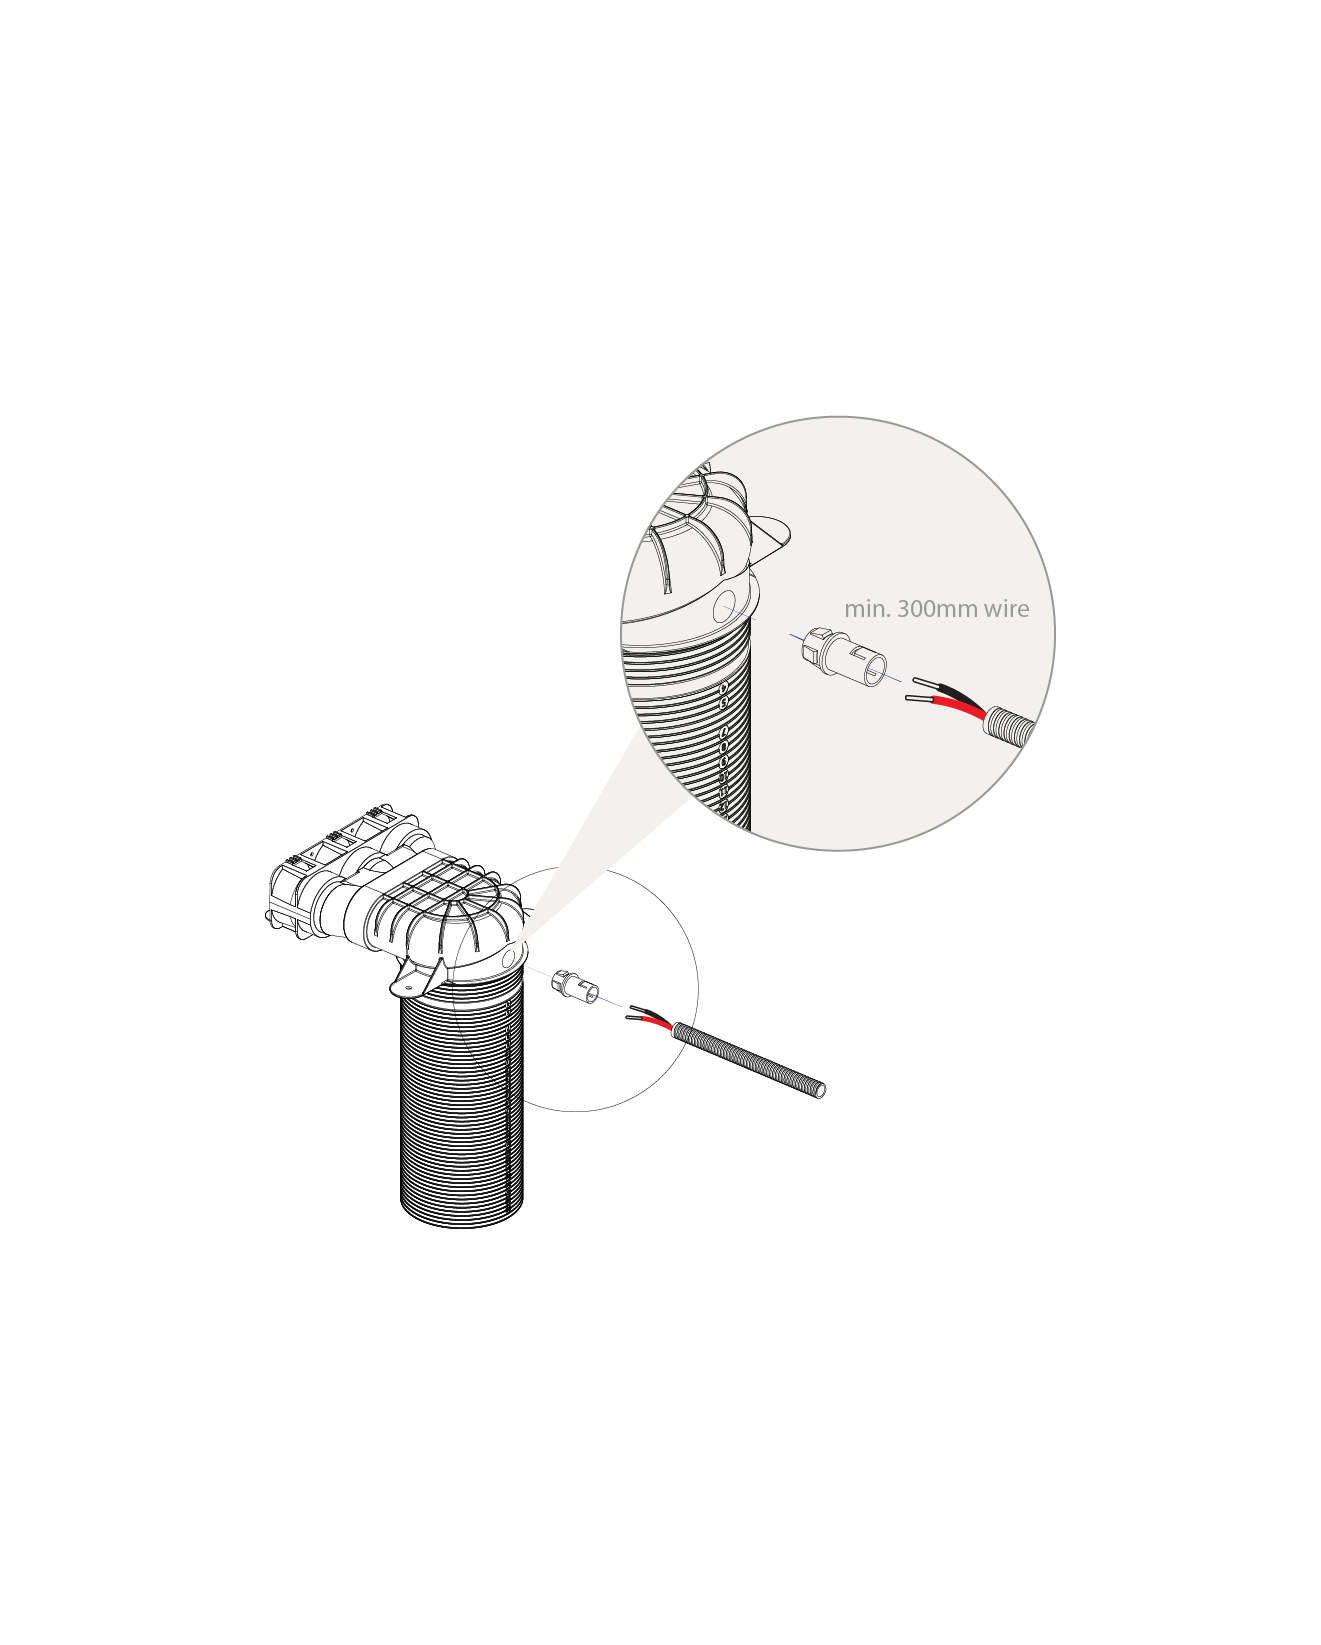
Connect a Ø16 preflex and the ventilation duct with the prado connector. Make sure to add at least 300mm of wire into the ventilation duct. Driver must be placed remotely to remain accessible.
Step 4 / 7
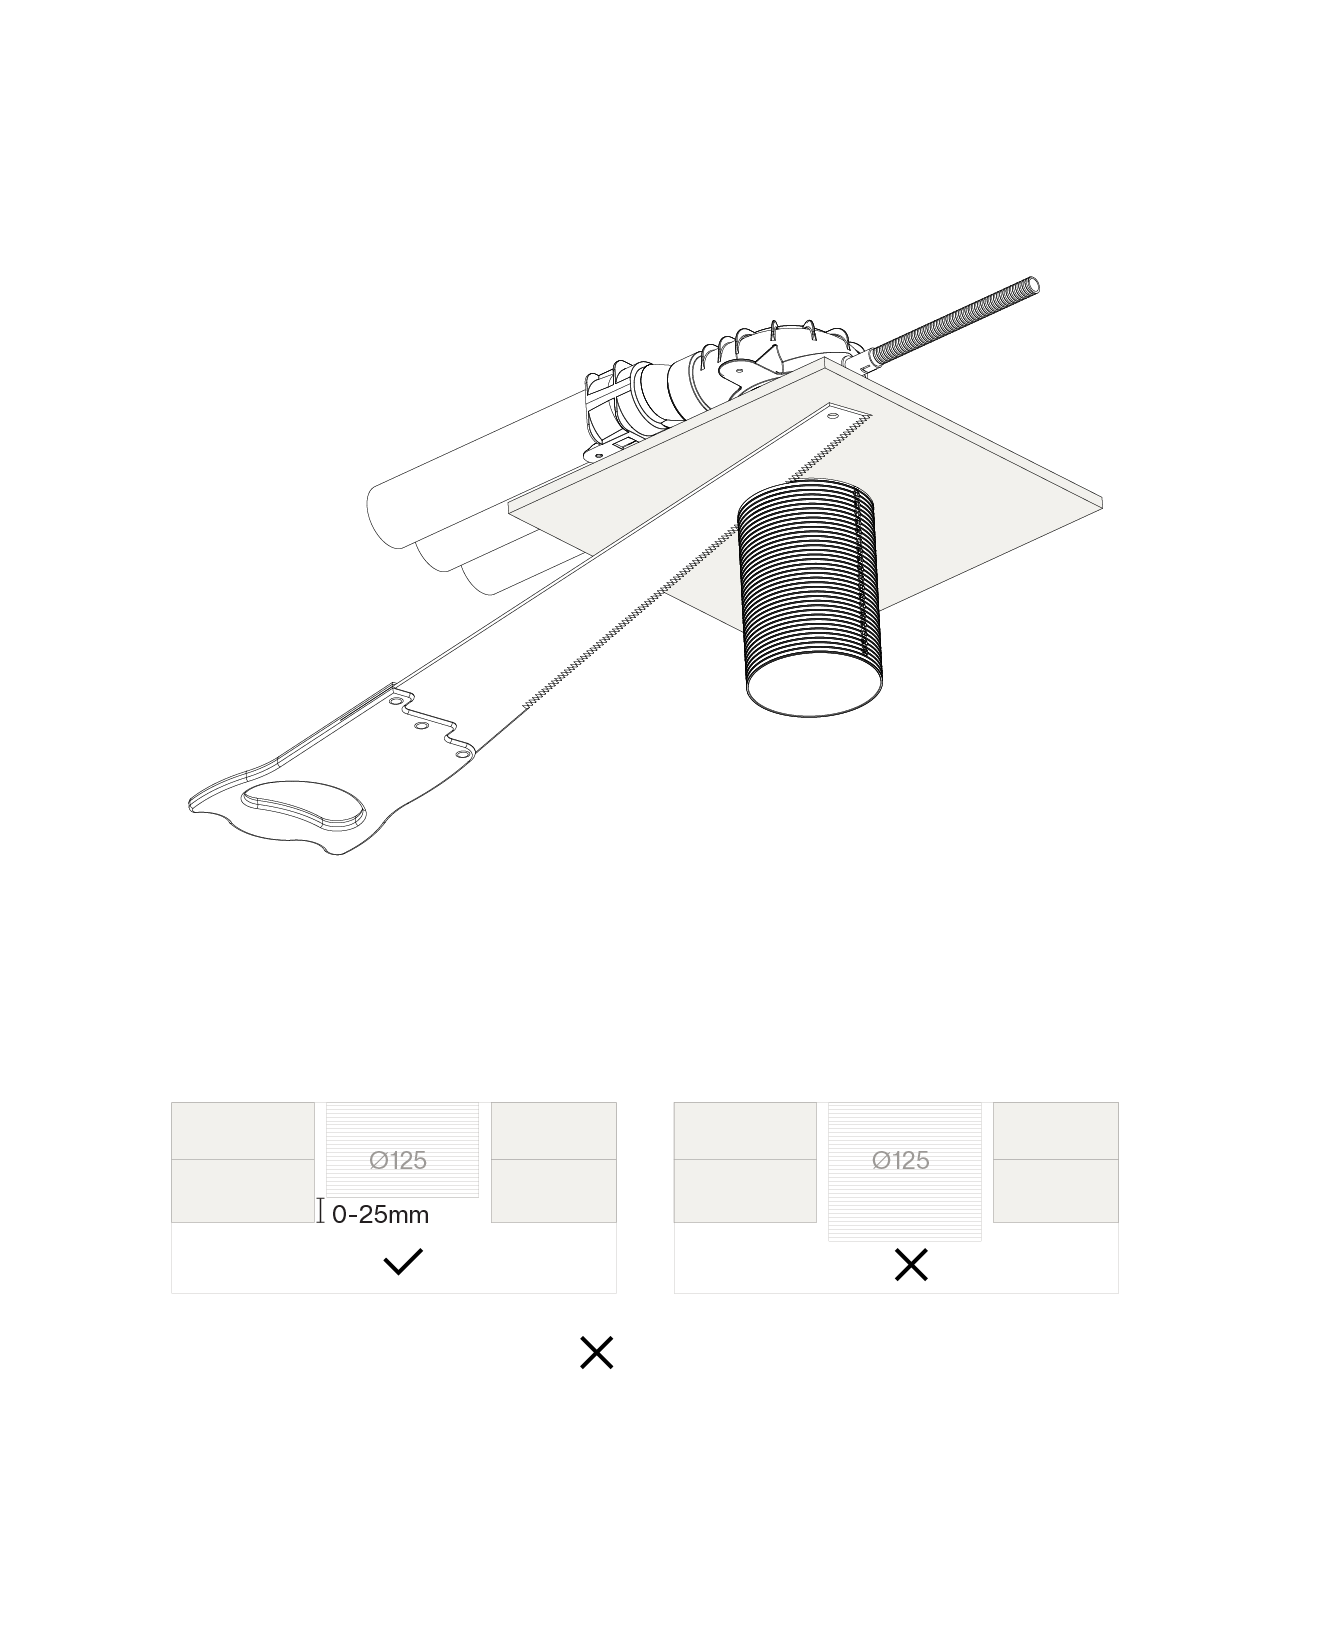
Cut off the excess length of the ventilation duct.
Step 5 / 7
Insert the plaster ring and securely fasten it with glue or the appropriate screws on a screwfast surface. The attachment must be able to obtain a static load of 5 kg. It’s the installers responsability to ensure optimal attachment.
Step 6 / 7
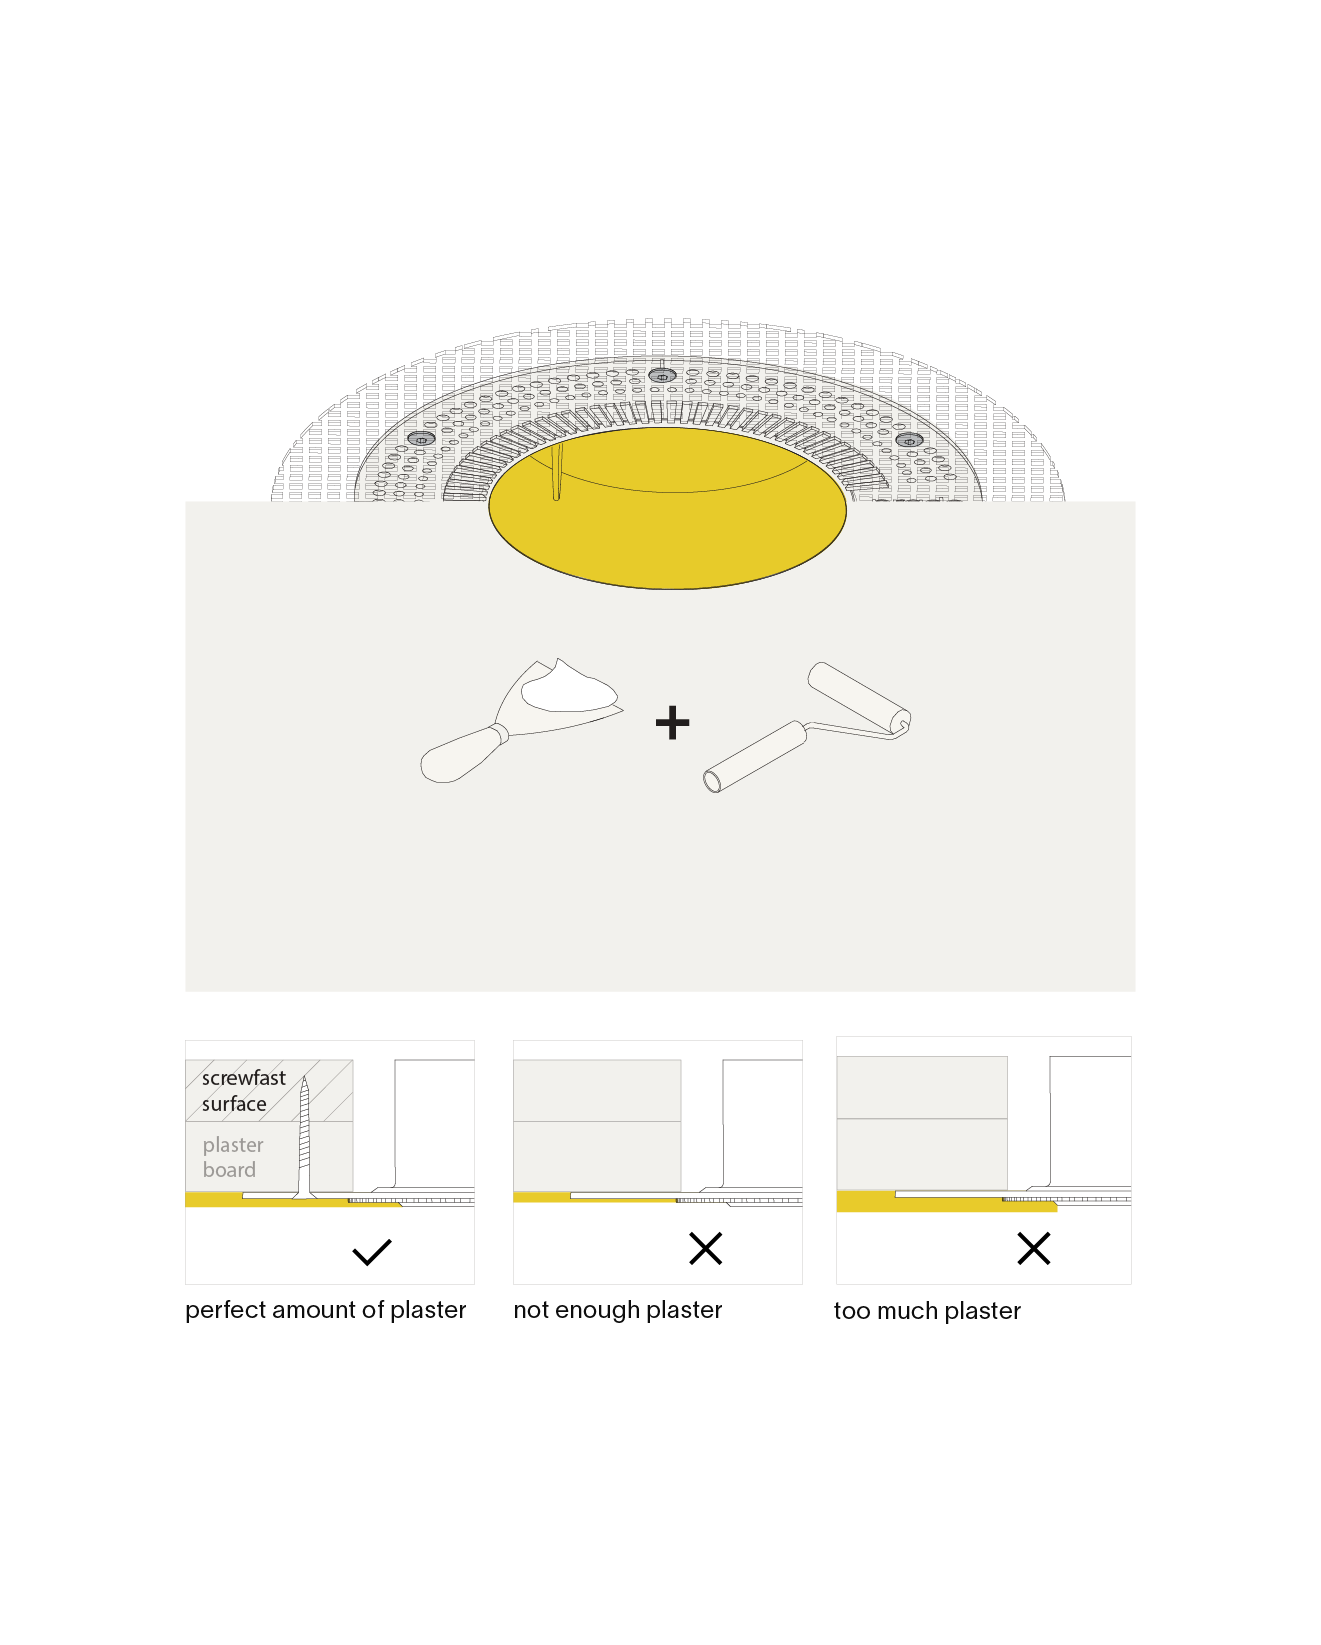
Excercise caution while plasering, do not damage the ring. Keep the plaster lid inside the plaster ring while plastering. Use a fiberglass mesh tape for optimal plaster adhesion. Make sure not to touch the edge of the ring when sanding.
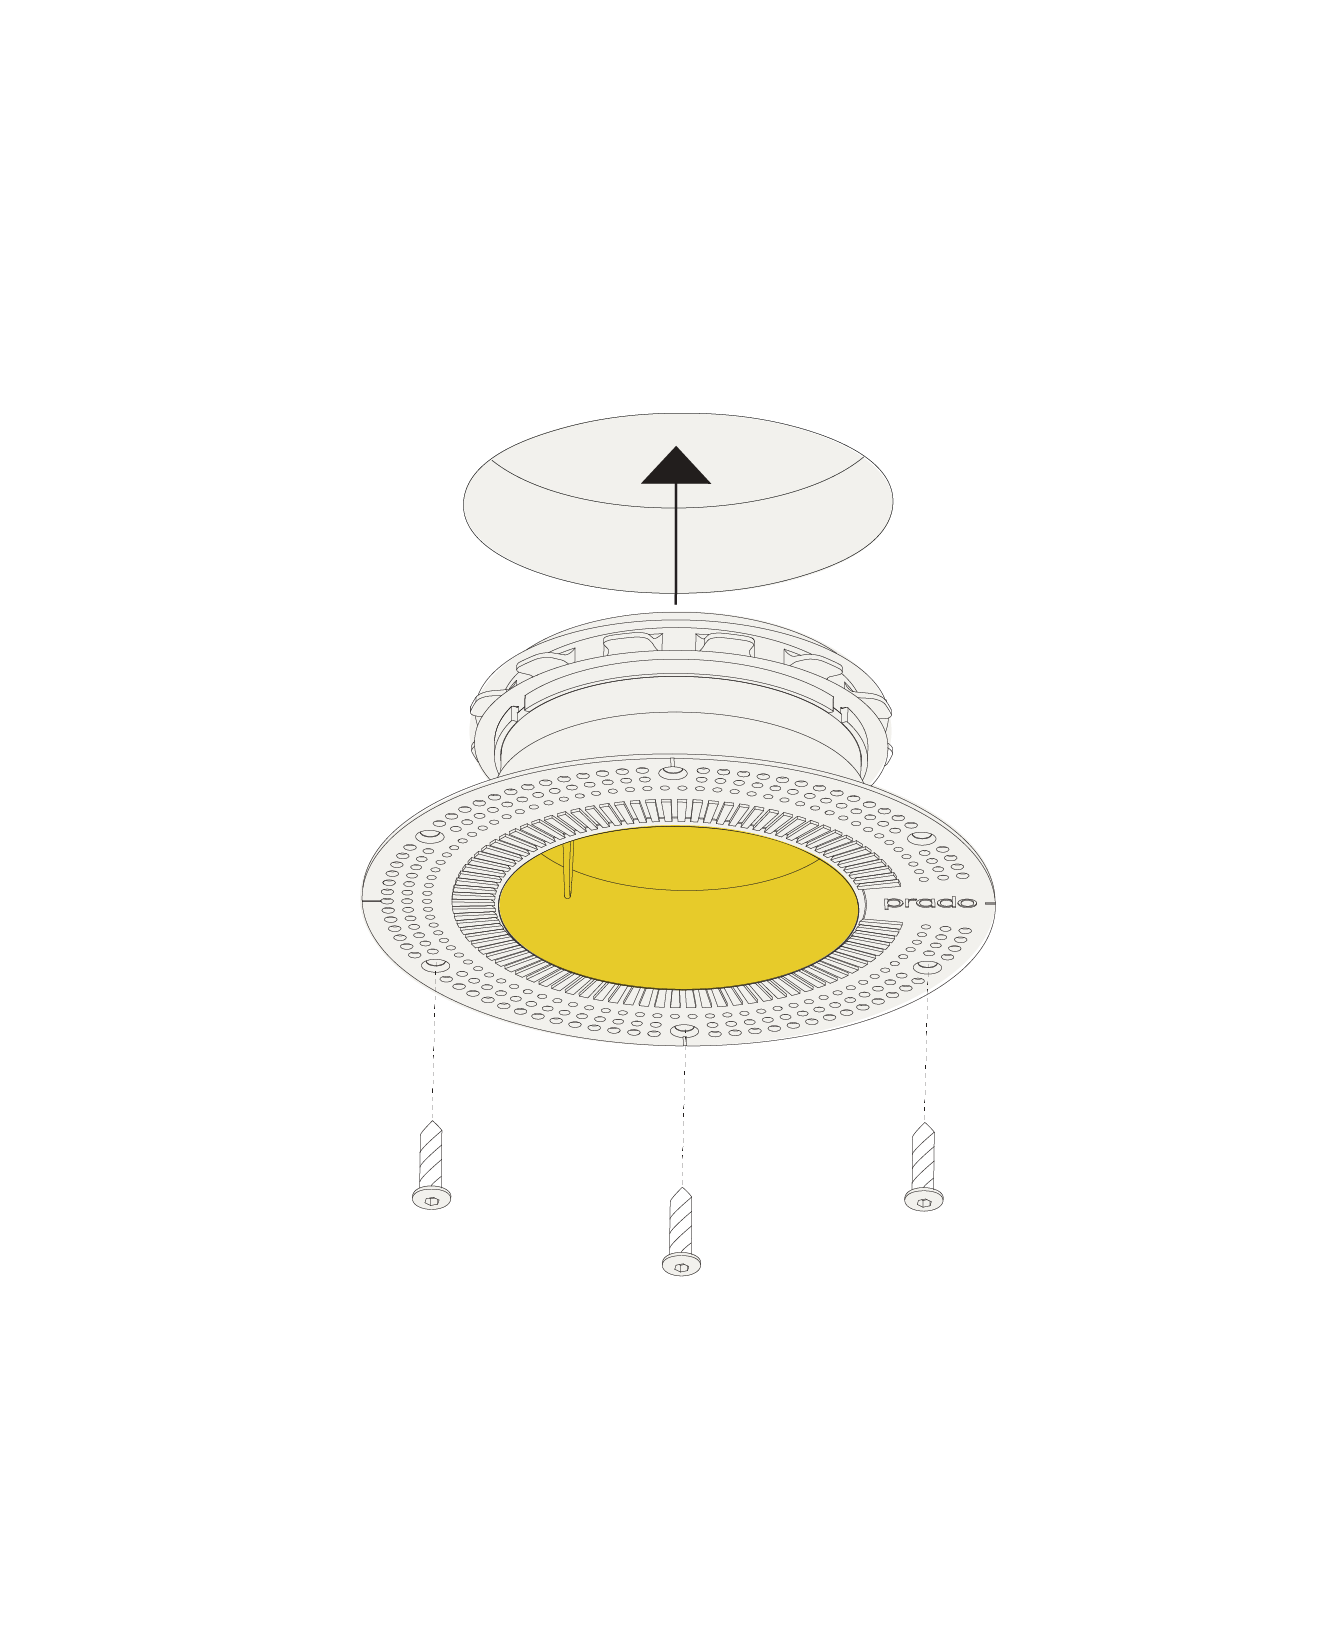
Step 7 / 7

Remove the plaster lid just before installing the fixture. It helps to keep the inside of your plaster ring free of filler, paint and dust. Any residue needs to be removed without damaging the edges of the plaster ring.
Installation must be done by skilled professionals only and instructions must be followed at all times. Warranty will not apply in case of wrongful use of if unskilled personnel attempts to repair a product.