Step 1 / 4
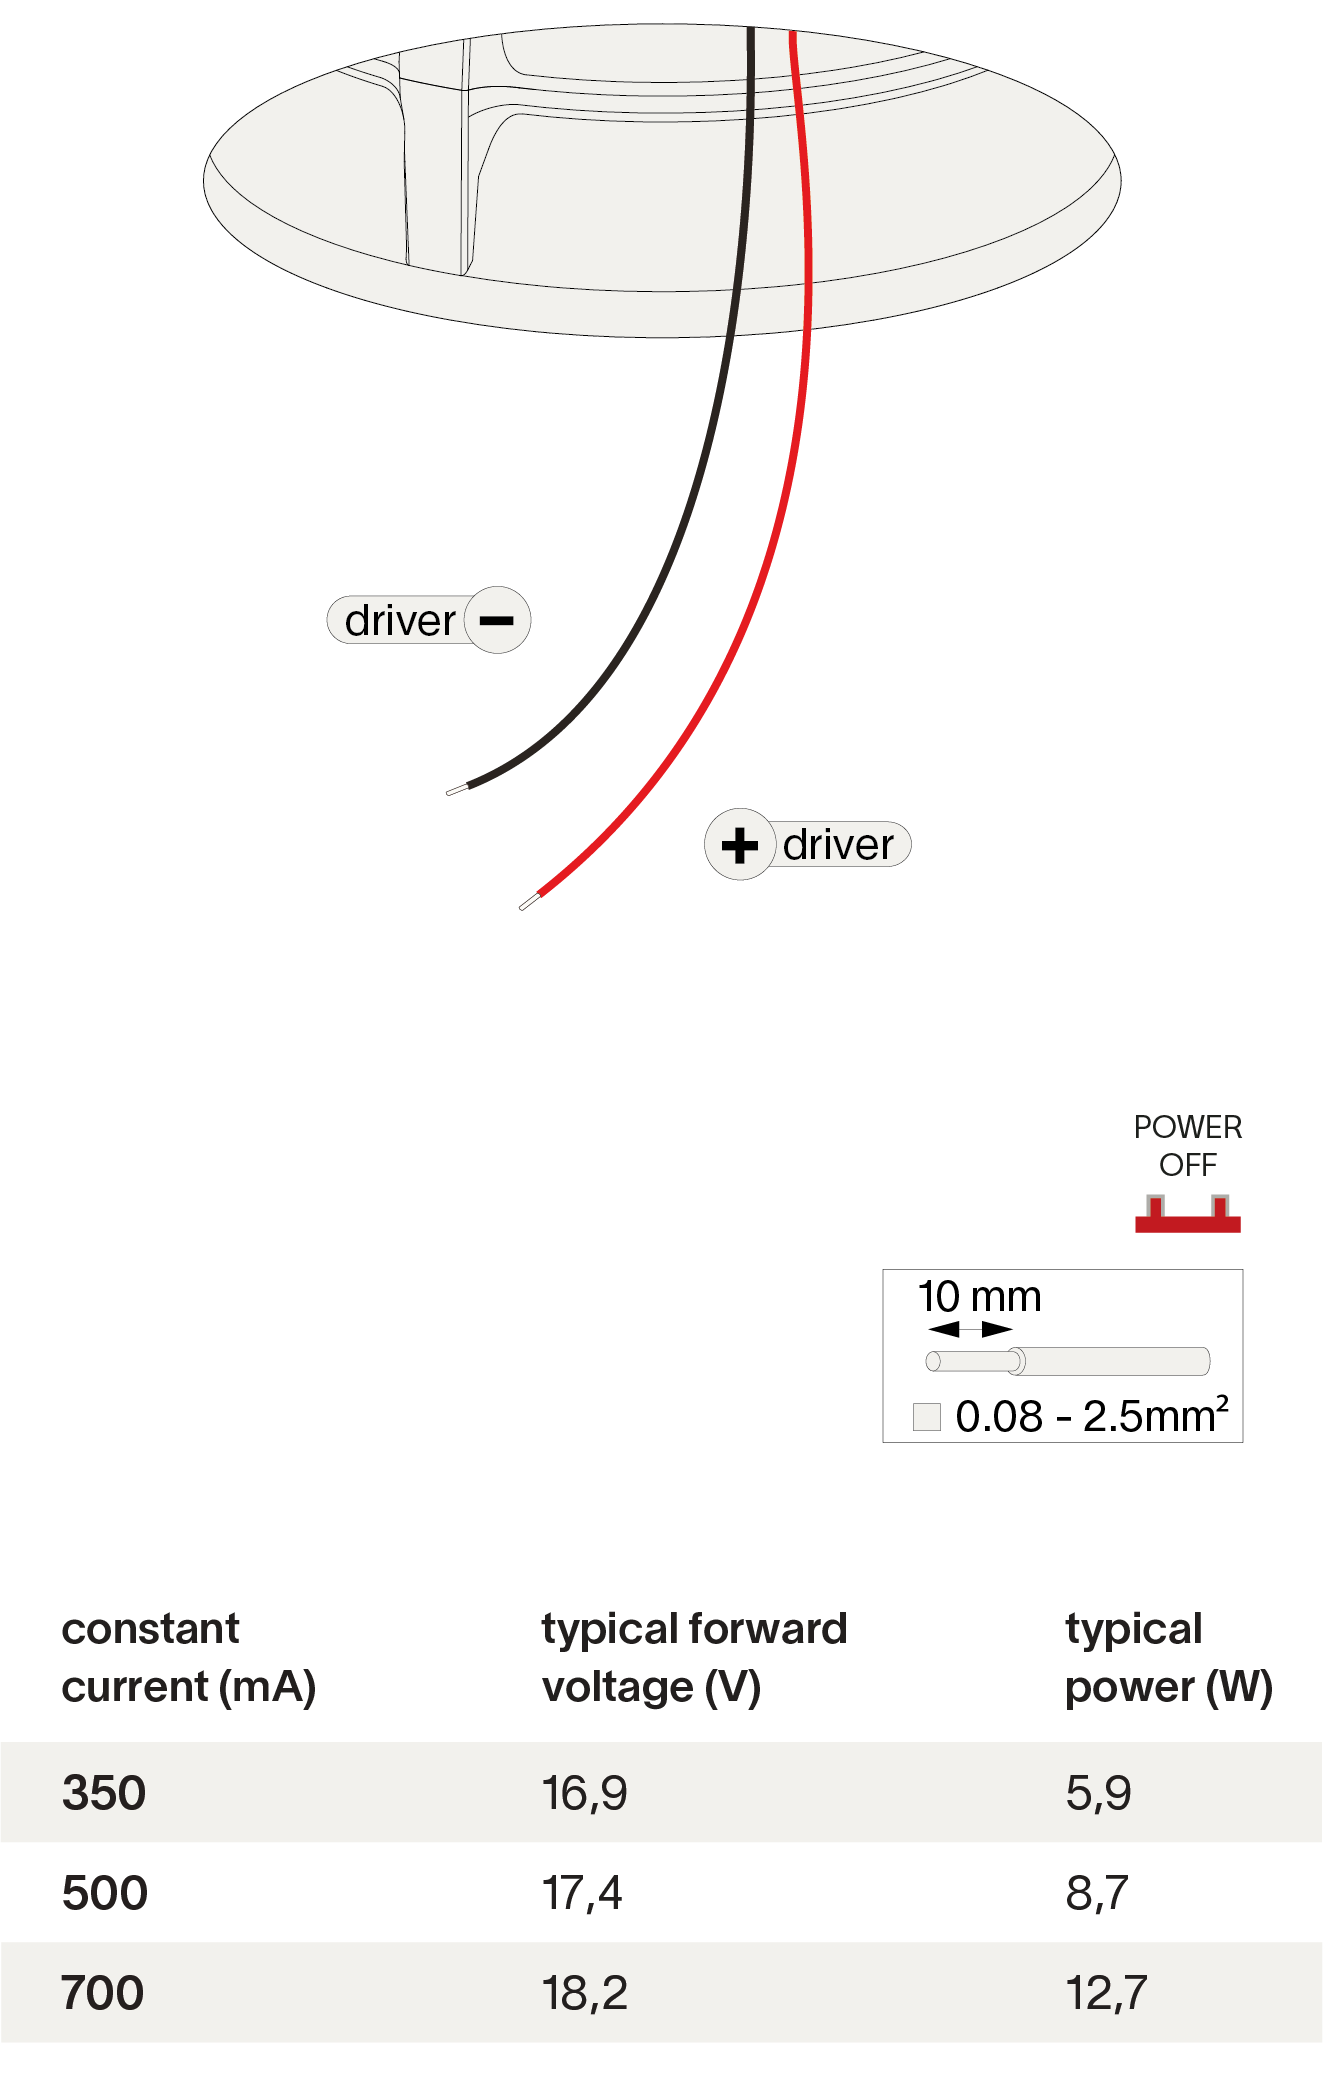
See packaging or fixture label for maximum current.
Step 2 / 4
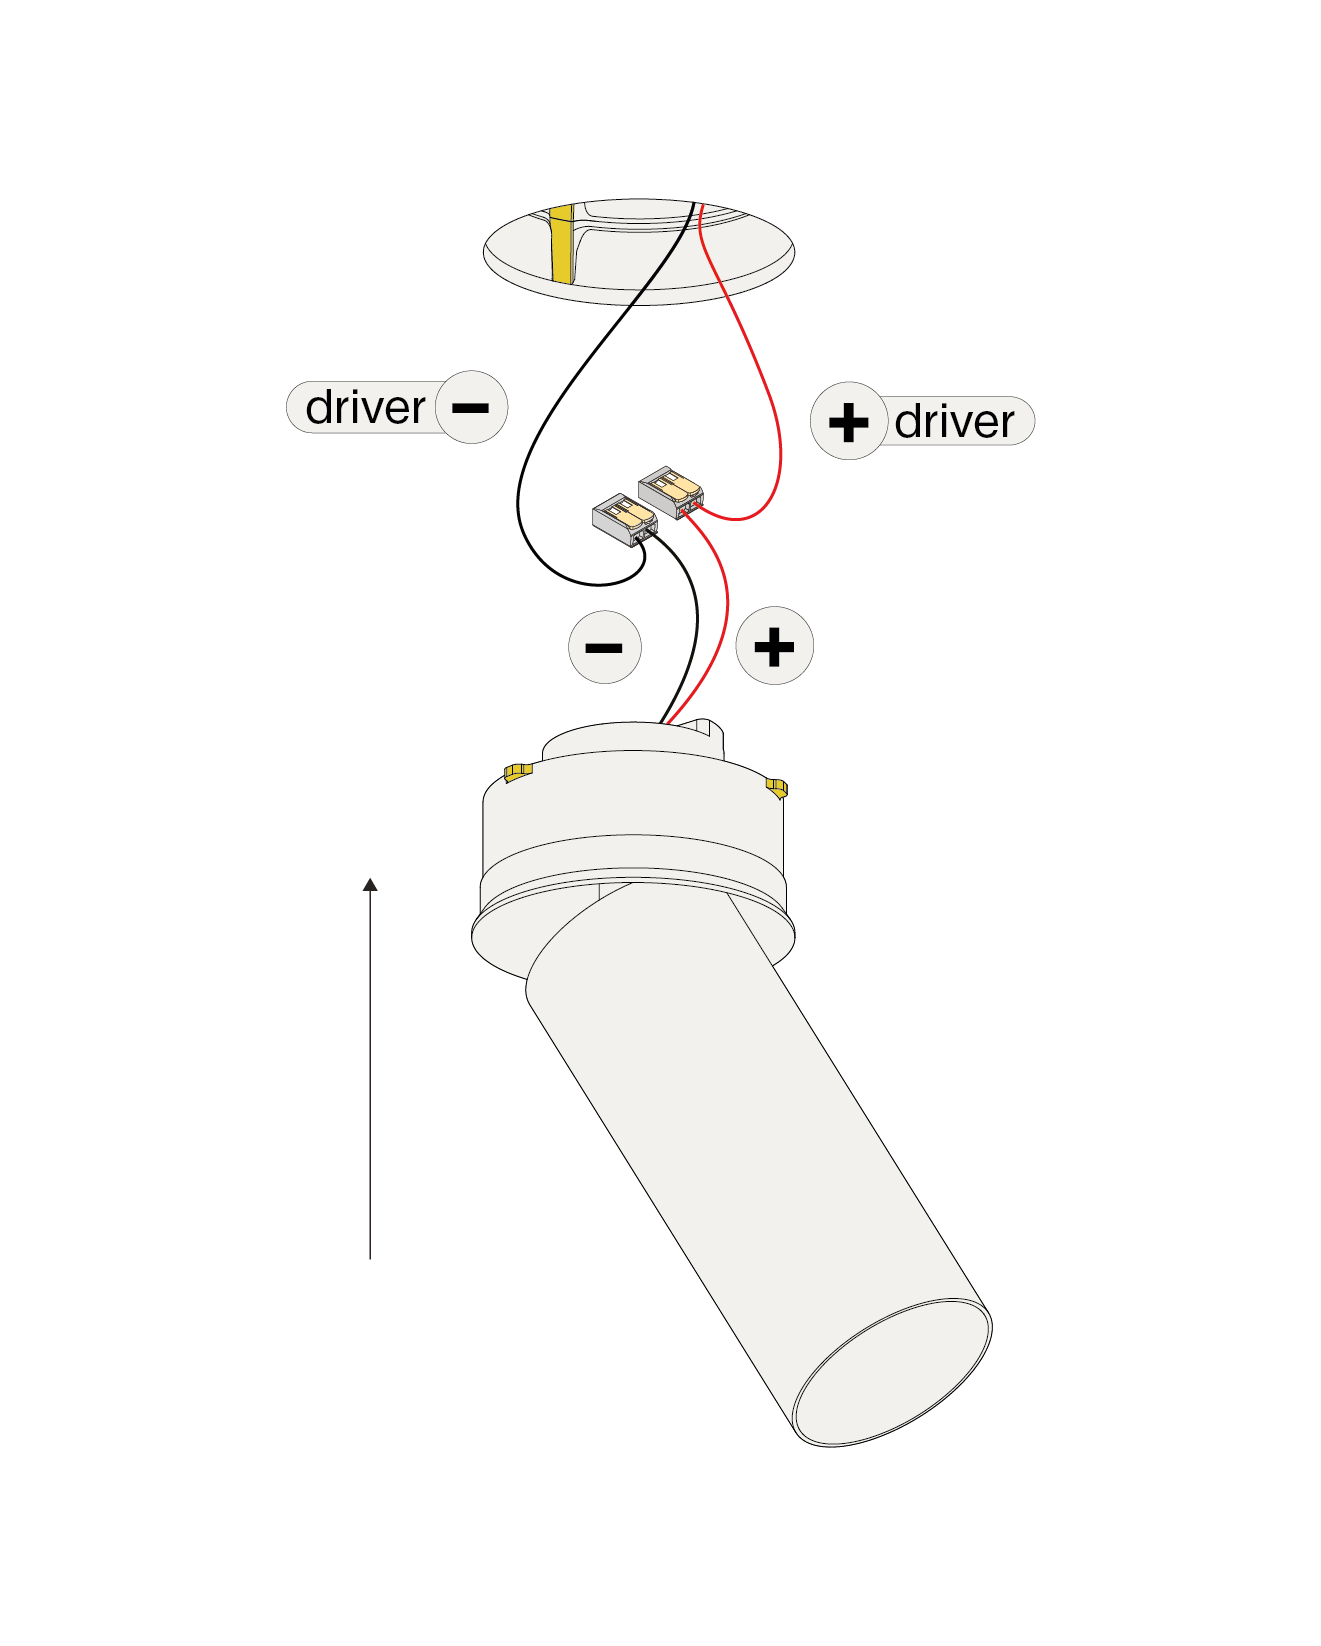
Connect the wires with wago connectors for serial connection, respect polarity combine with a prado LED-driver.
Step 3 / 4
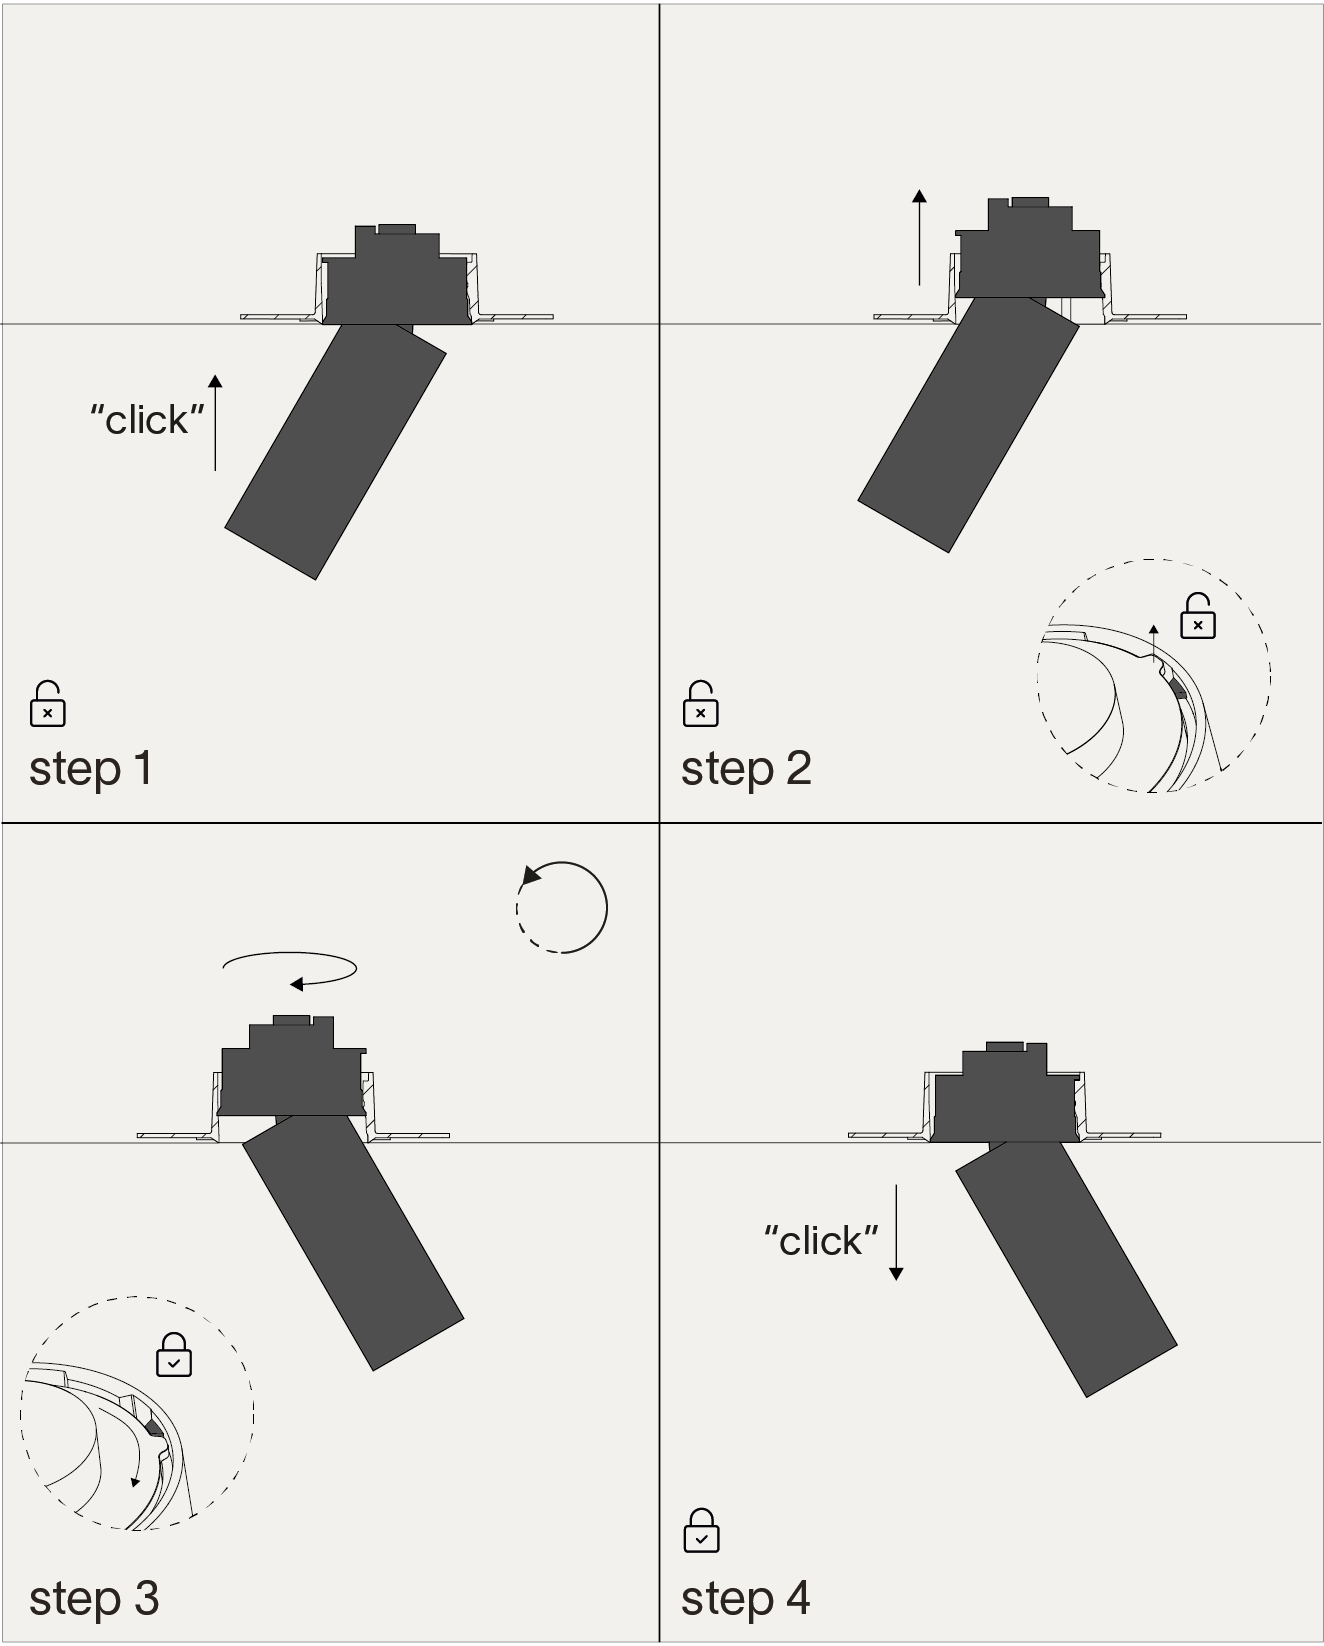
Insert the luminaire into the ceiling until it “clicks”. Push the luminaire a little further and twist it to lock it. Gently pull the luminaire down again. Now it’s locked.
Step 4 / 4
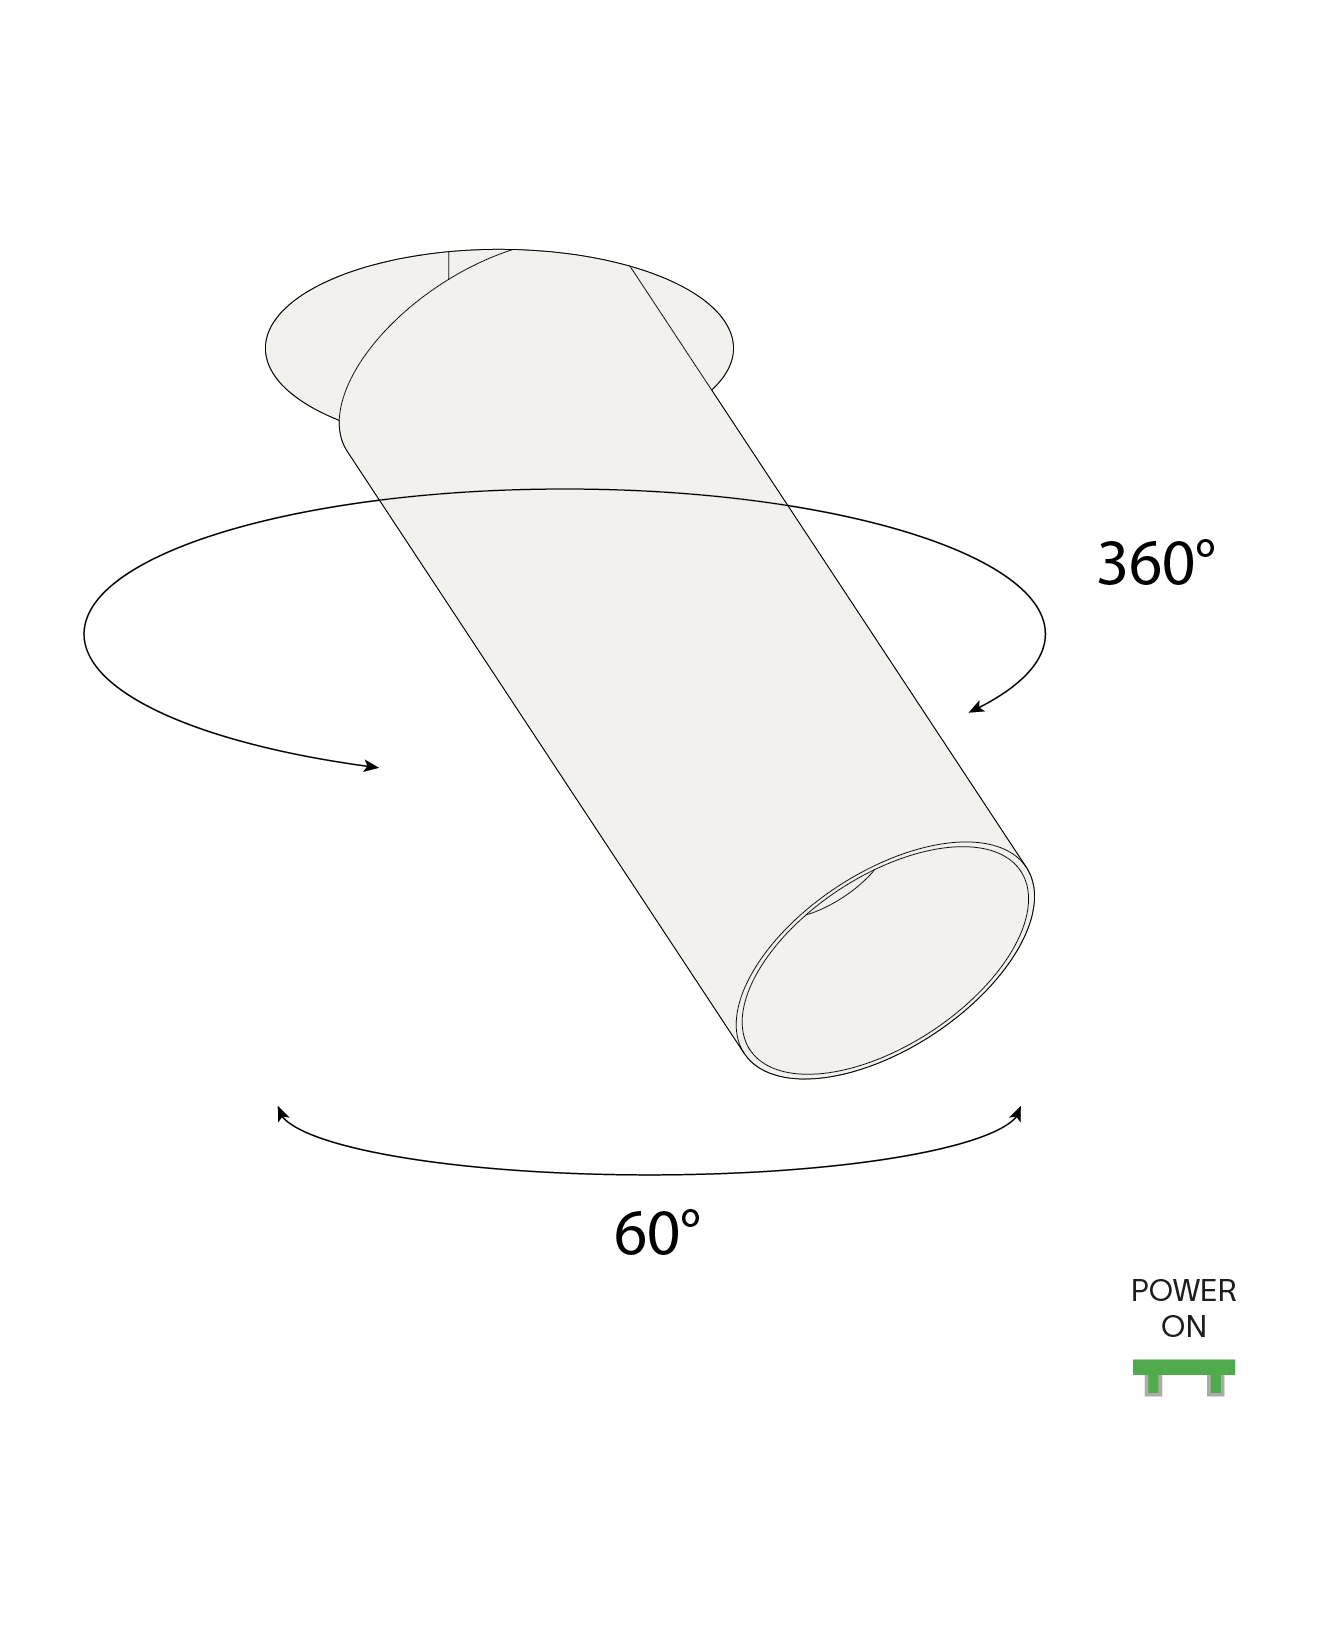
Twist the luminaire as desired.
-

-

-

-

-

-

-
Replace glass lens when broken.
Luminaire shall only be used together with glass lens.
The light source in this luminaire shall only be replaced by the manufacturer or a similar qualified person. Warranty will not apply in case of wrongful use or if unskilled personnel attempts to repair the product.

