Step 1 / 7
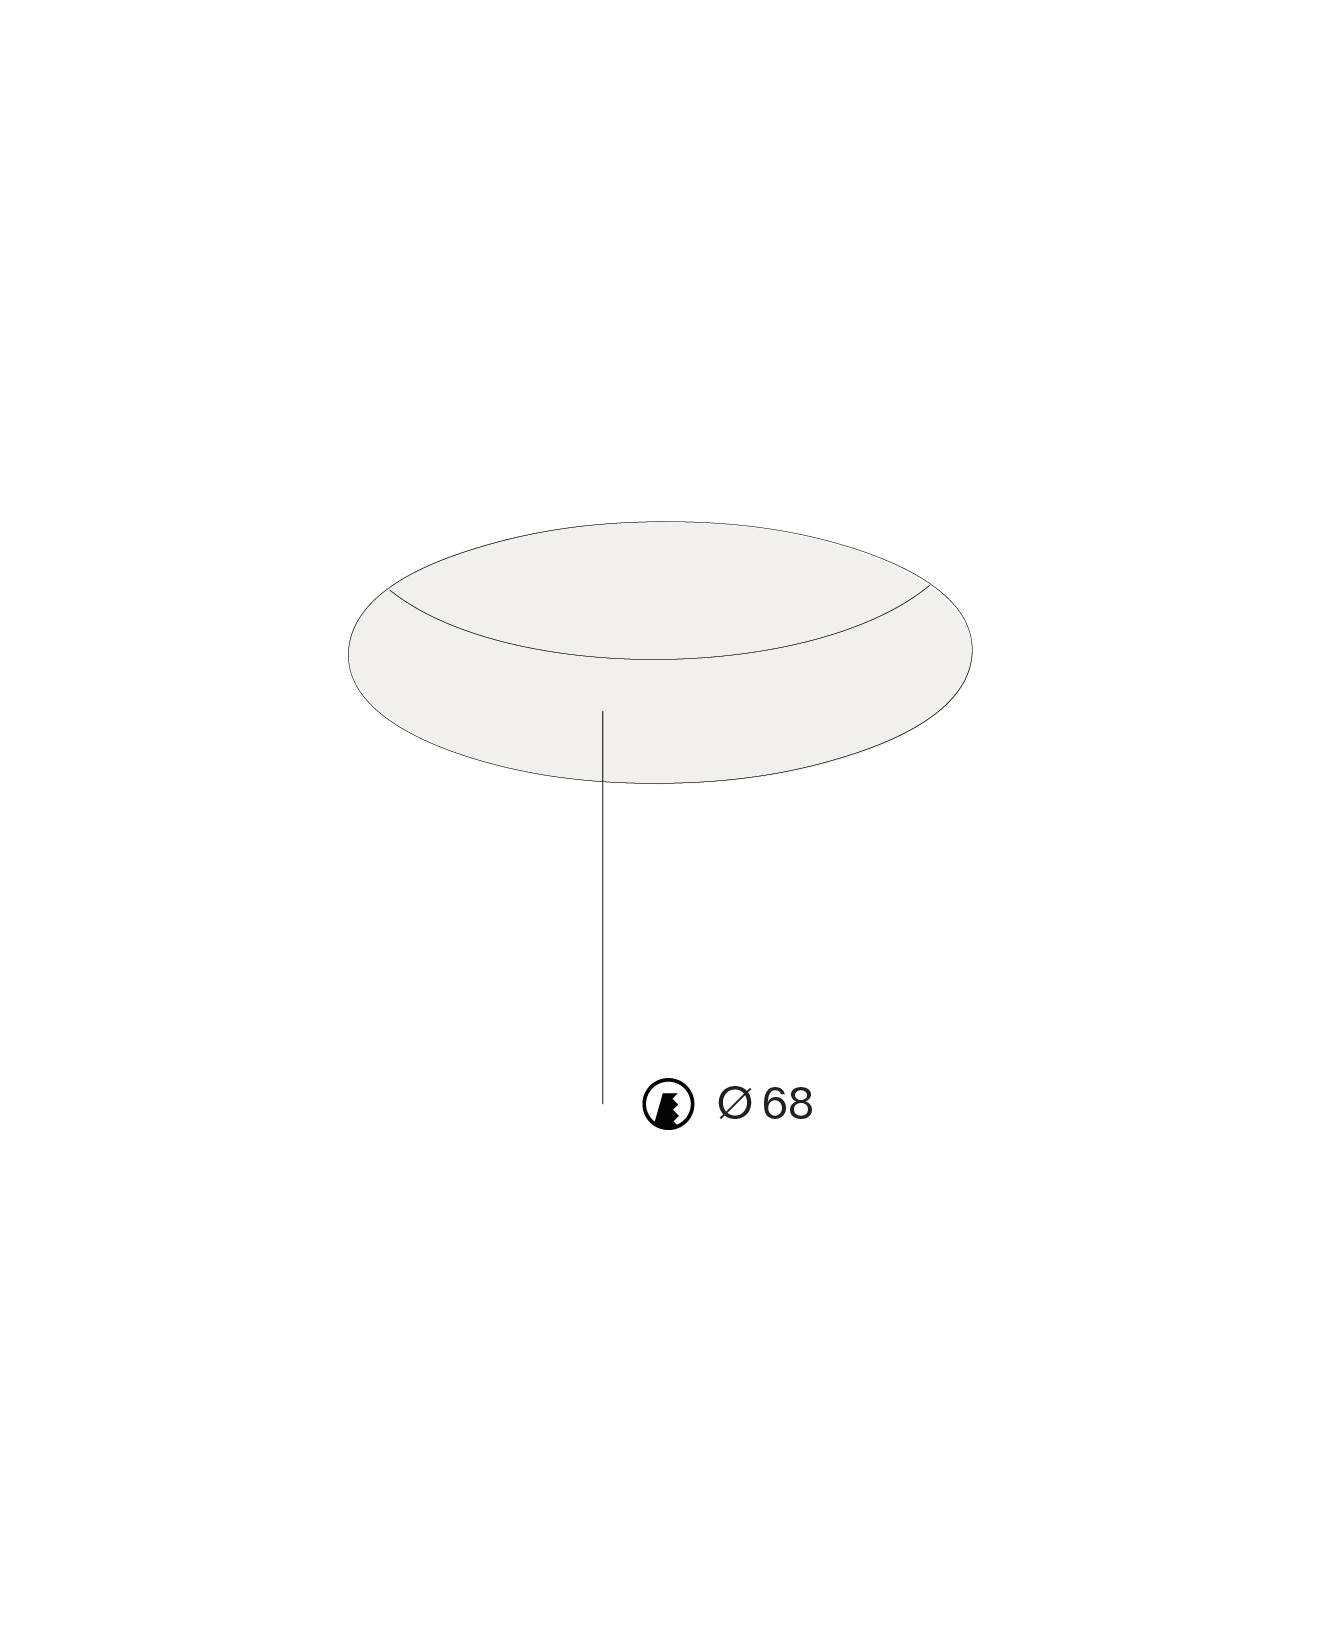
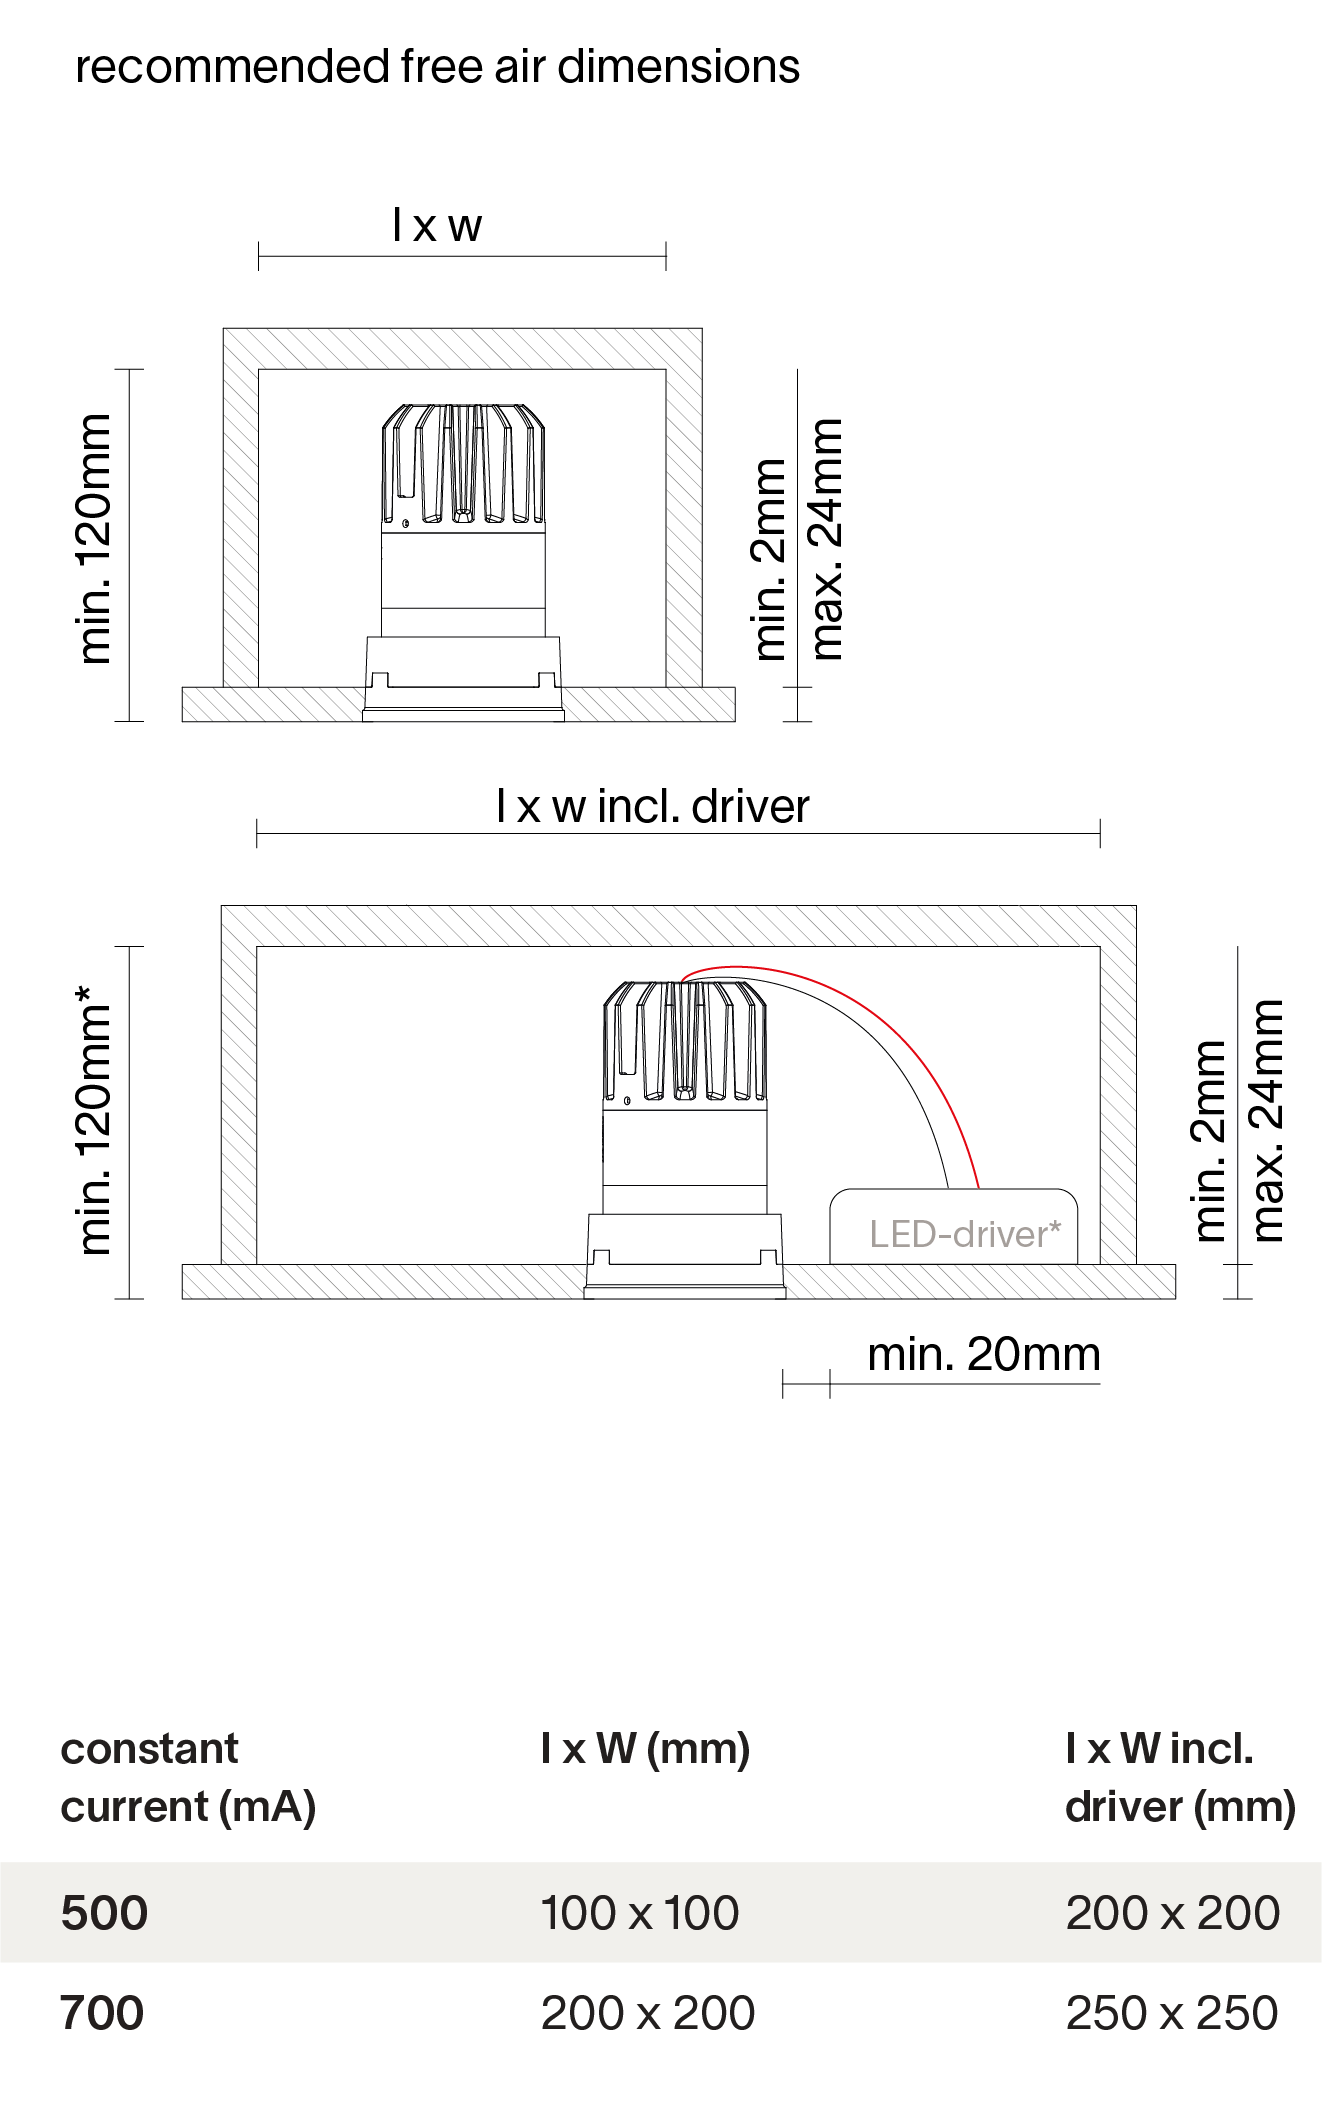
Cut a round hole (Ø 68). Consult the chosen luminaire tech specs for required height and free air dimensions.
Step 2 / 7
Step 3 / 7

Step 4 / 7
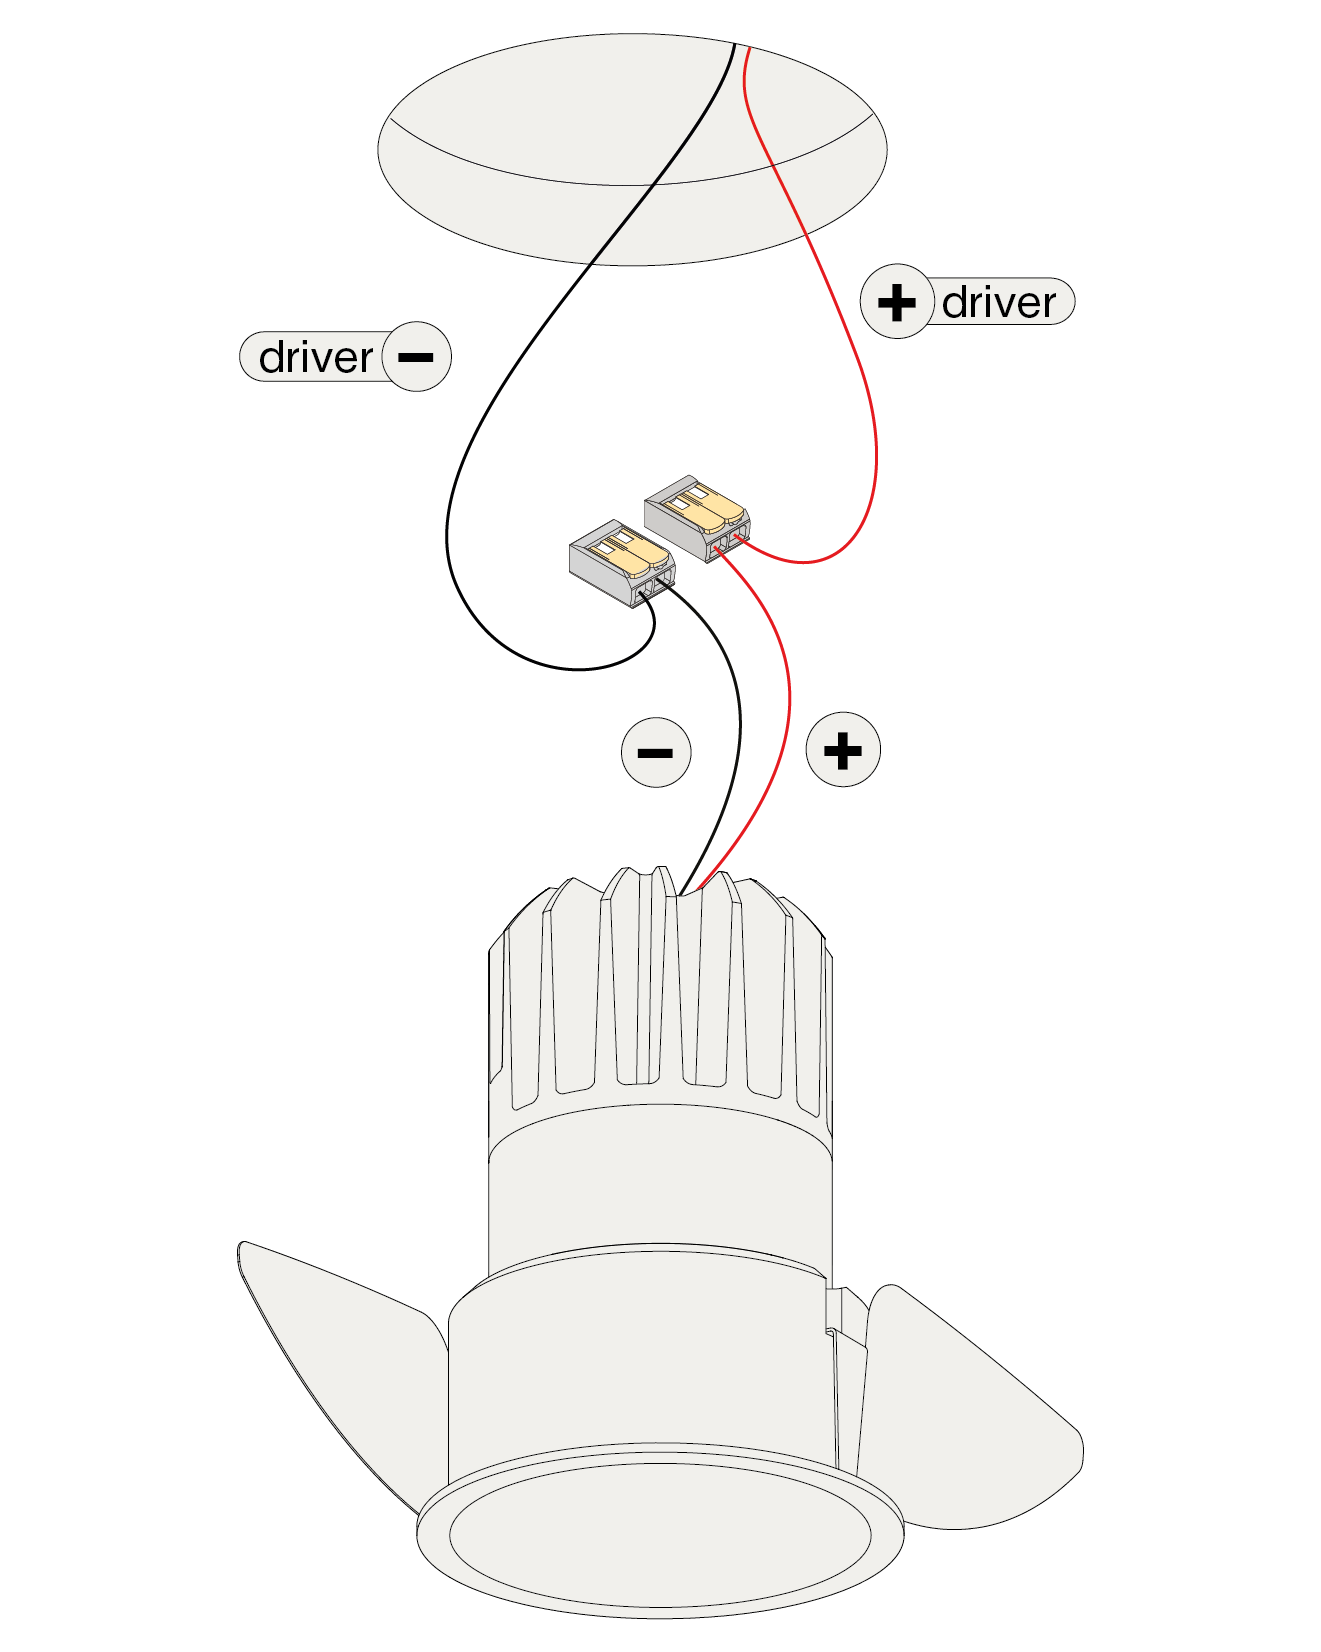
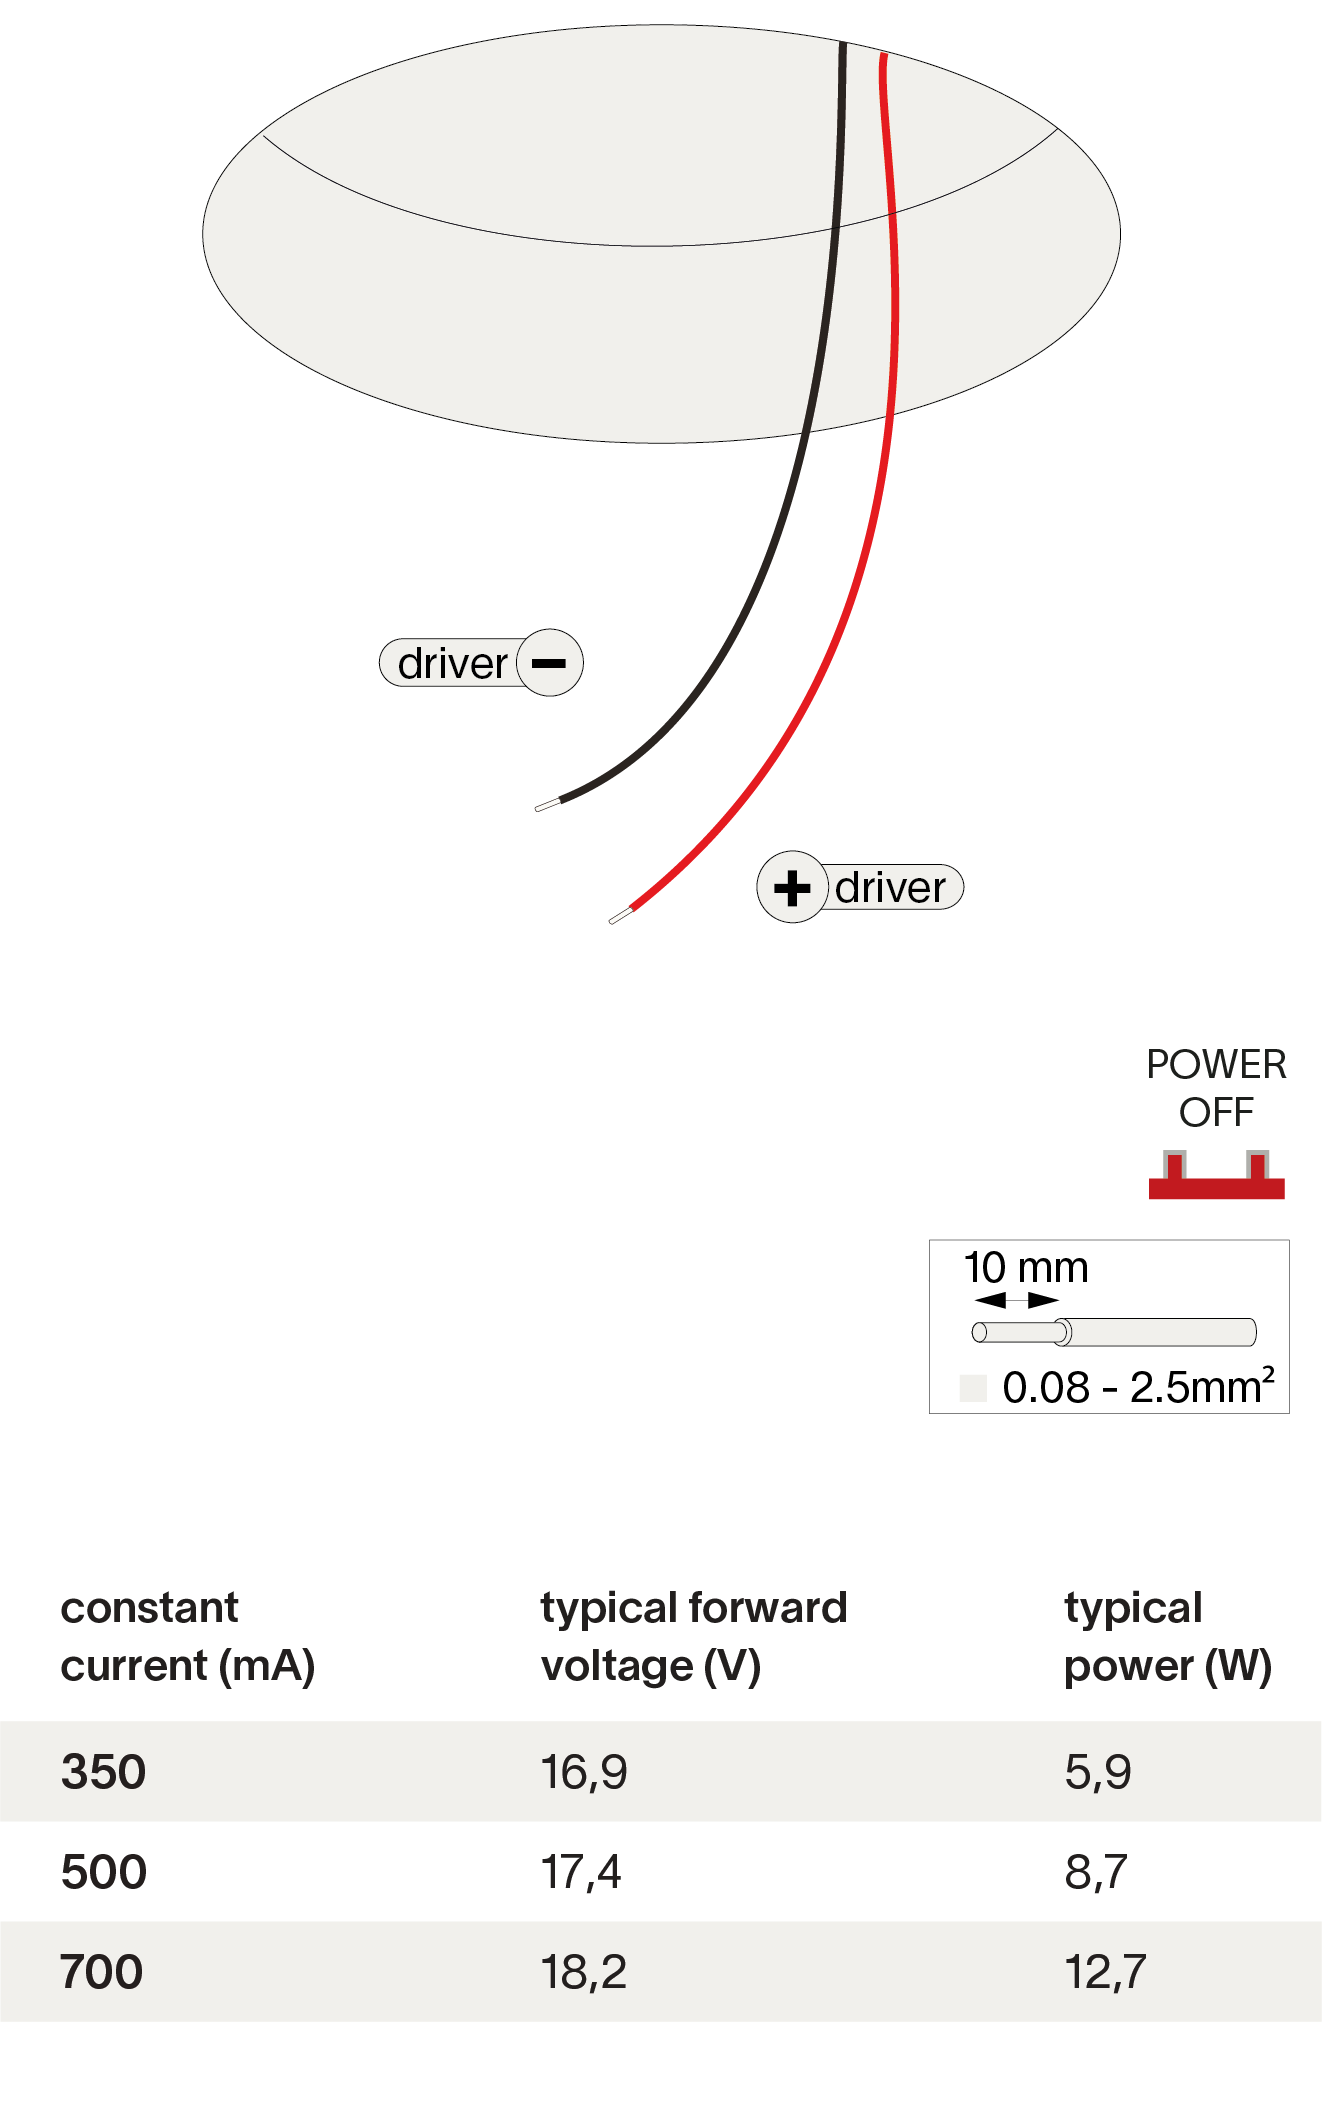
Connect the wires with wago connectors for serial connection, respect polarity combine with a prado LED-driver.
Step 5 / 7
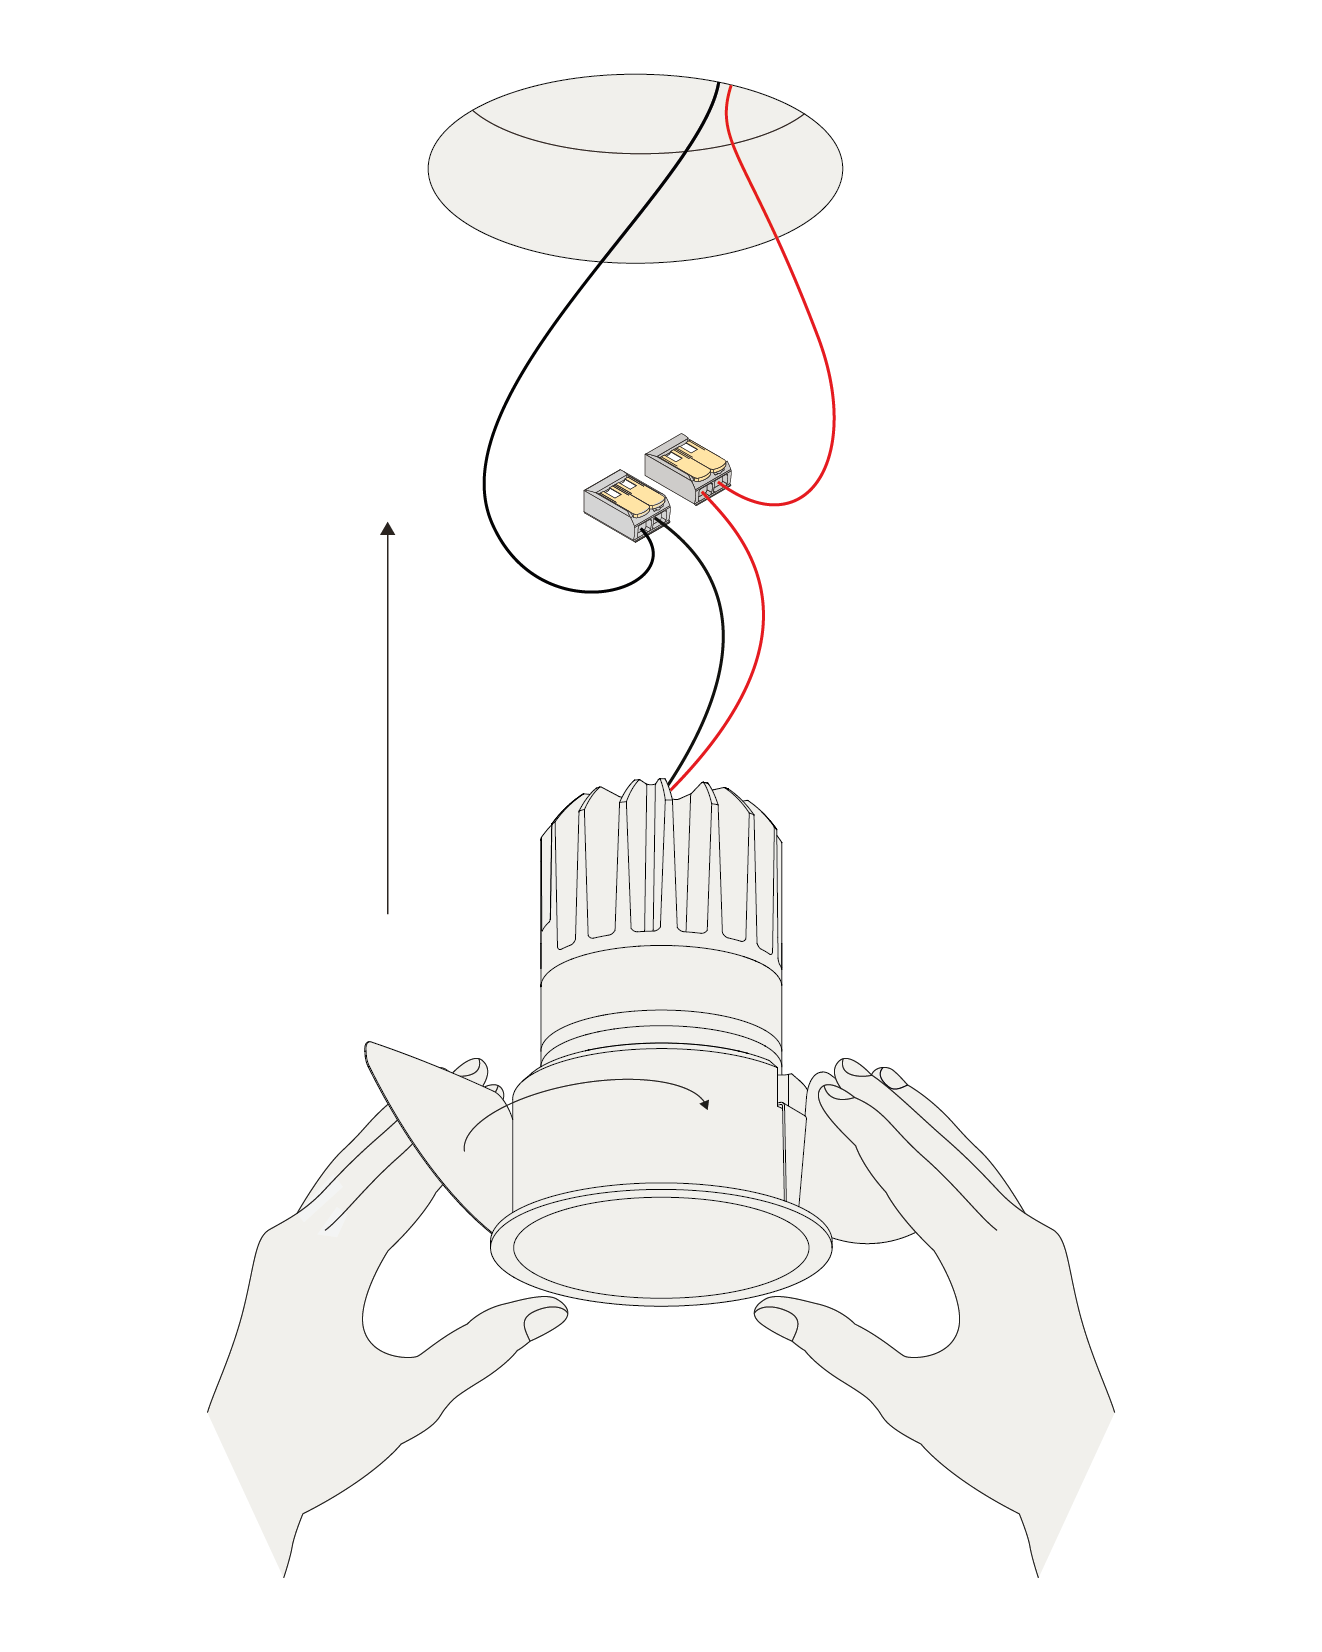
Bend over the springs and push the luminaire into the ceiling.
Step 6 / 7
Step 7 / 7
-

-

-

-

-

-

-
Replace glass lens when broken.
Luminaire shall only be used together with glass lens.
The light source in this luminaire shall only be replaced by the manufacturer or a similar qualified person. Warranty will not apply in case of wrongful use or if unskilled personnel attempts to repair the product.