Step 1 / 13
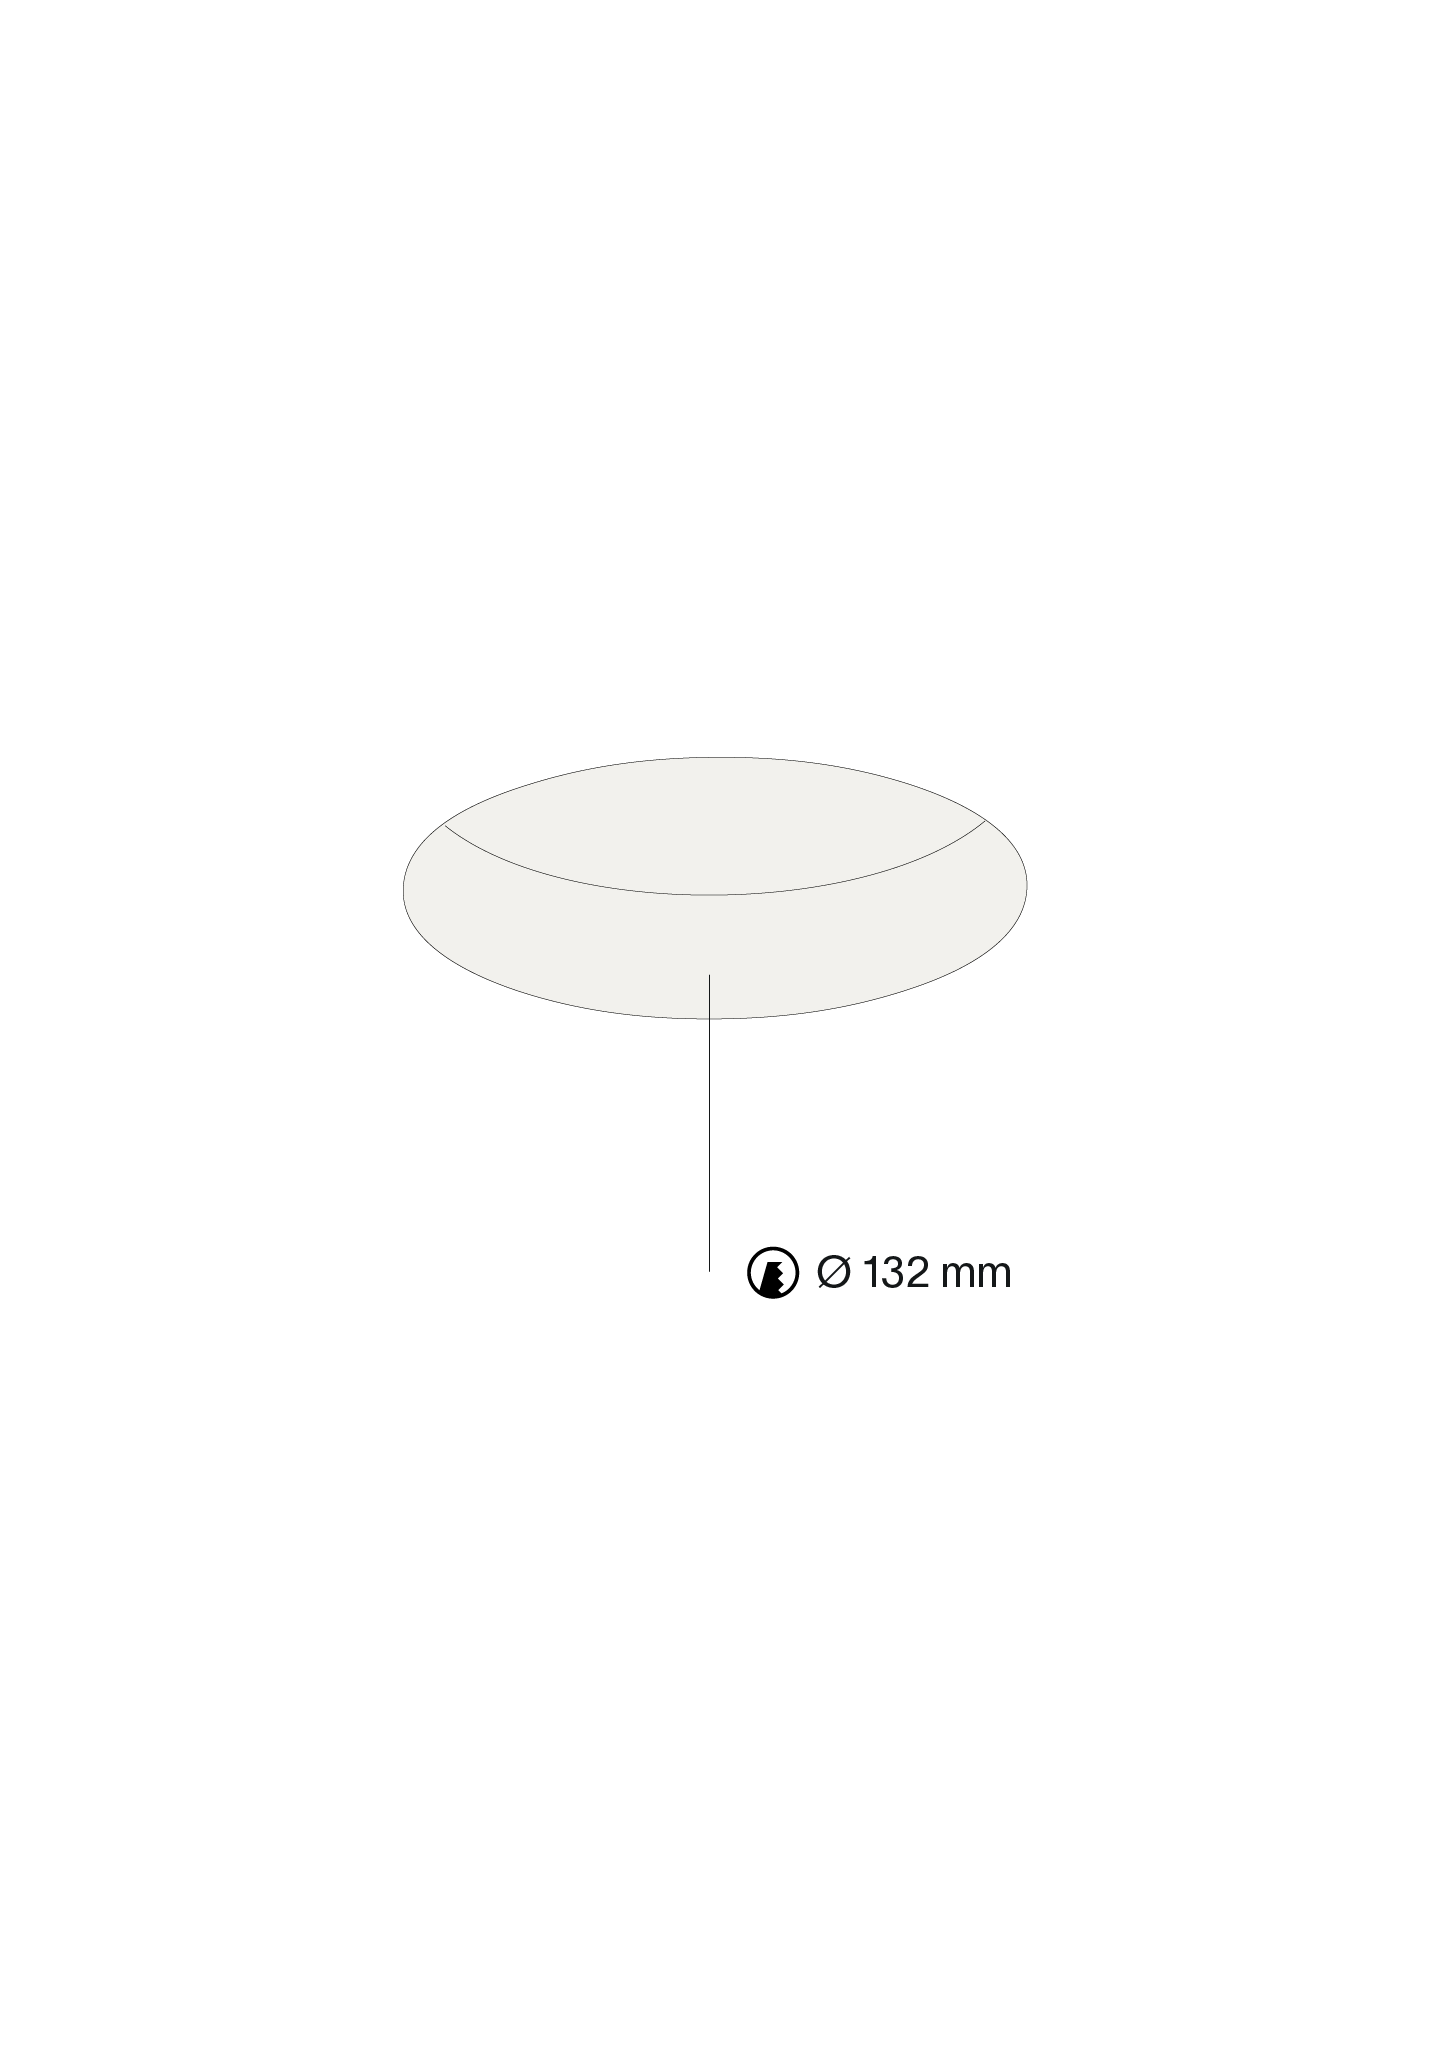
Cut a round hole (Ø 132 h 85).
Step 2 / 13
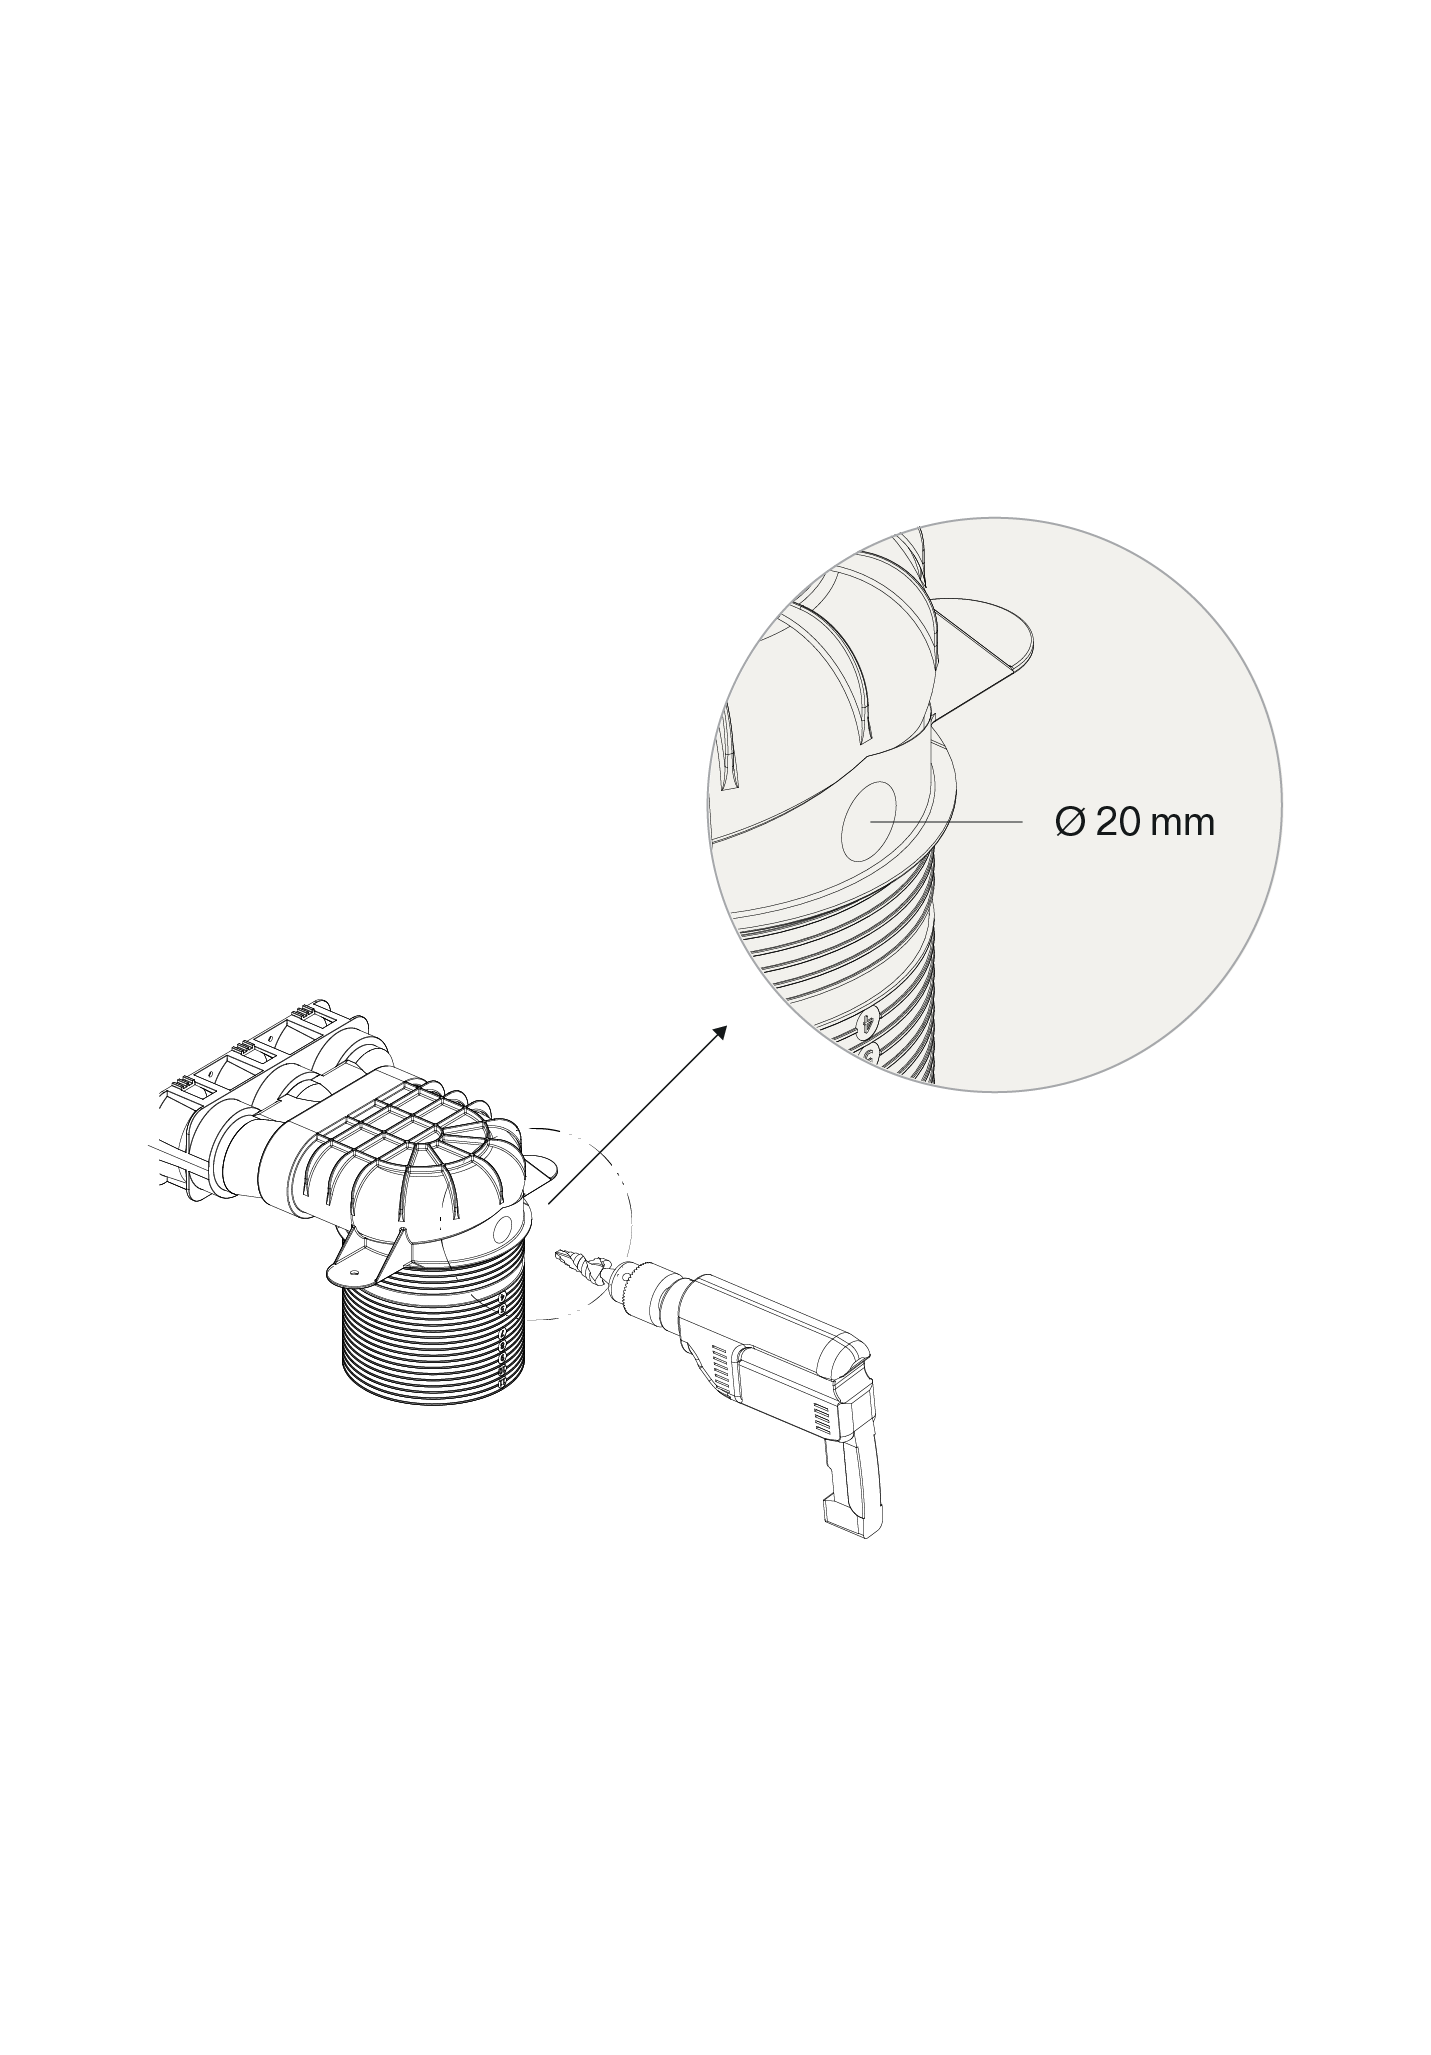
Use a step drill to cut a Ø20 hole into the Ø125 valve adapter of your choice. A hole can be drilled in any type or brand of Ø125 valve adapter.
Step 3 / 13
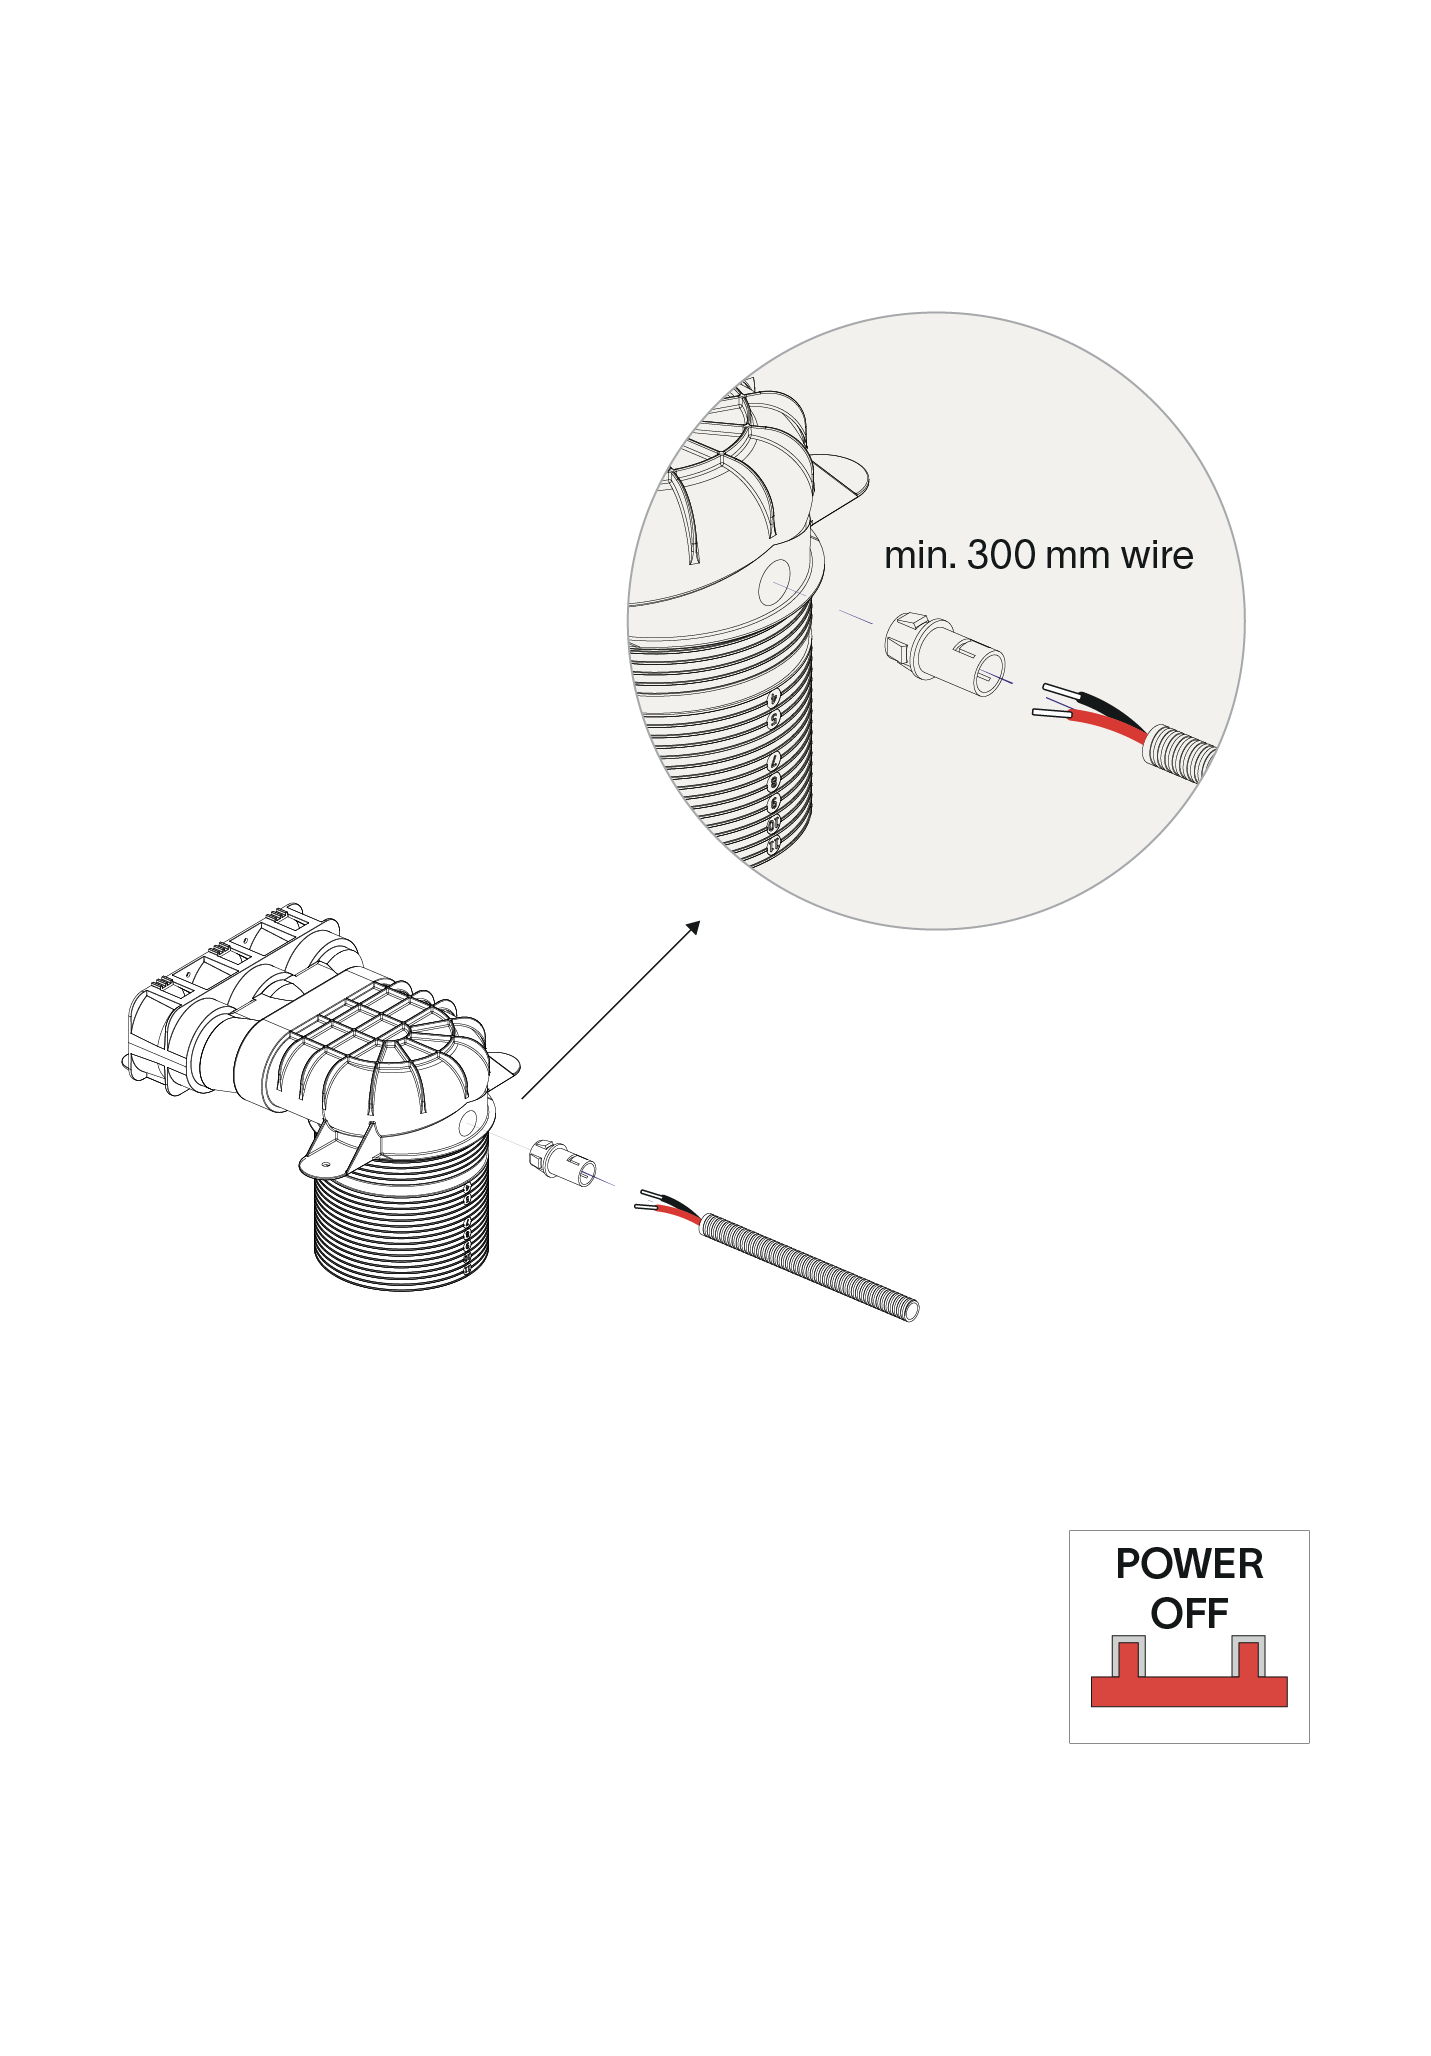
Connect the Ø16 preflex and the valve adapter with the prado connector. Make sure to add minimal 300 mm of wire into the valve adapter. Driver must be placed remotely to remain accessible.
Step 4 / 13
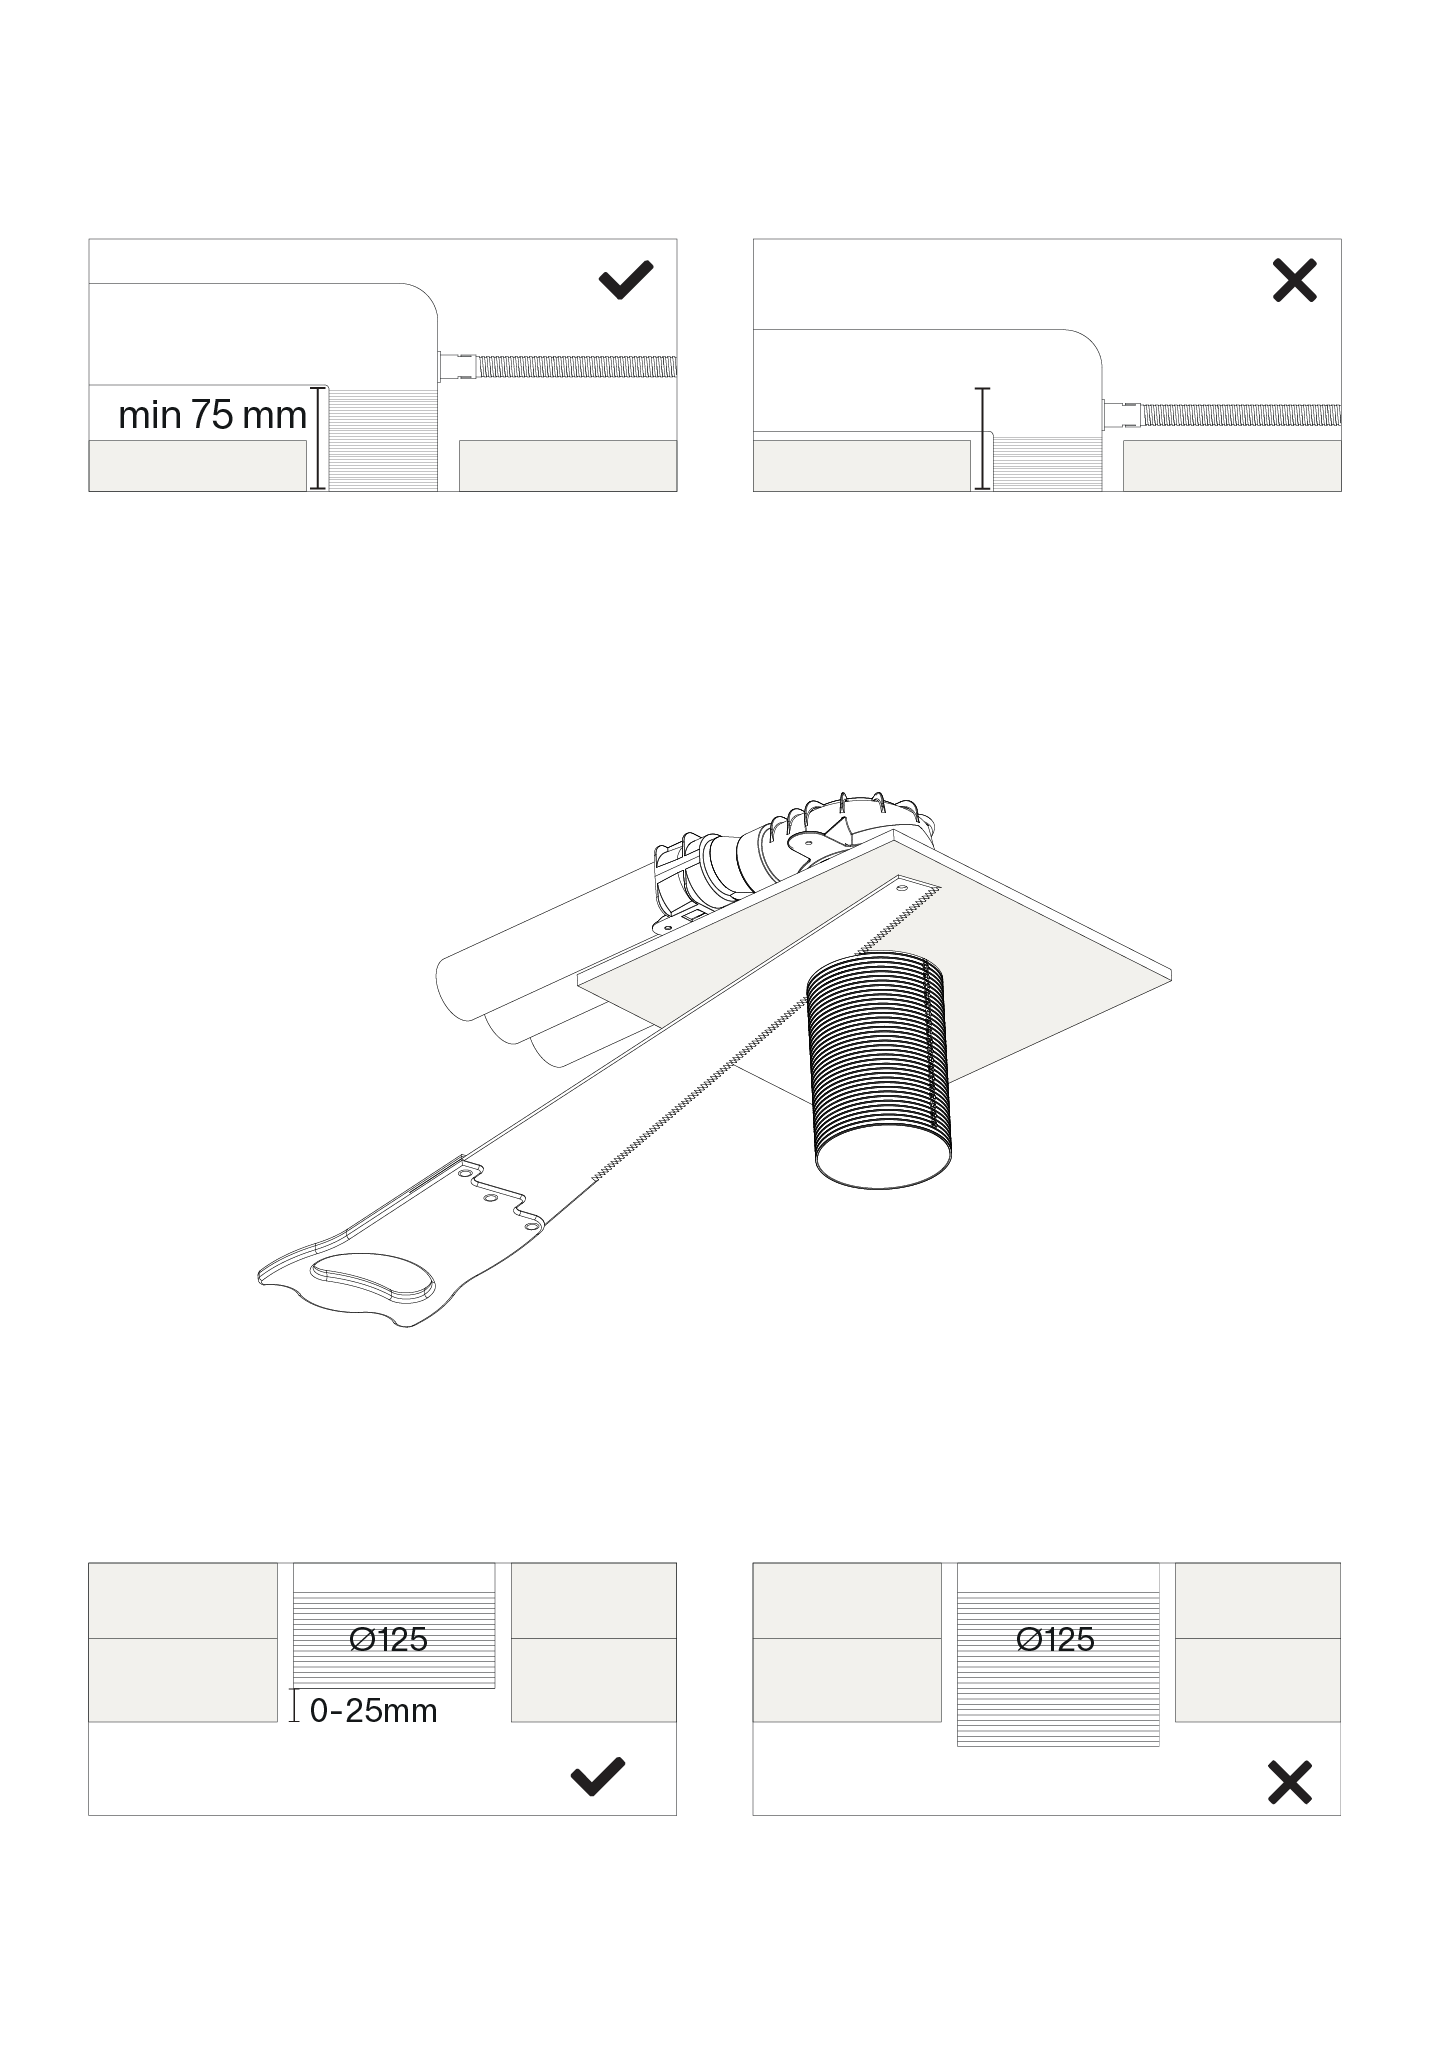
Cut off the excess length of the valve adapter. (between 0 and 25 mm above final ceiling level) The remaining vertical part of the adapter (before the start of the turn) must be at least 75 mm high for the plaster ring (connector can’t be placed in this zone).
Step 5 / 13
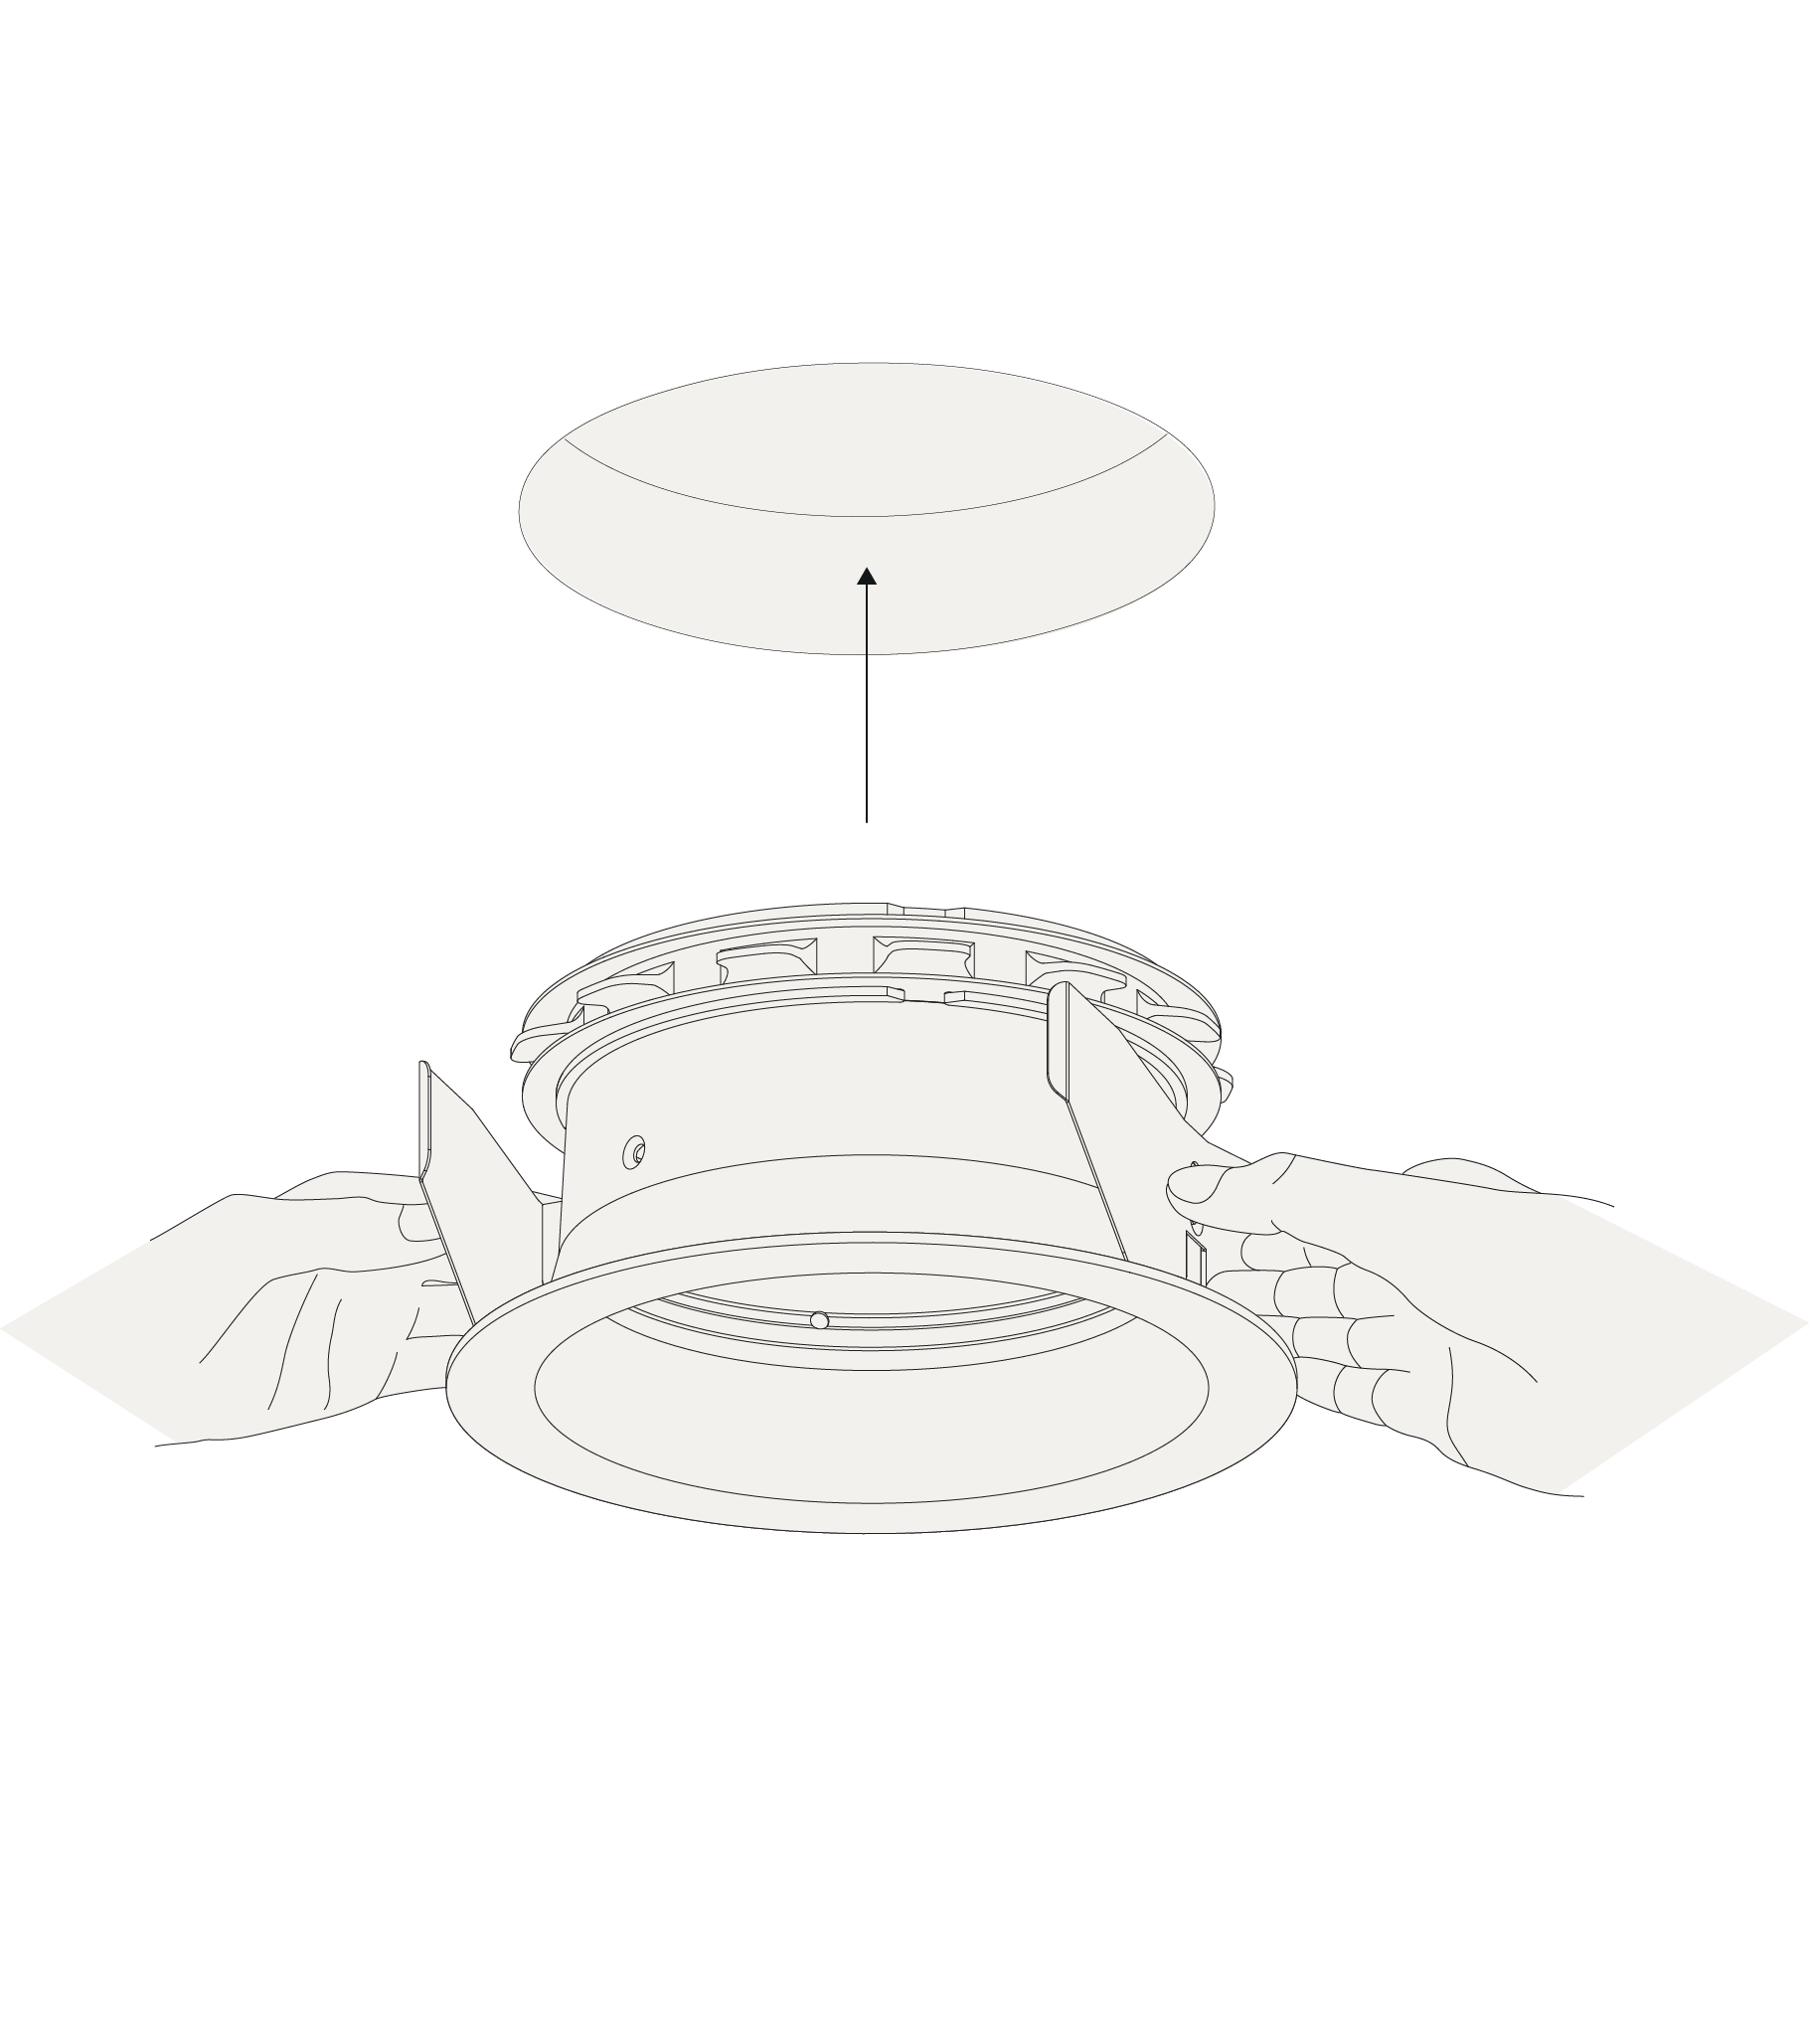
Insert the holder.
Step 6 / 13
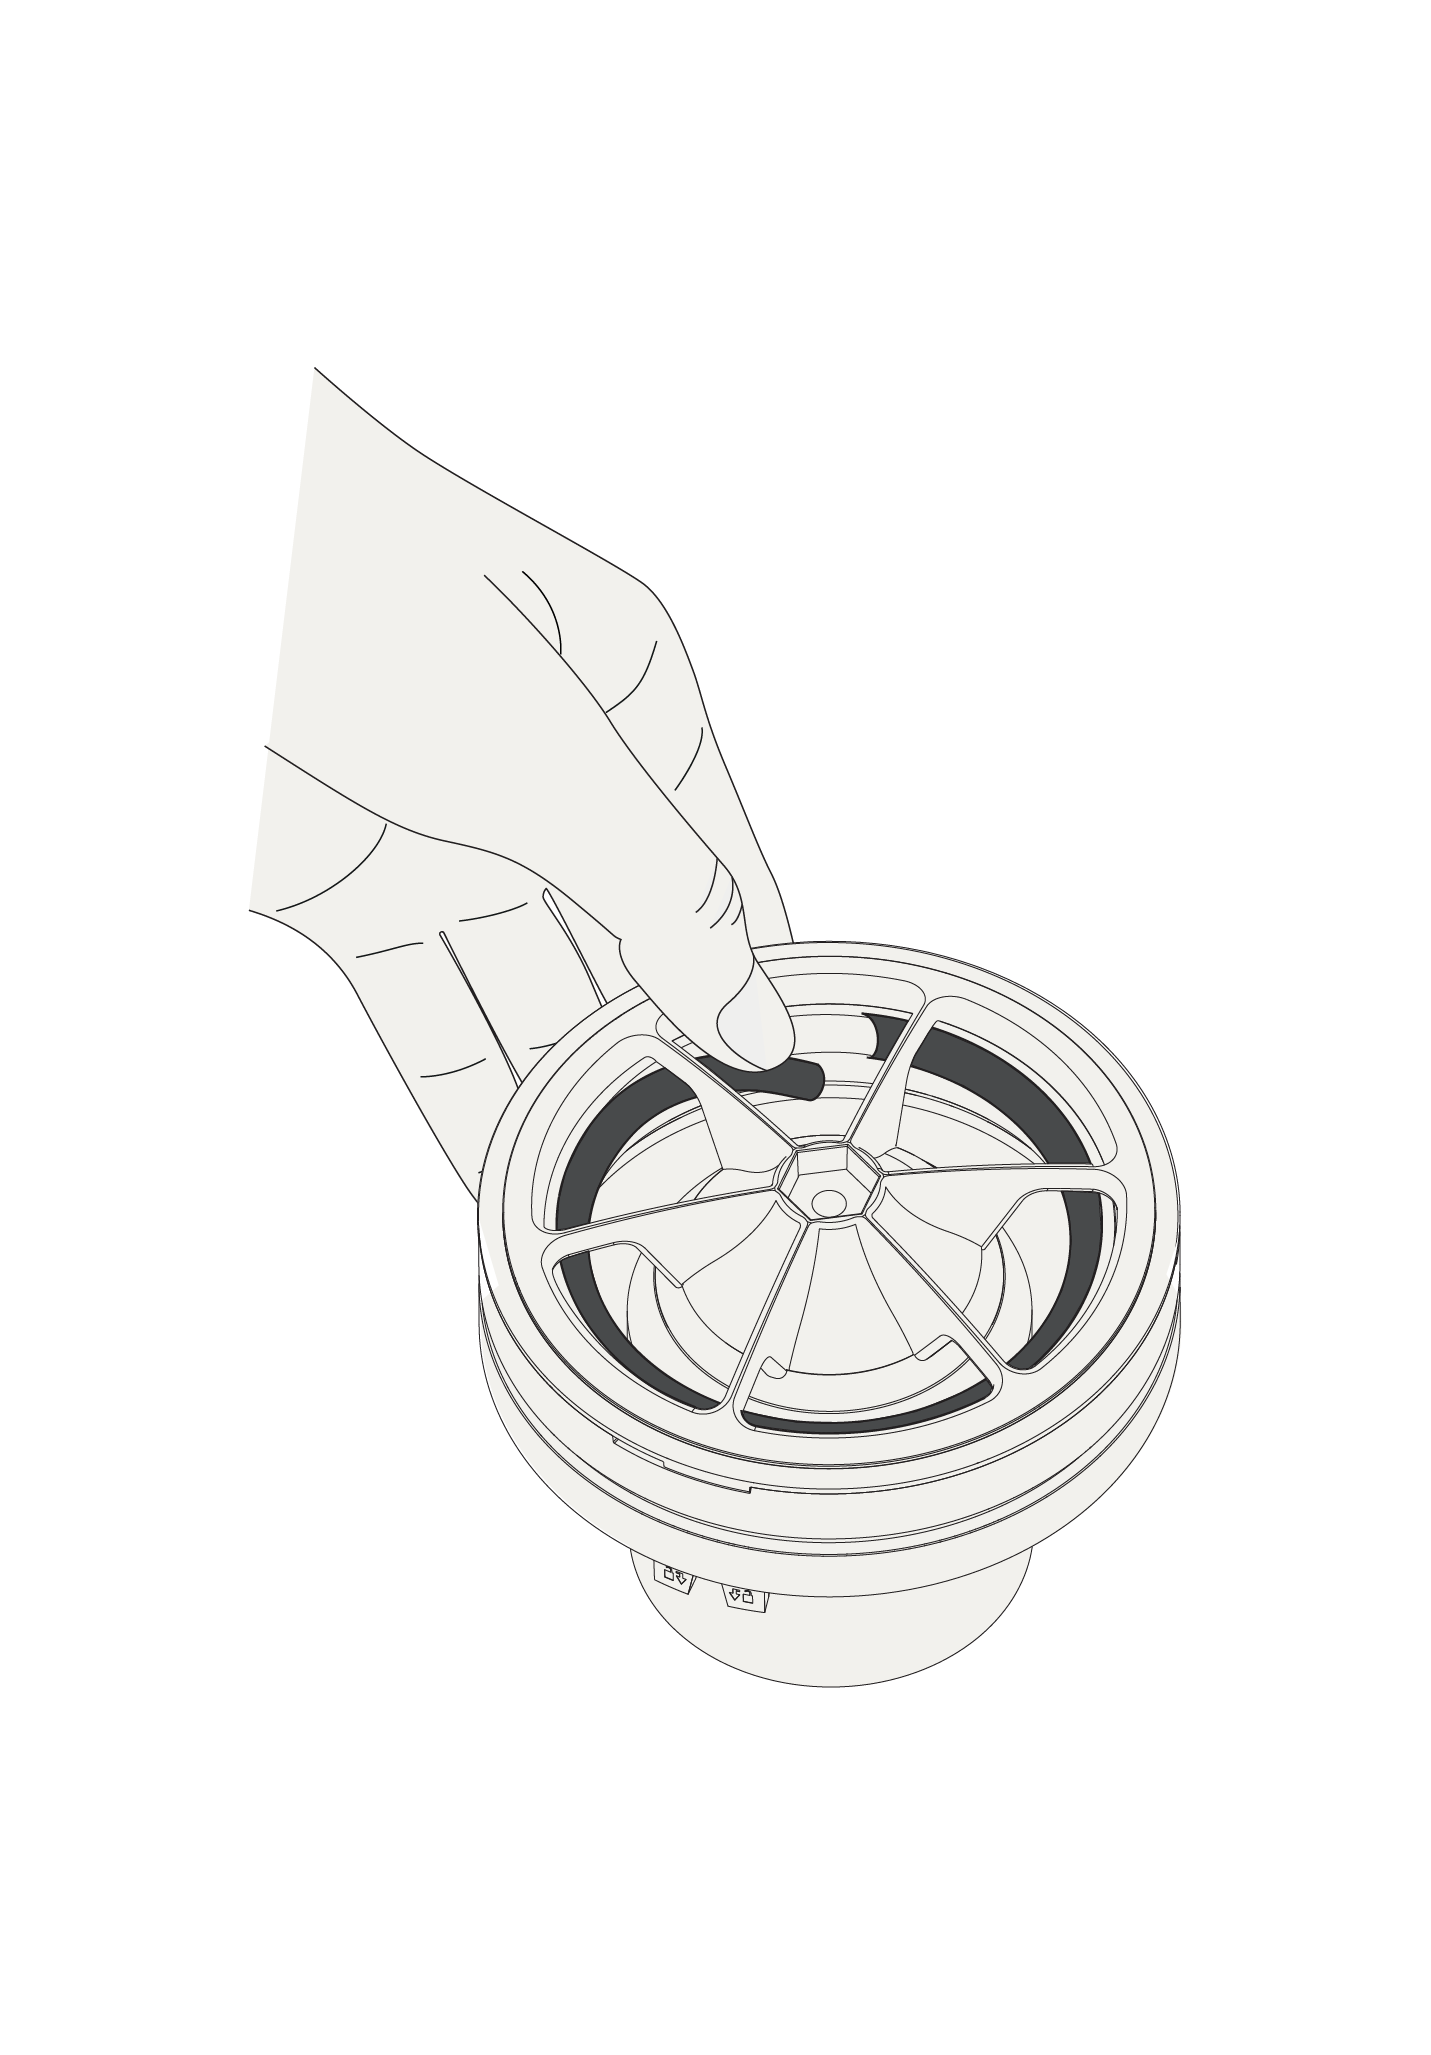
If 50 m/h is required remove the 25 m /h ring like shown above. If 25 m/h is required do not remove the 25 m /h ring like shown above.
Step 7 / 13
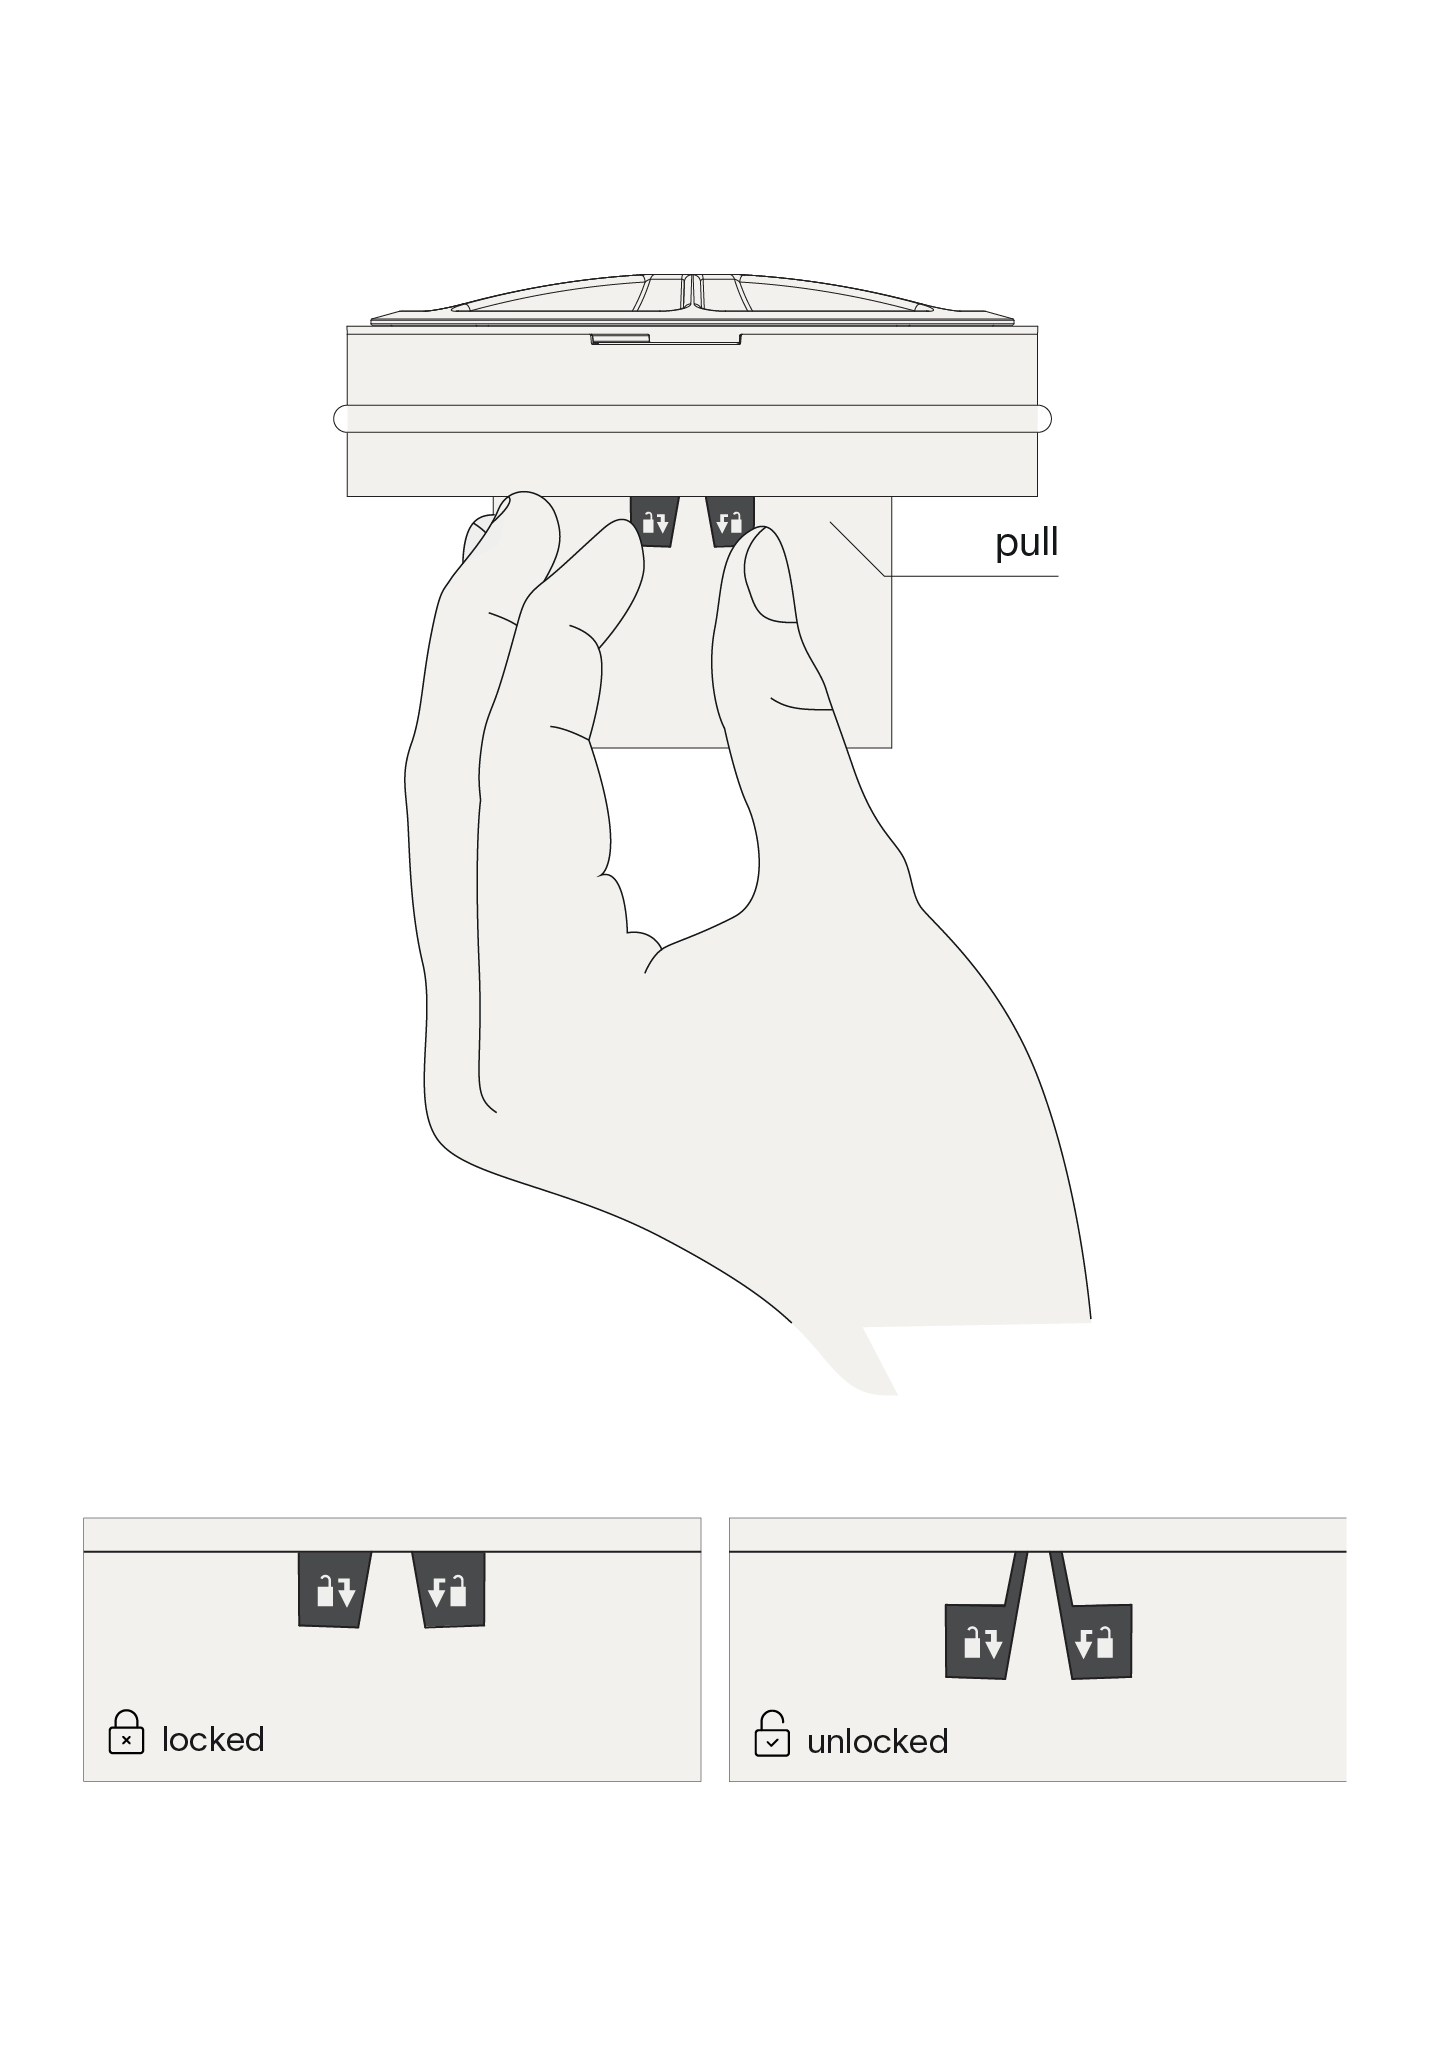
Gently pull the lock out before adjusting the air flow.
Step 8 / 13
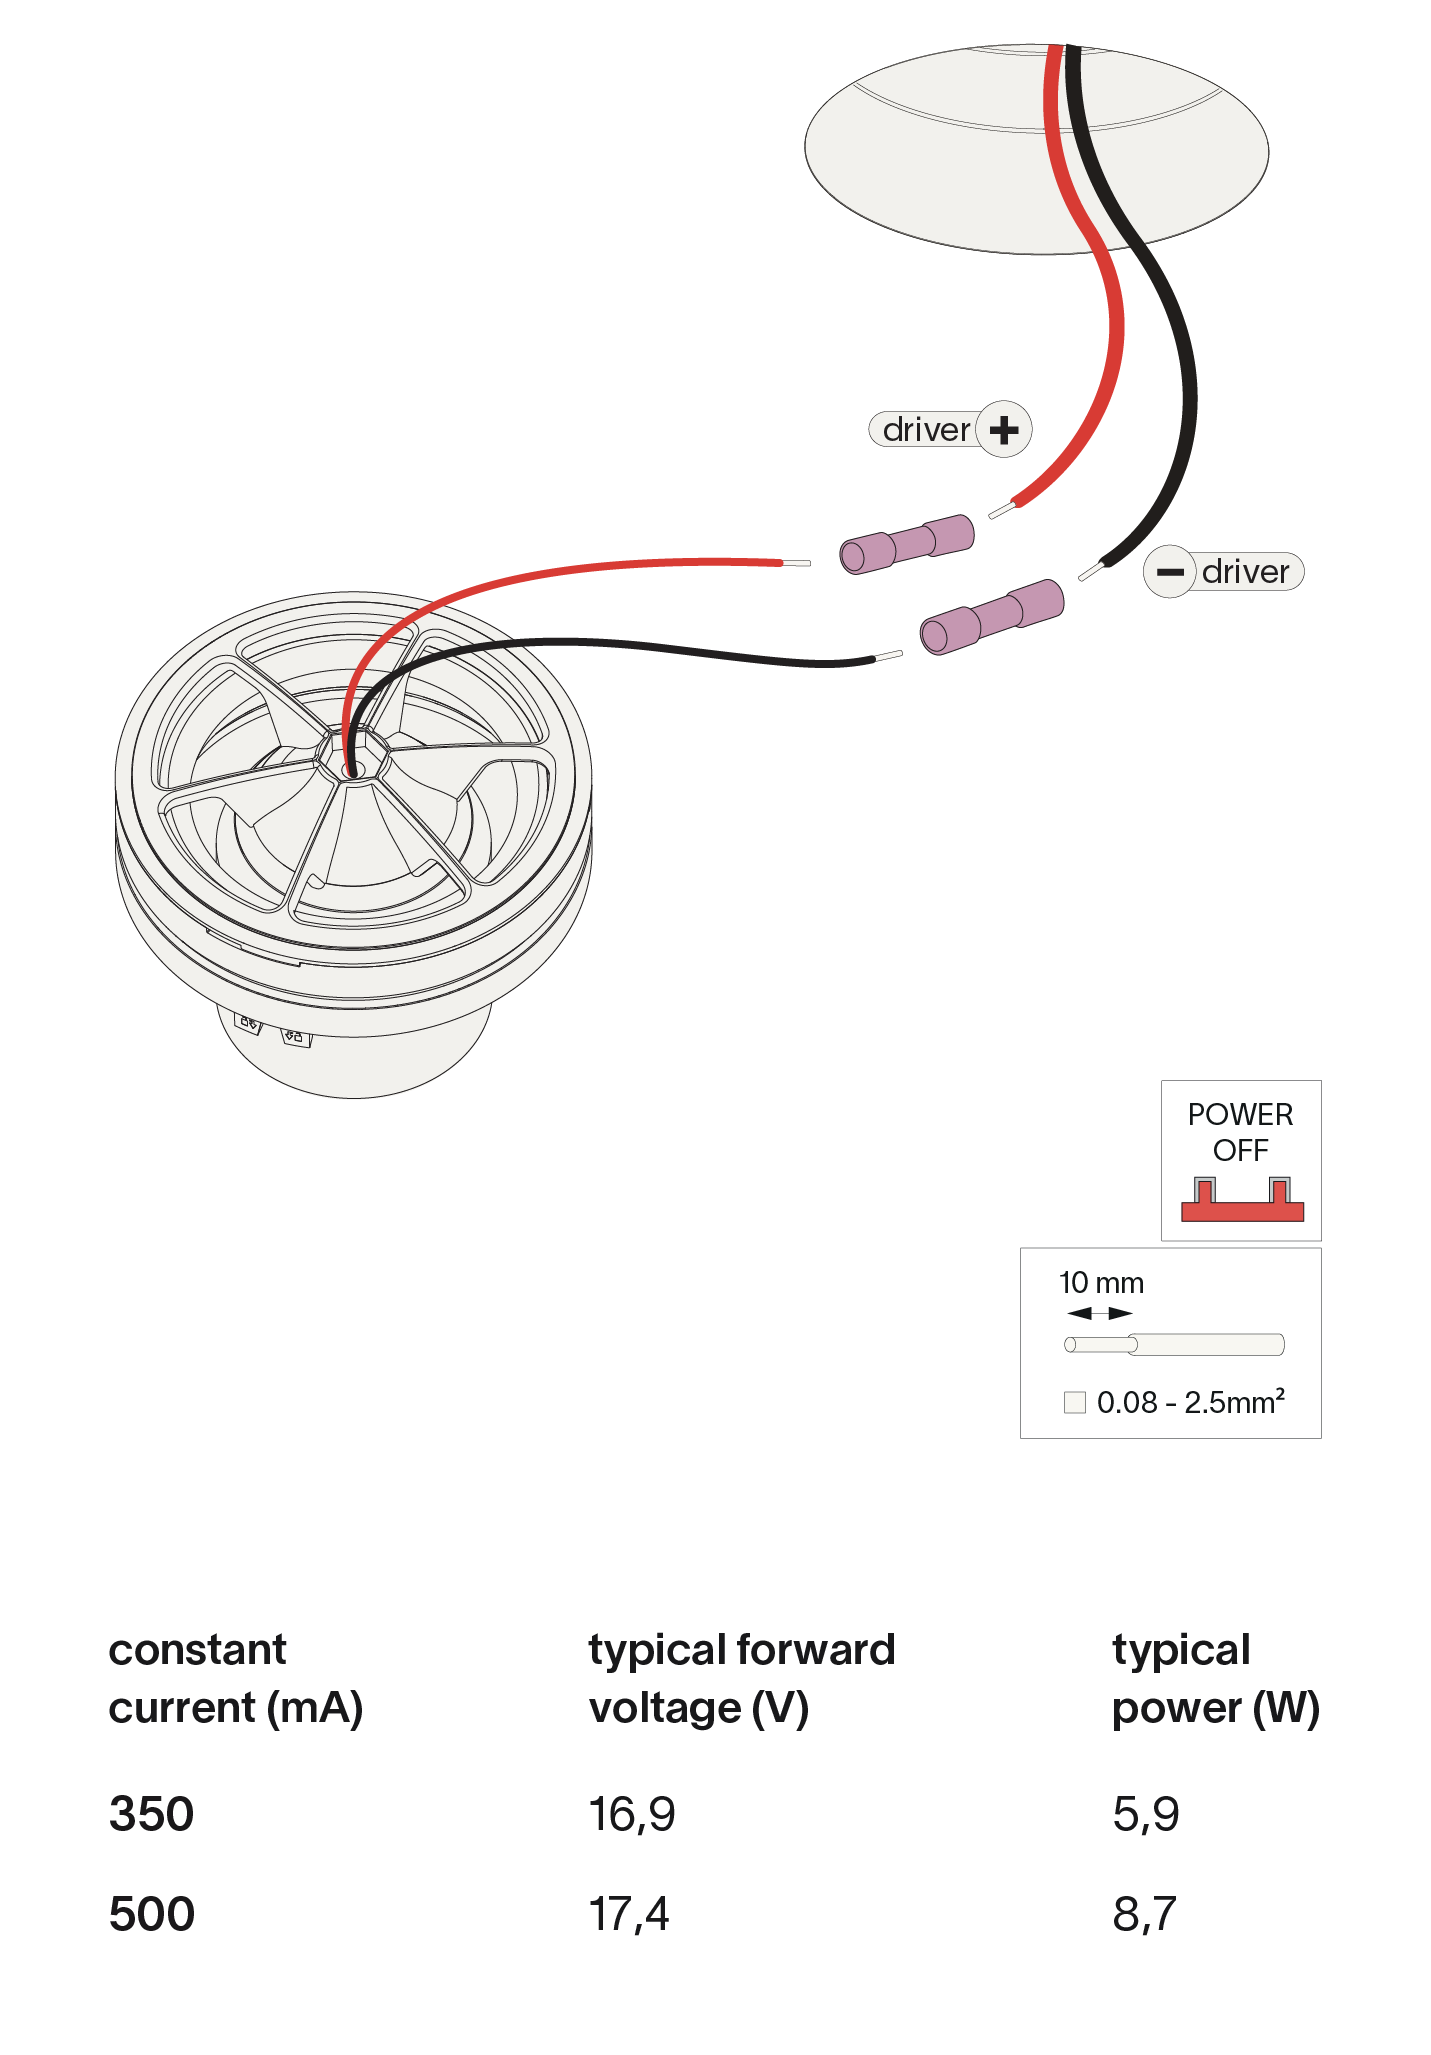
Connect the wires with waterproof connectors for serial connection, respect polarity combine with prado LED-driver.
Step 9 / 13
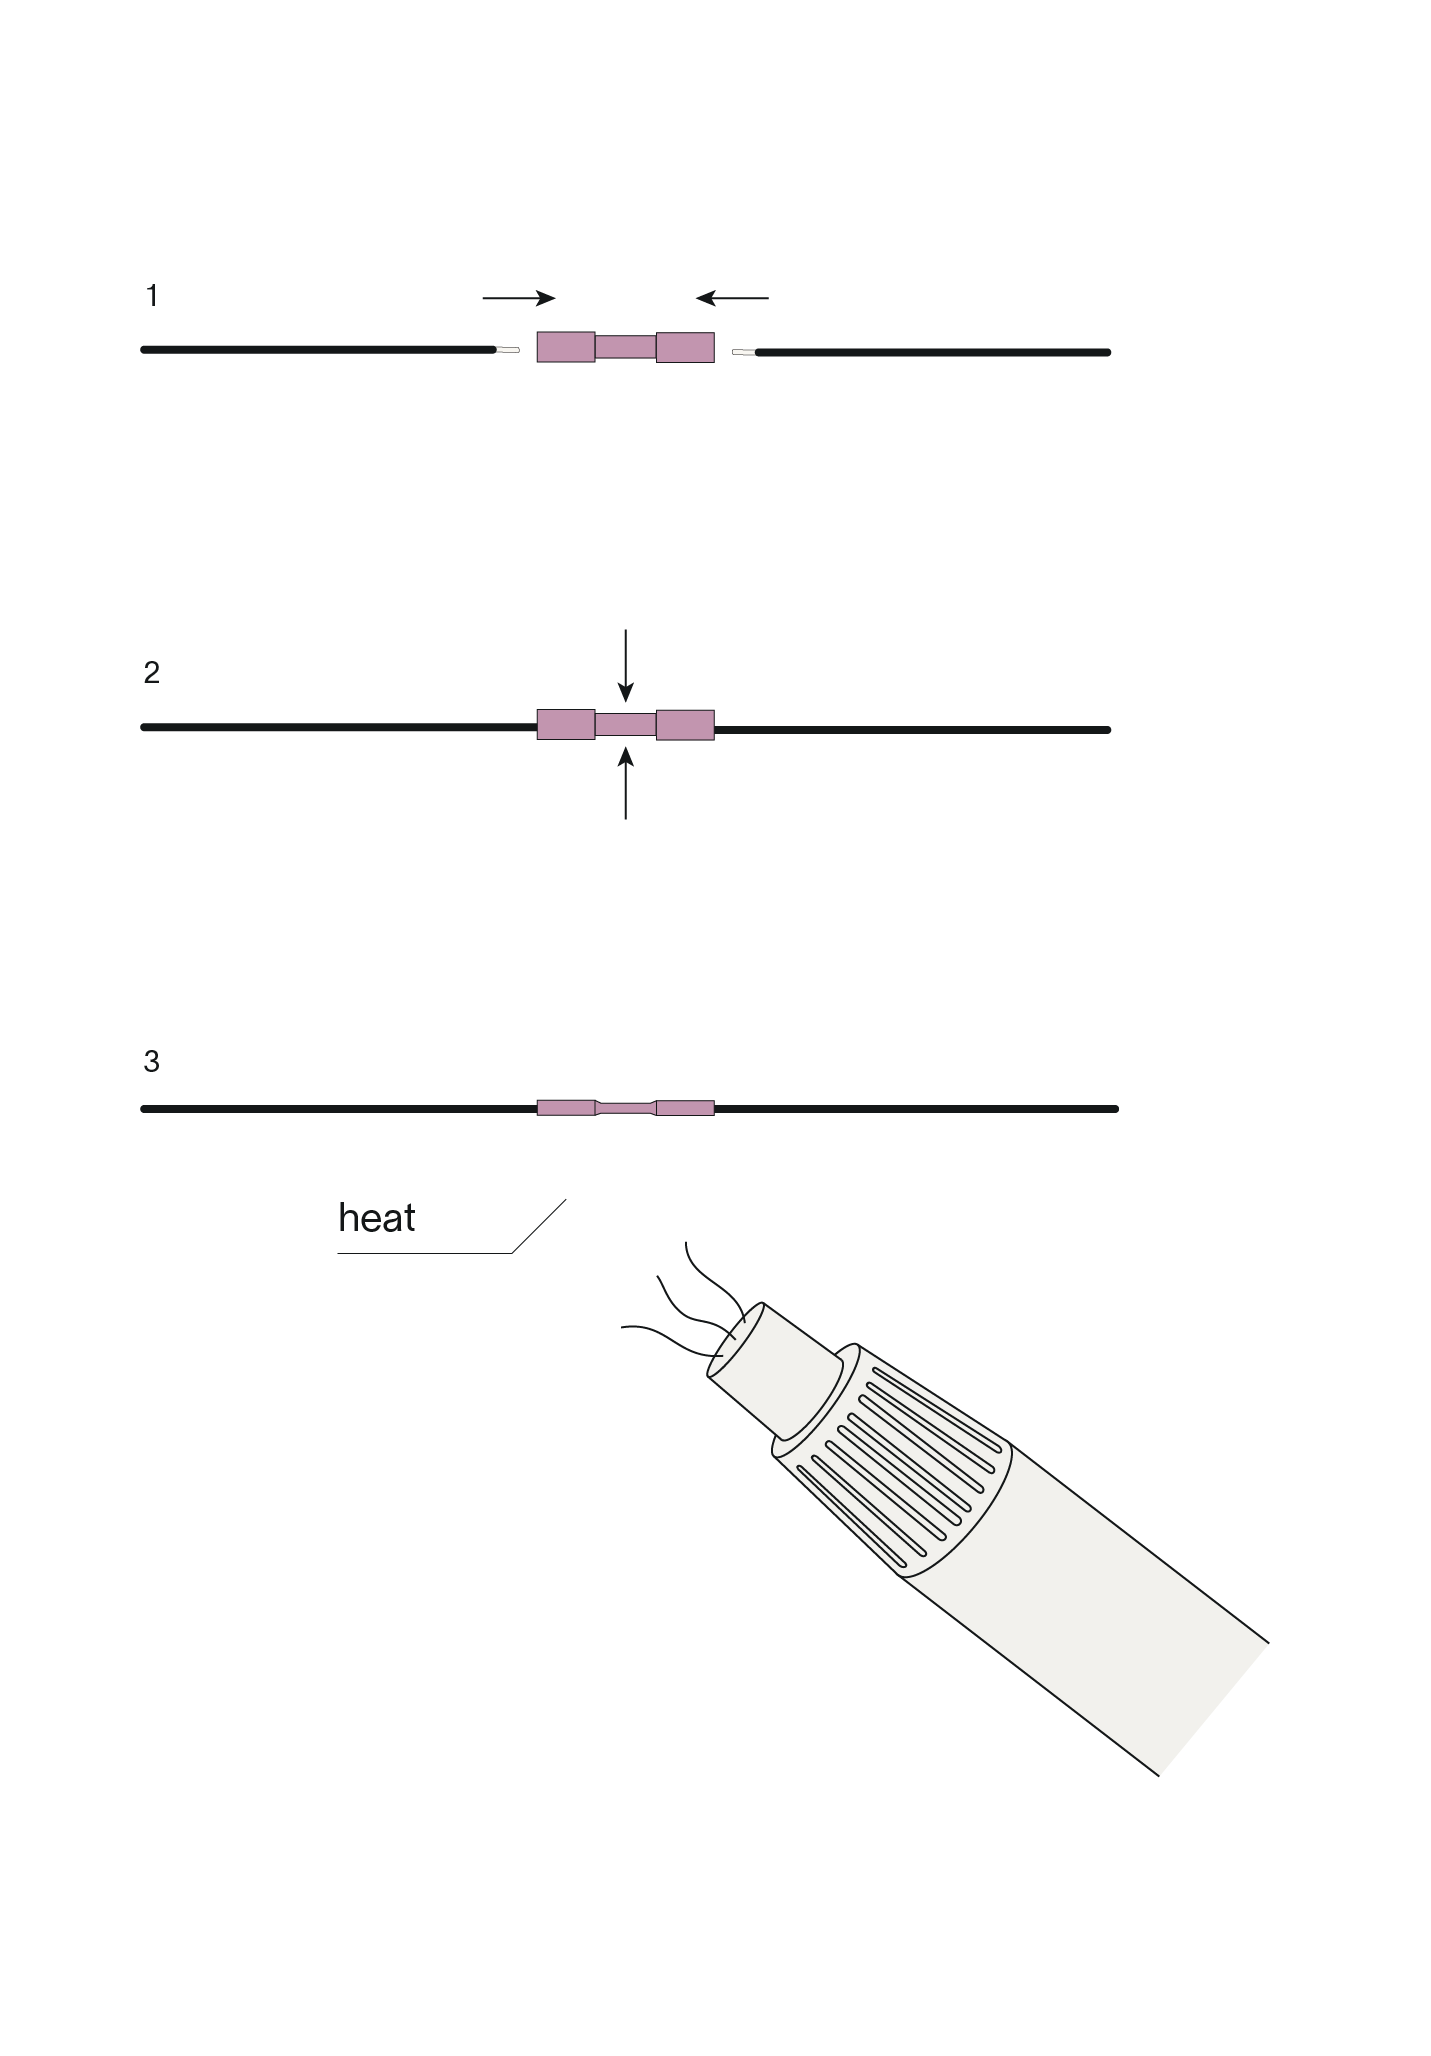
1. Insert the wires into the connector
2. Compress the middle part
3. Seal with a heater.
2. Compress the middle part
3. Seal with a heater.
Step 10 / 13
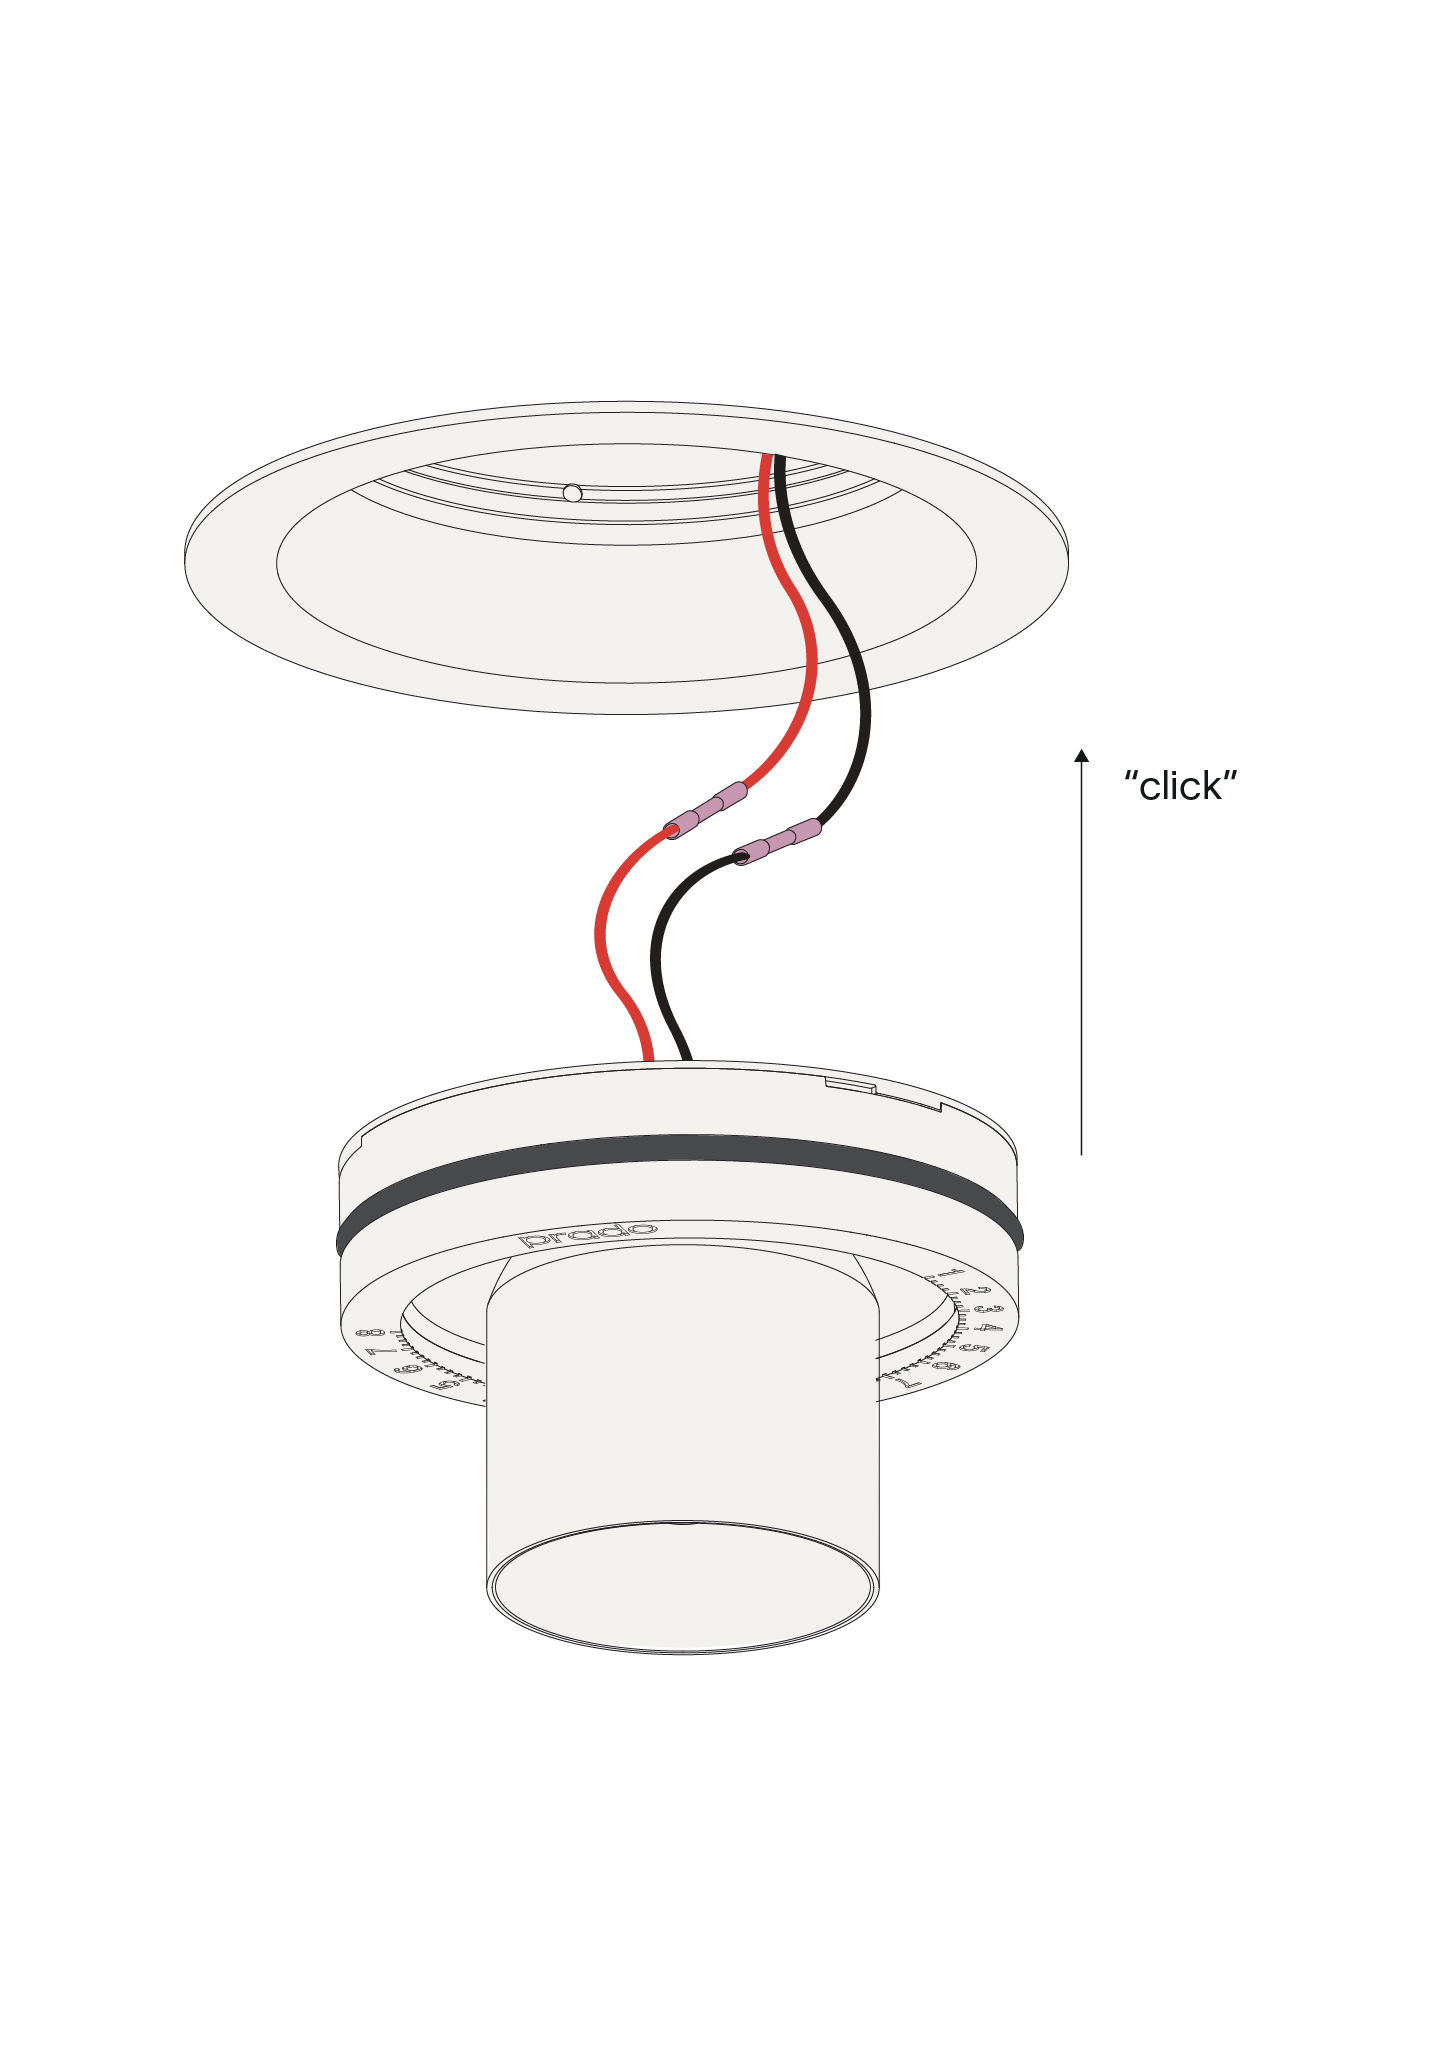
Gently insert the fixture into the kit until it “clicks”.
Step 11 / 13
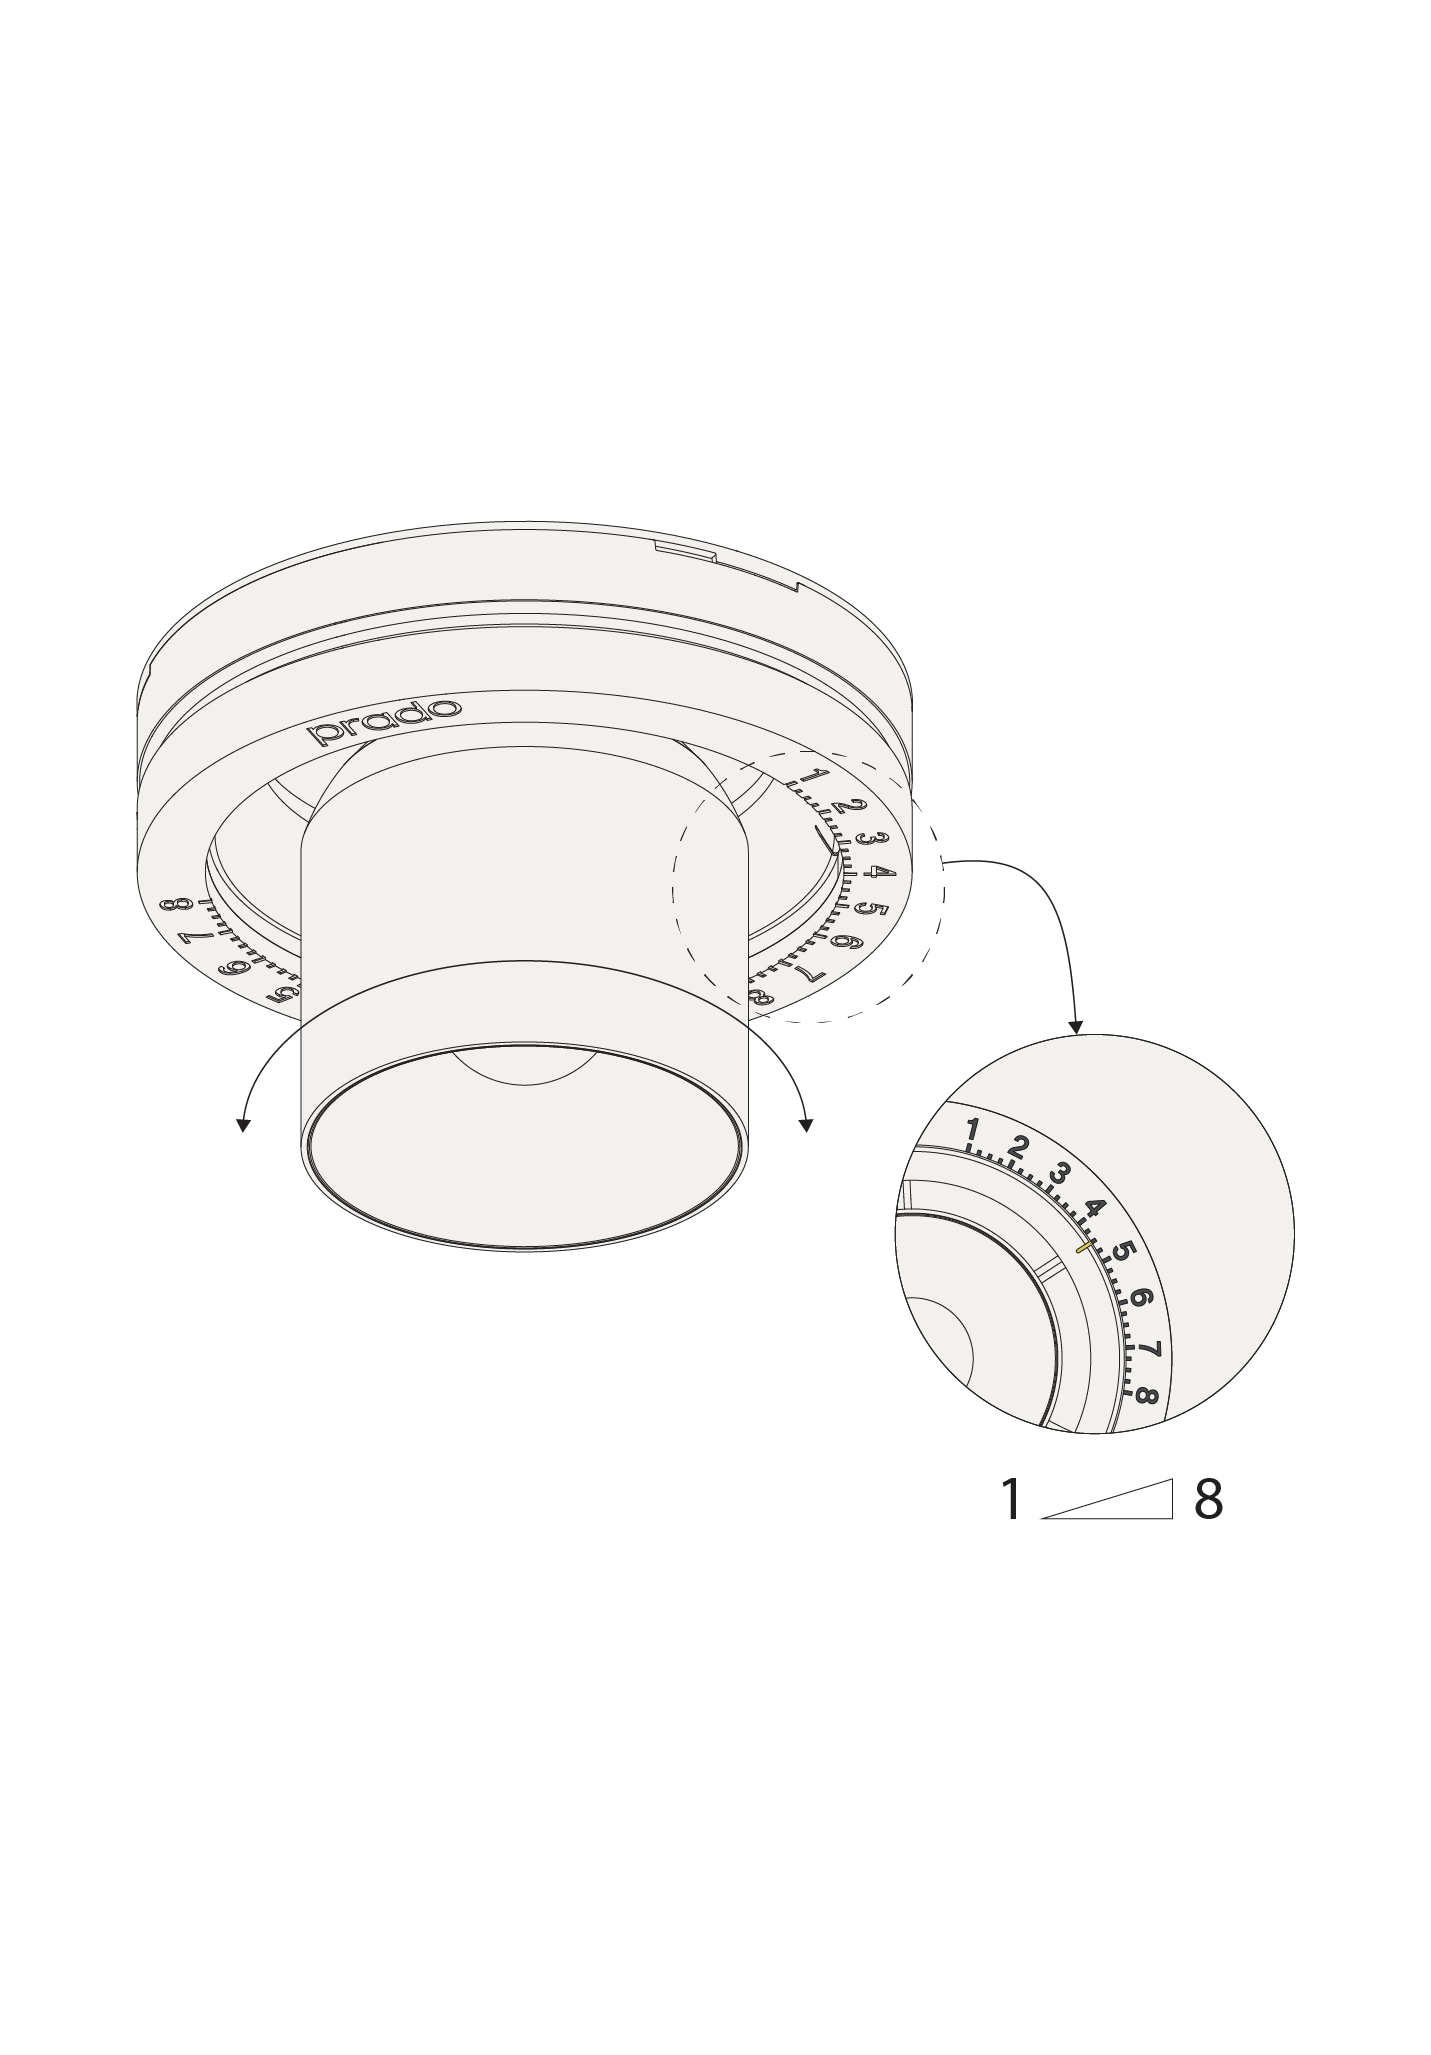
Twist the luminaire to adjust the ventilation flow level.
Step 12 / 13
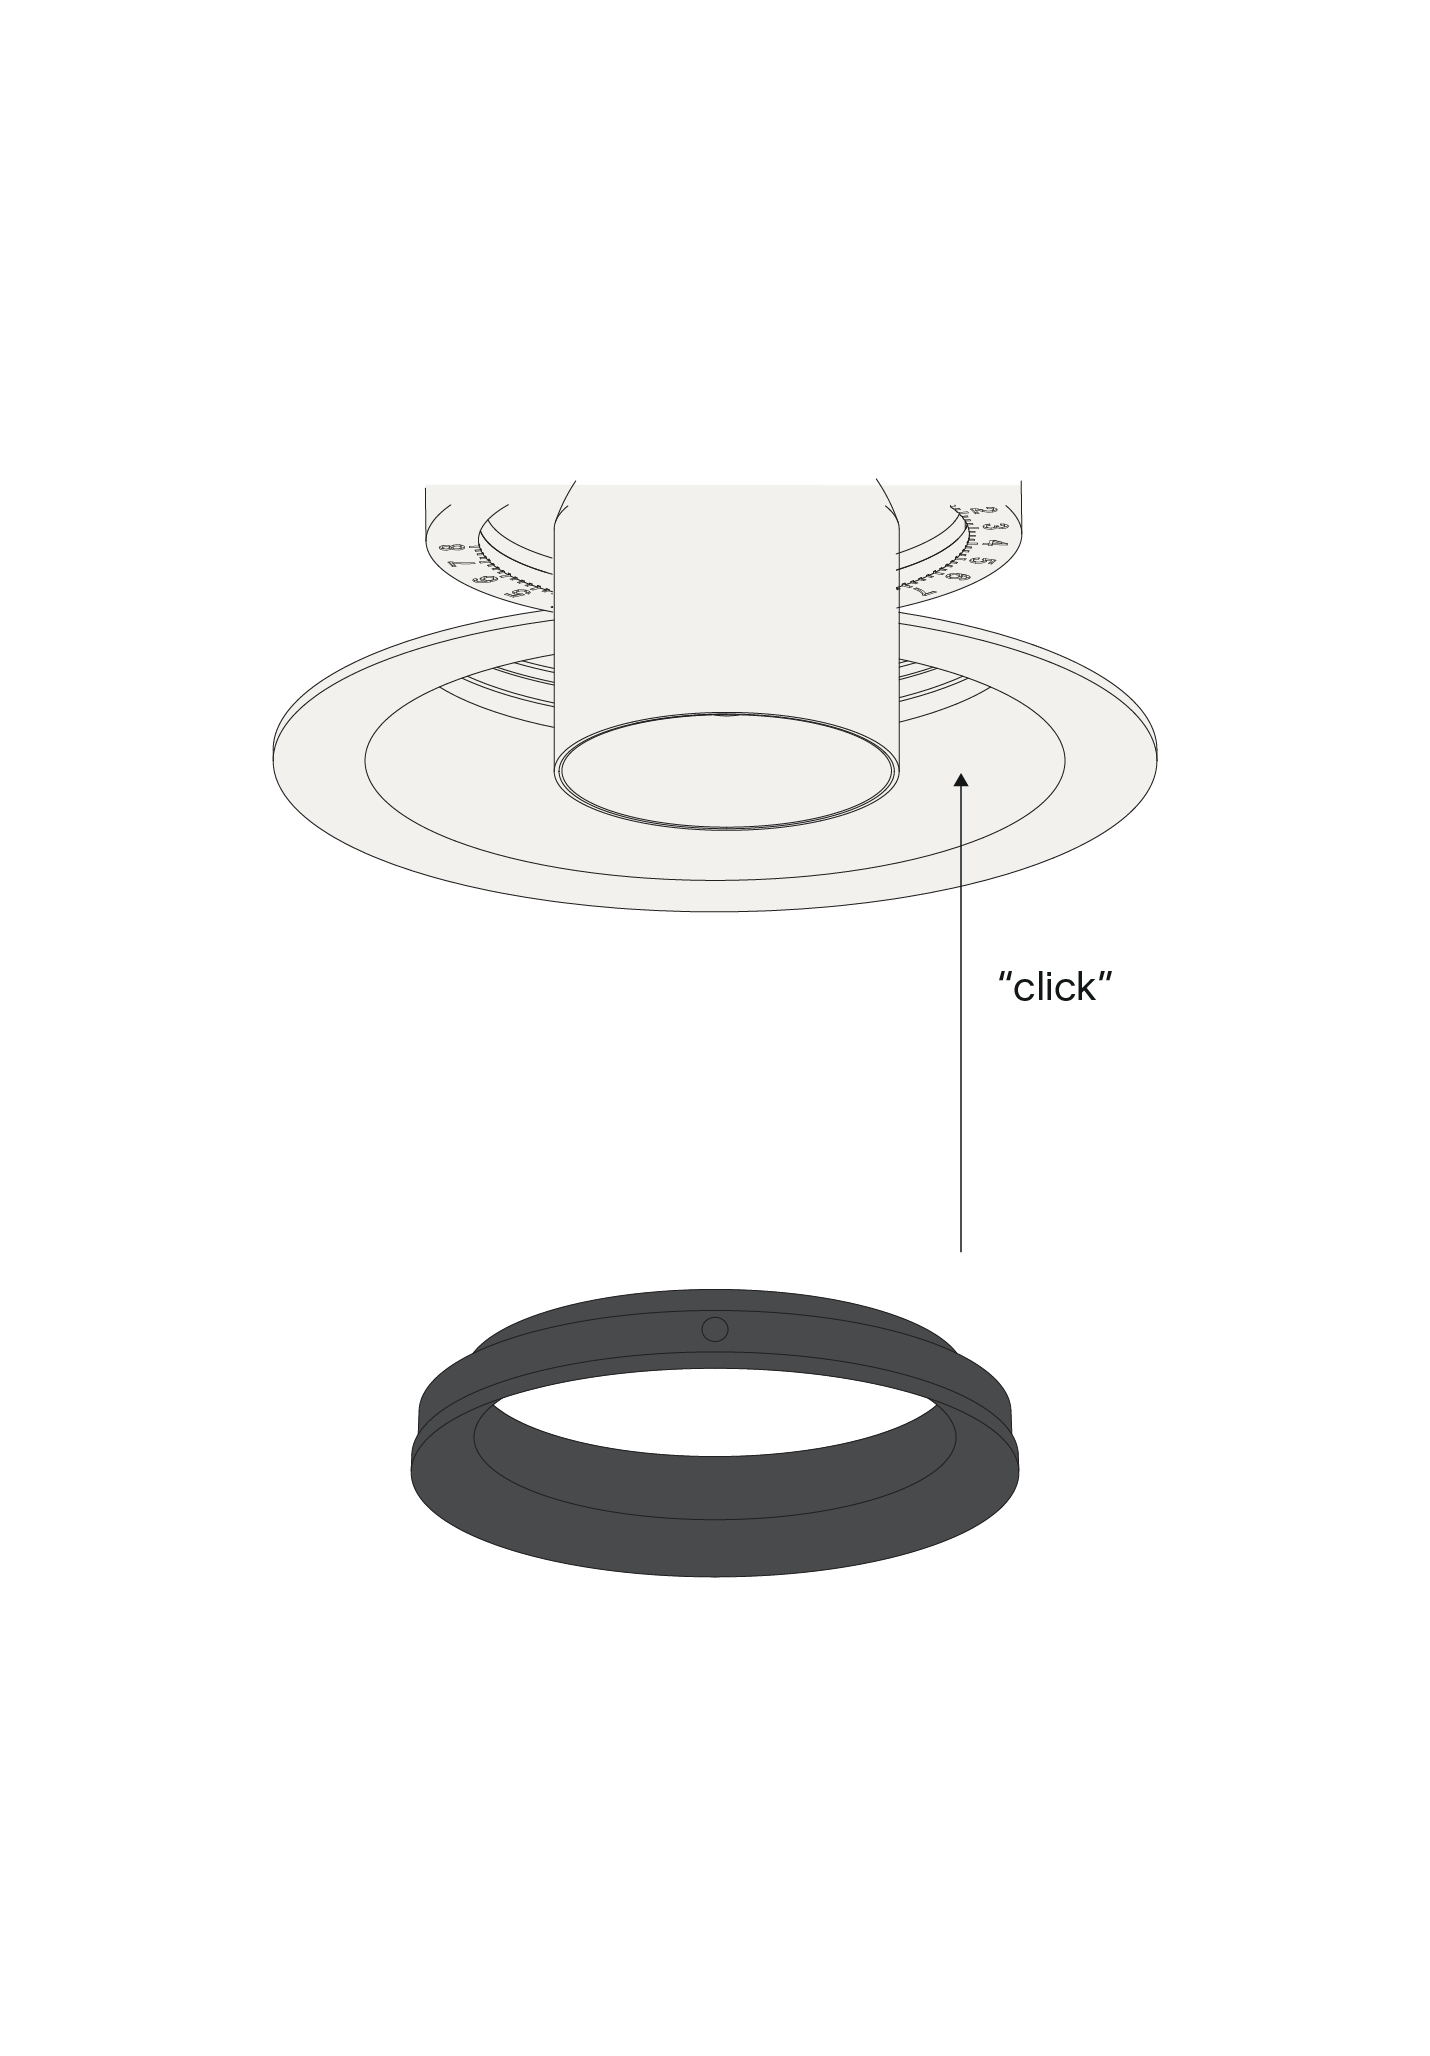
Insert the design ring to lock the ventilation valve.
Step 13 / 13
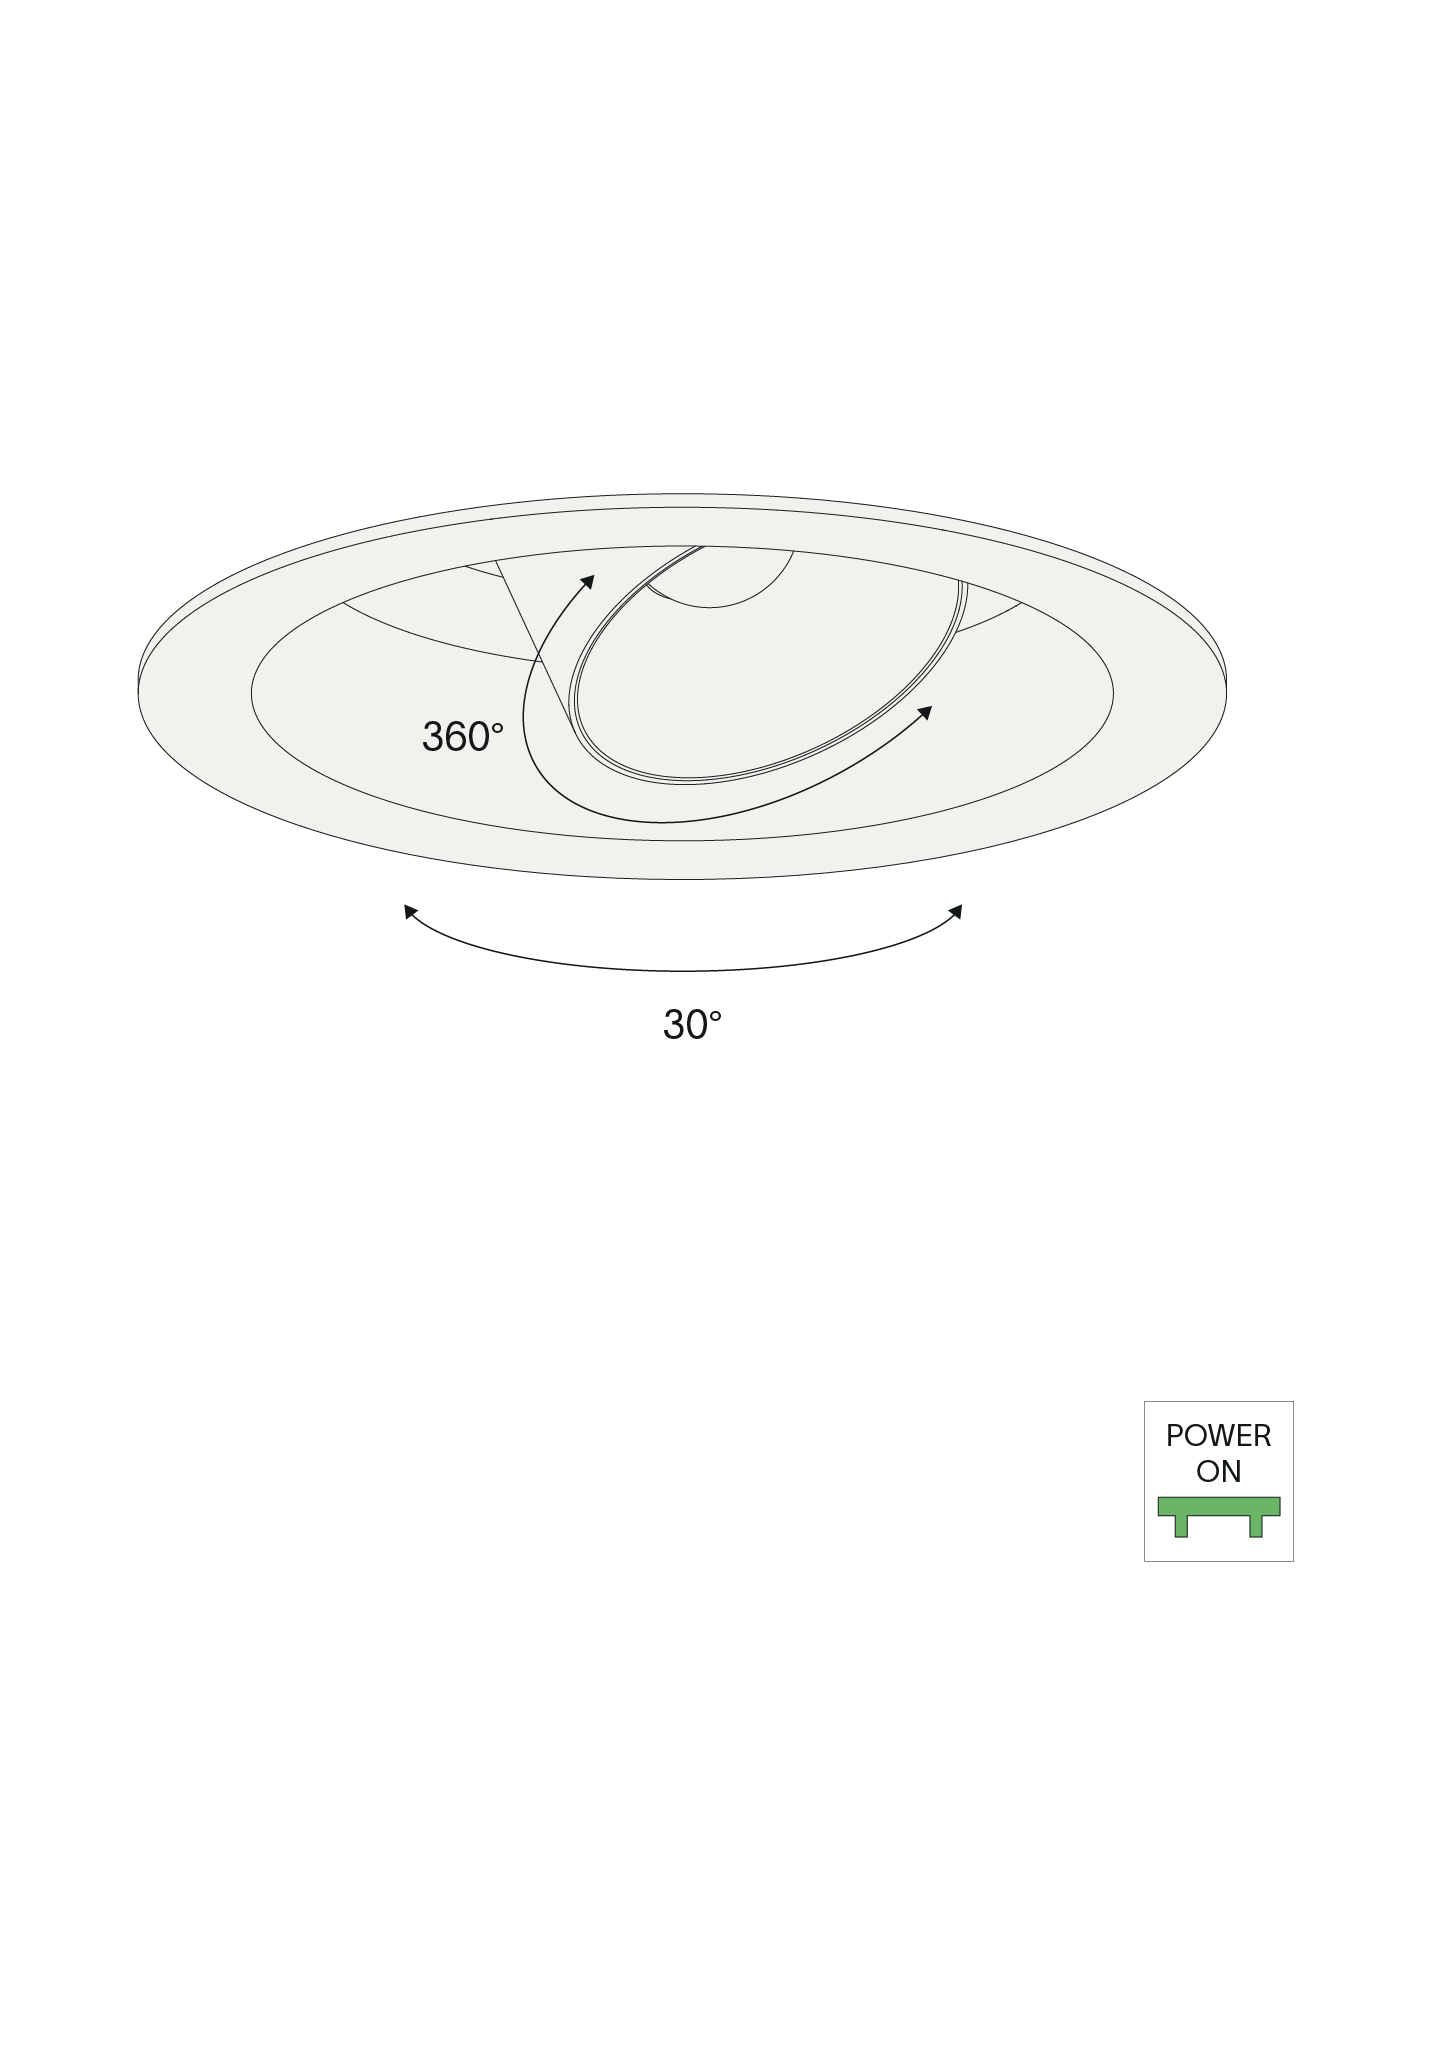
Twist the luminaire as desired.
-

-

-

-

-

-

-
Replace glass lens when broken.
Luminaire shall only be used together with glass lens.
The light source in this luminaire shall only be replaced by the manufacturer or a similar qualified person. Warranty will not apply in case of wrongful use or if unskilled personnel attempts to repair the product.