Step 1 / 8
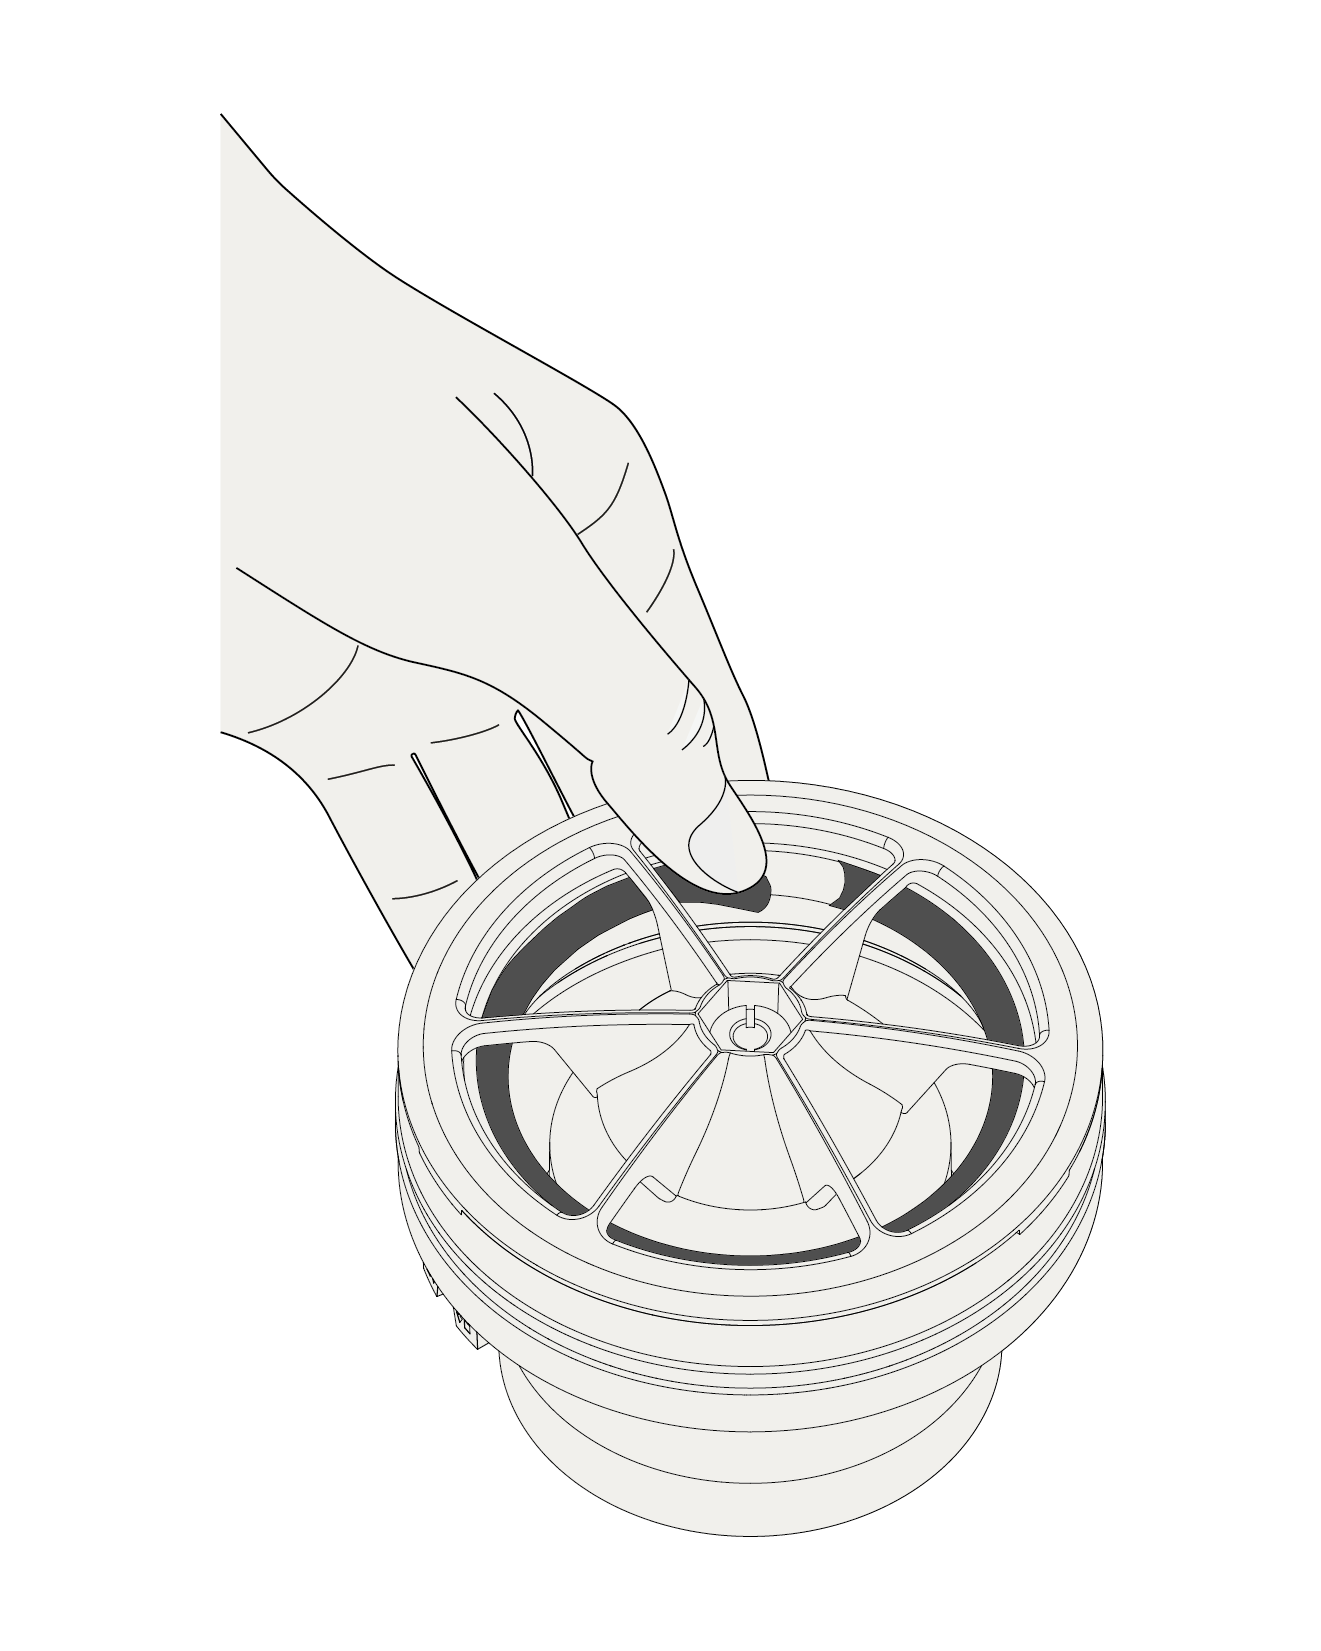
If 50m3/h is required remove the 25m /h ring like shown above. If 25m3/h do not remove the 25m3/h ring like shown above.
Step 2 / 8
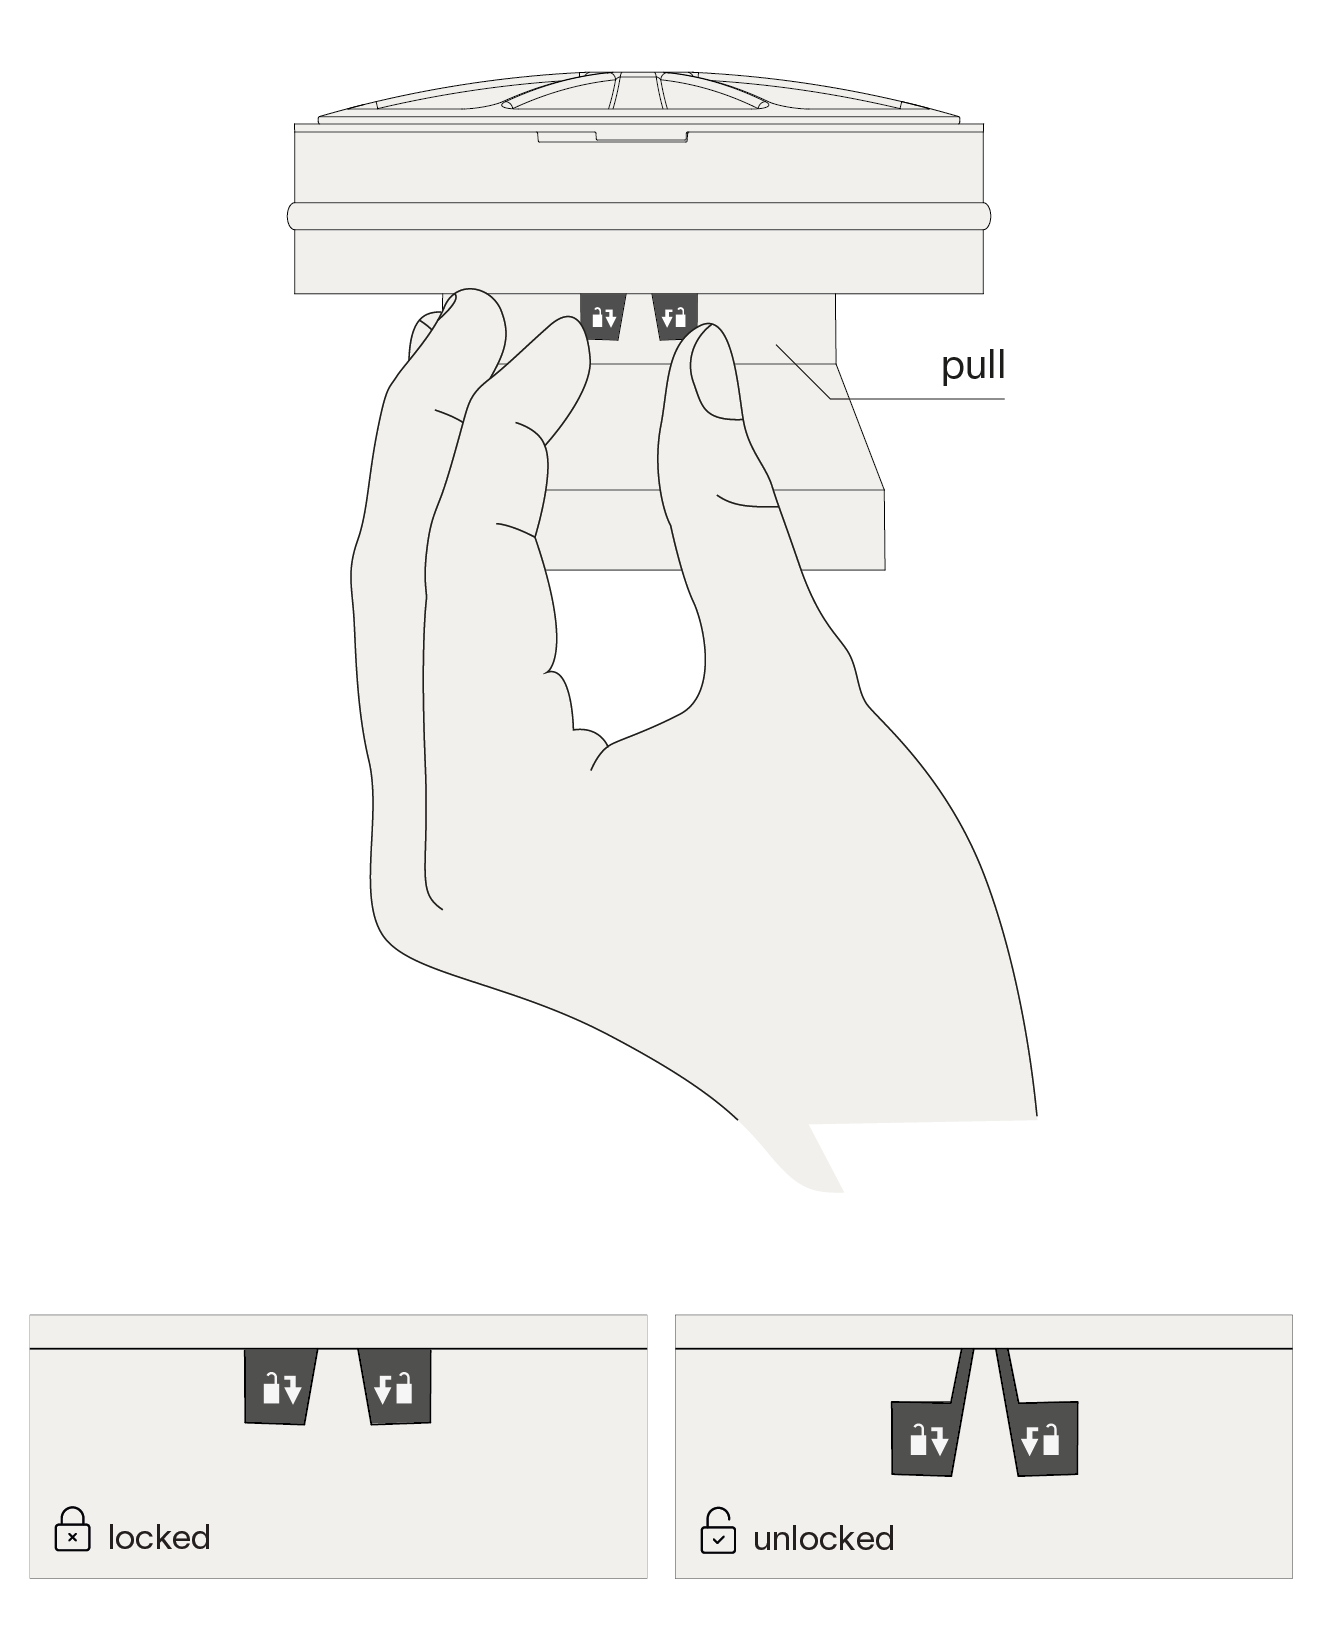
Gently pull the lock out before adjusting the air flow.
Step 3 / 8
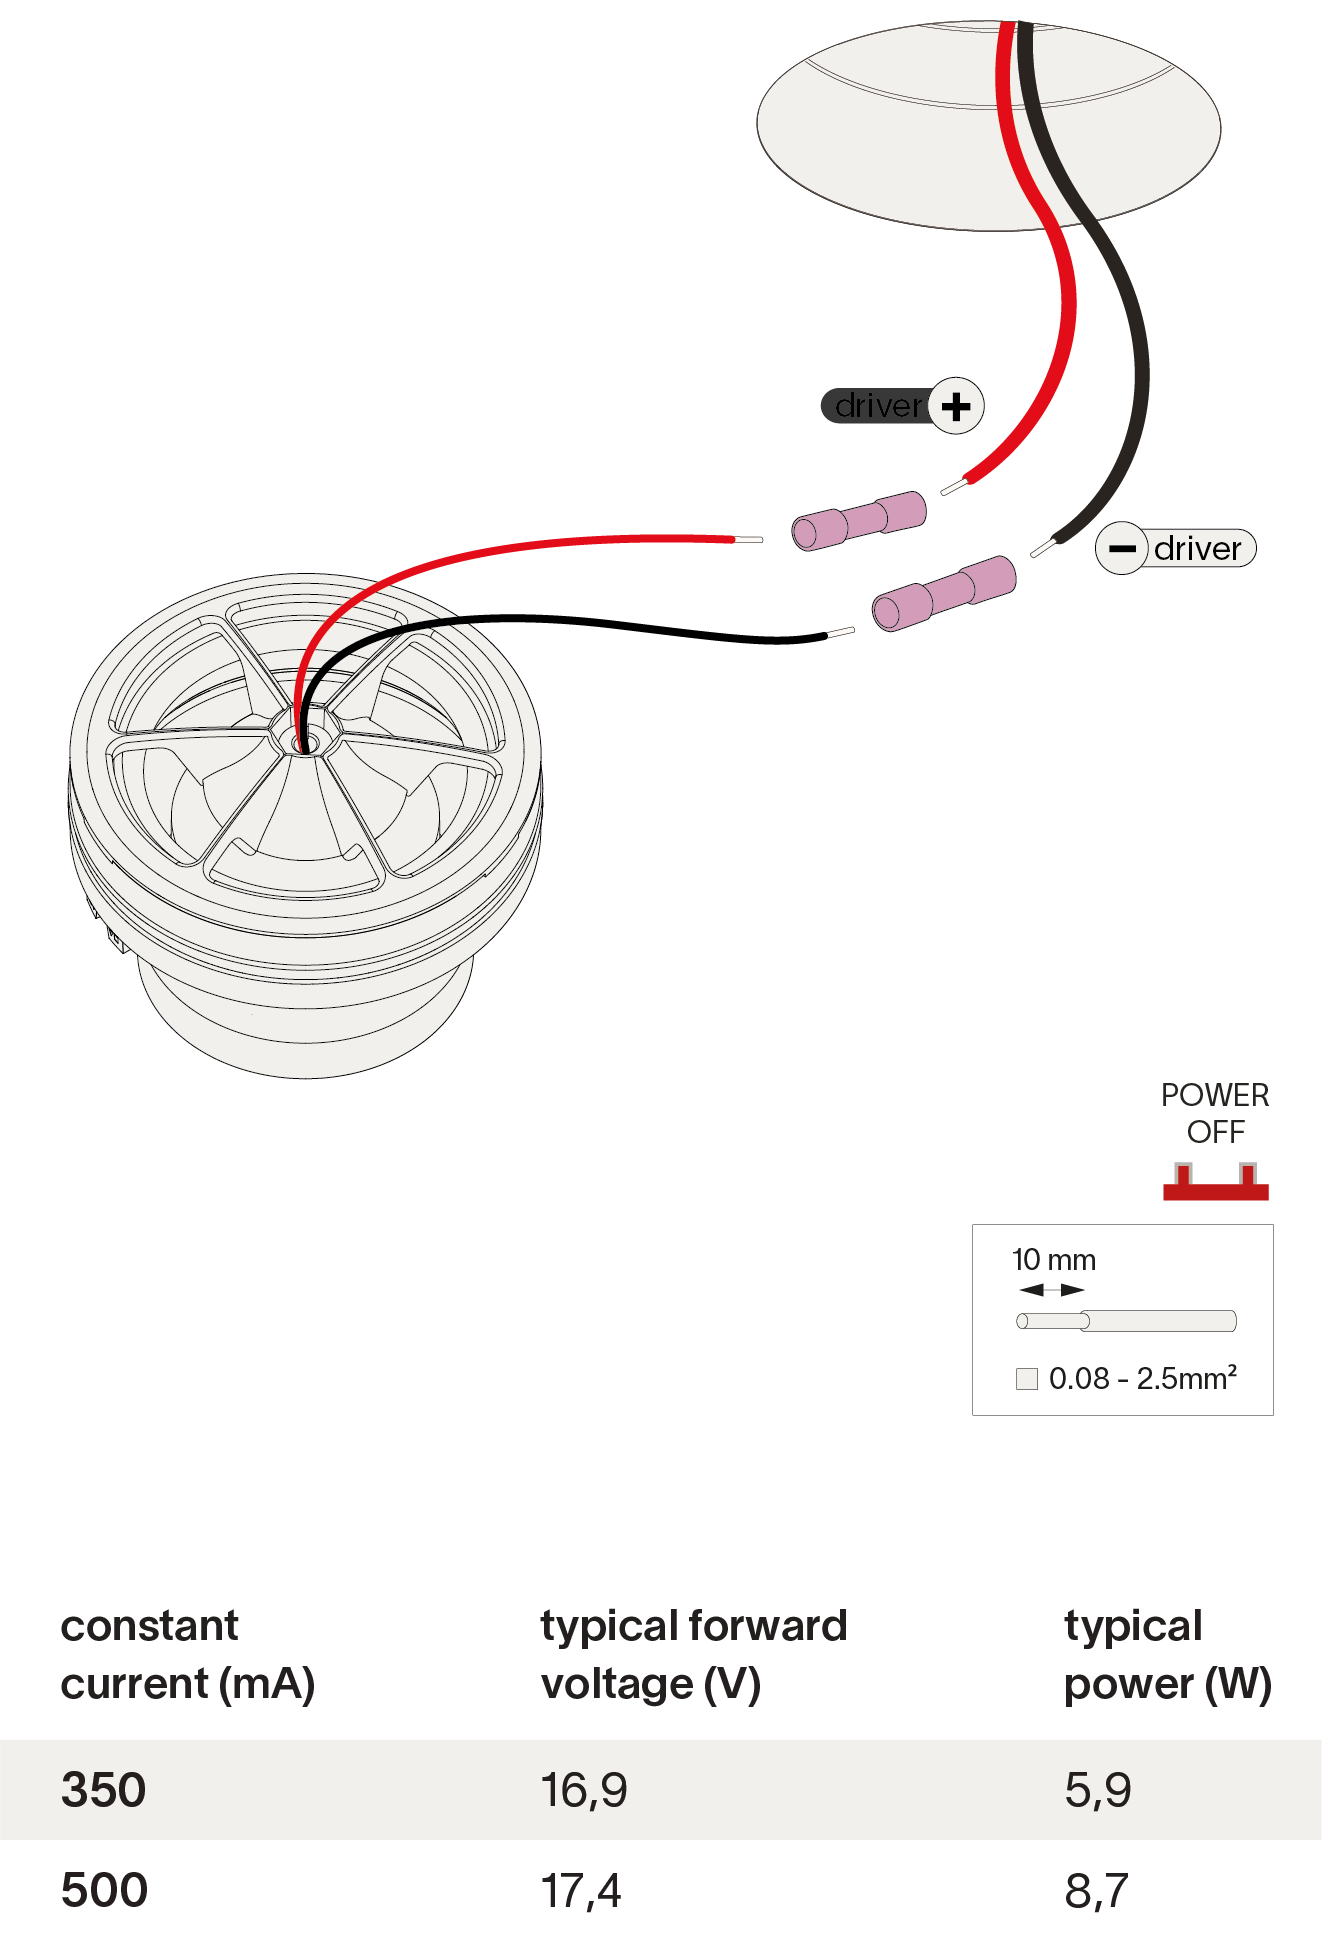
expected lifetime L80 B20 50.000h connect the wires with waterproof connectors for serial connection, respect polarity combine with prado LED-driver.
Step 4 / 8
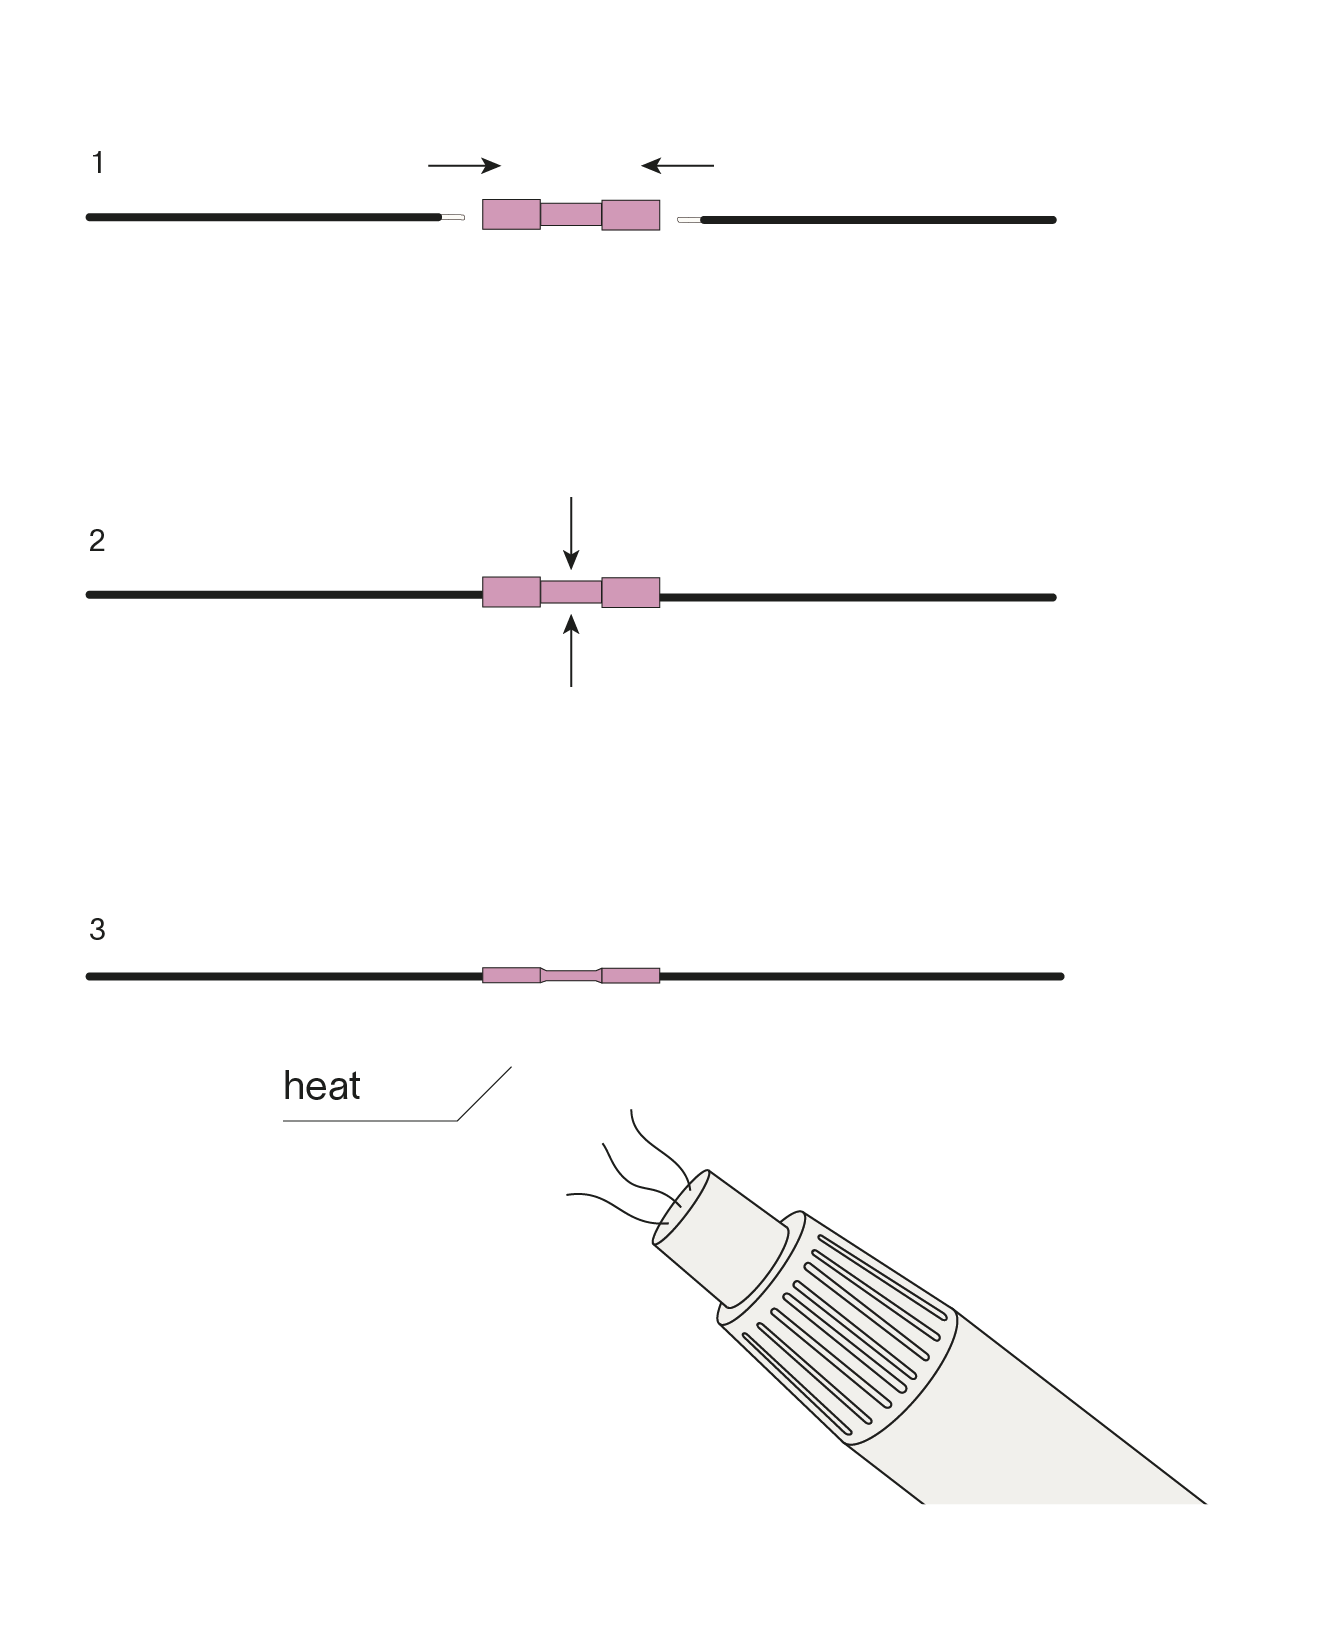
1. Insert the wires into the connector
2. Compress the middle part
3. Seal with a heater
2. Compress the middle part
3. Seal with a heater
Step 5 / 8
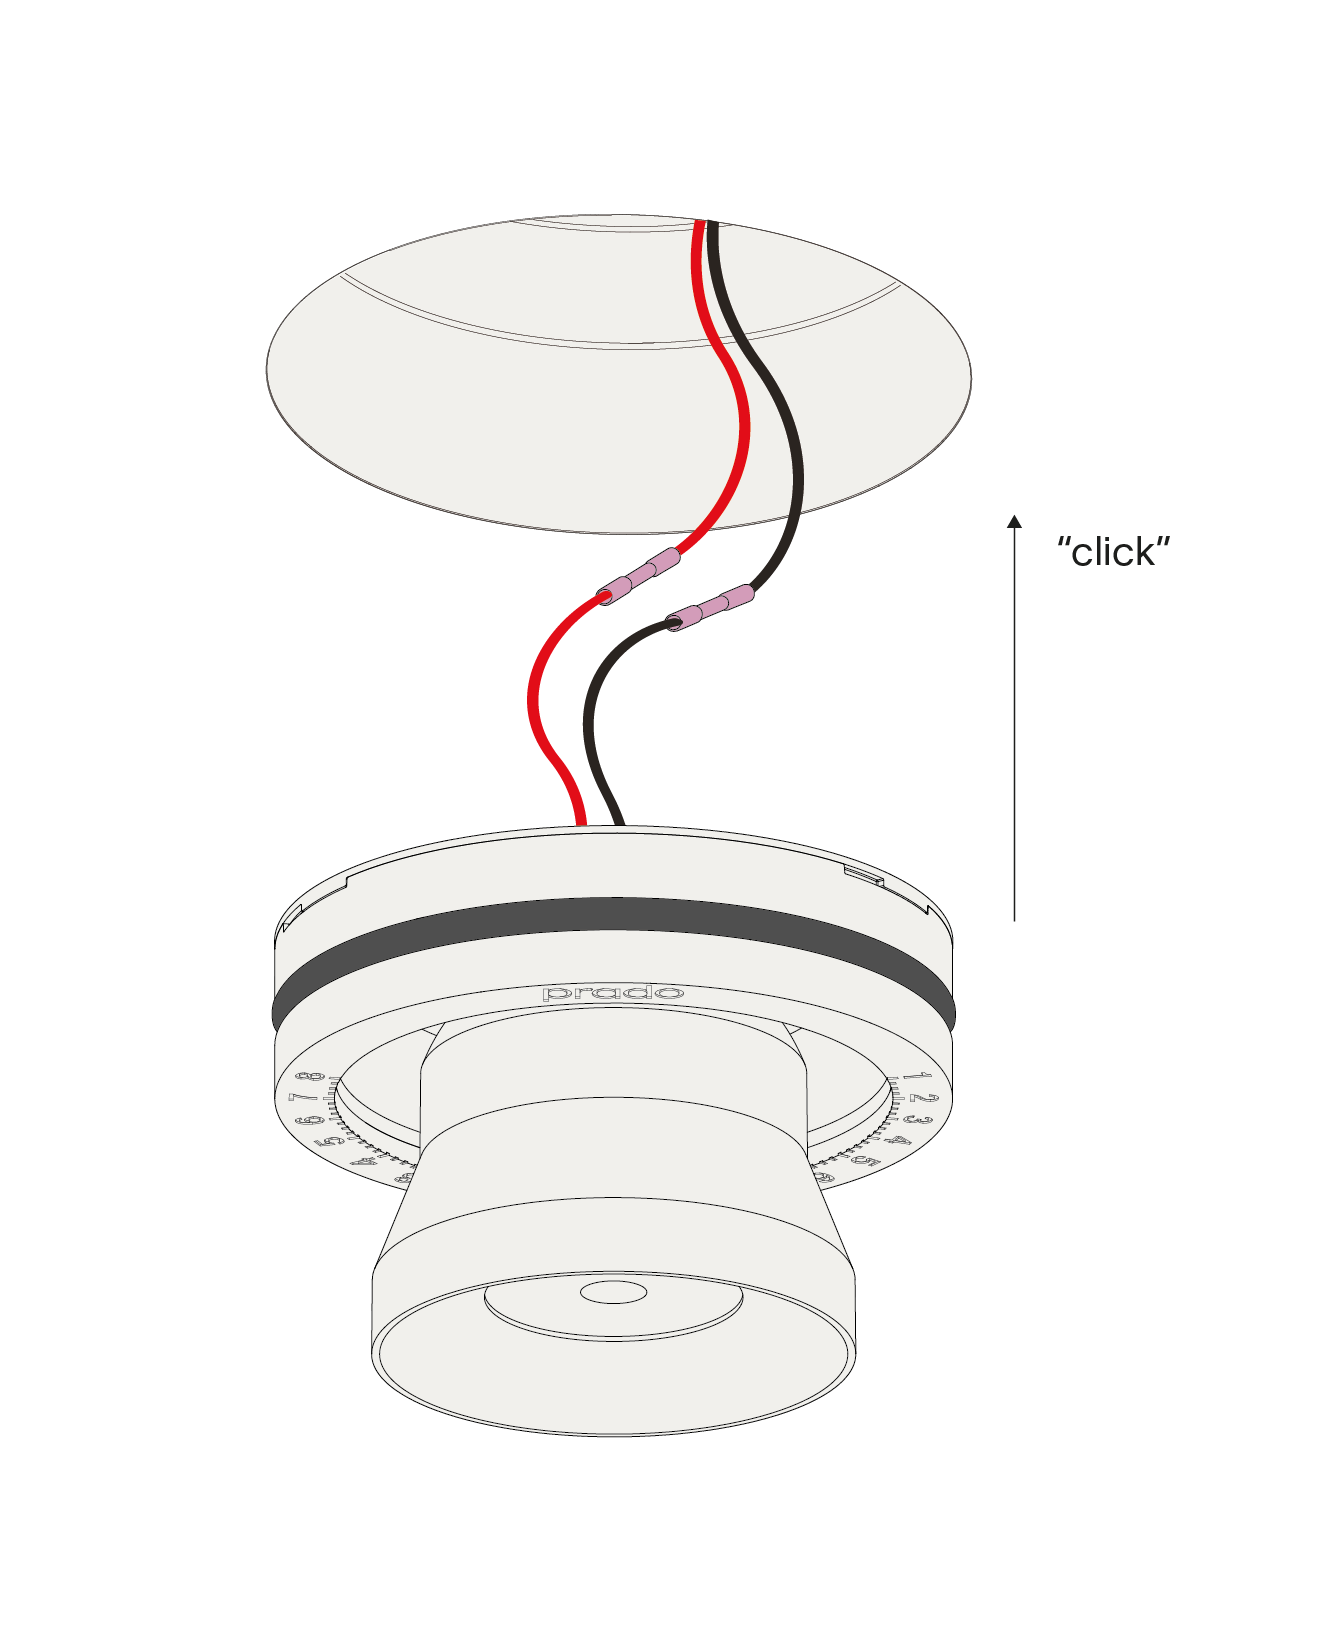
Gently insert the fixture into the kit until it “clicks”.
Step 6 / 8

Twist the luminaire to adjust the ventilation flow level.
Step 7 / 8
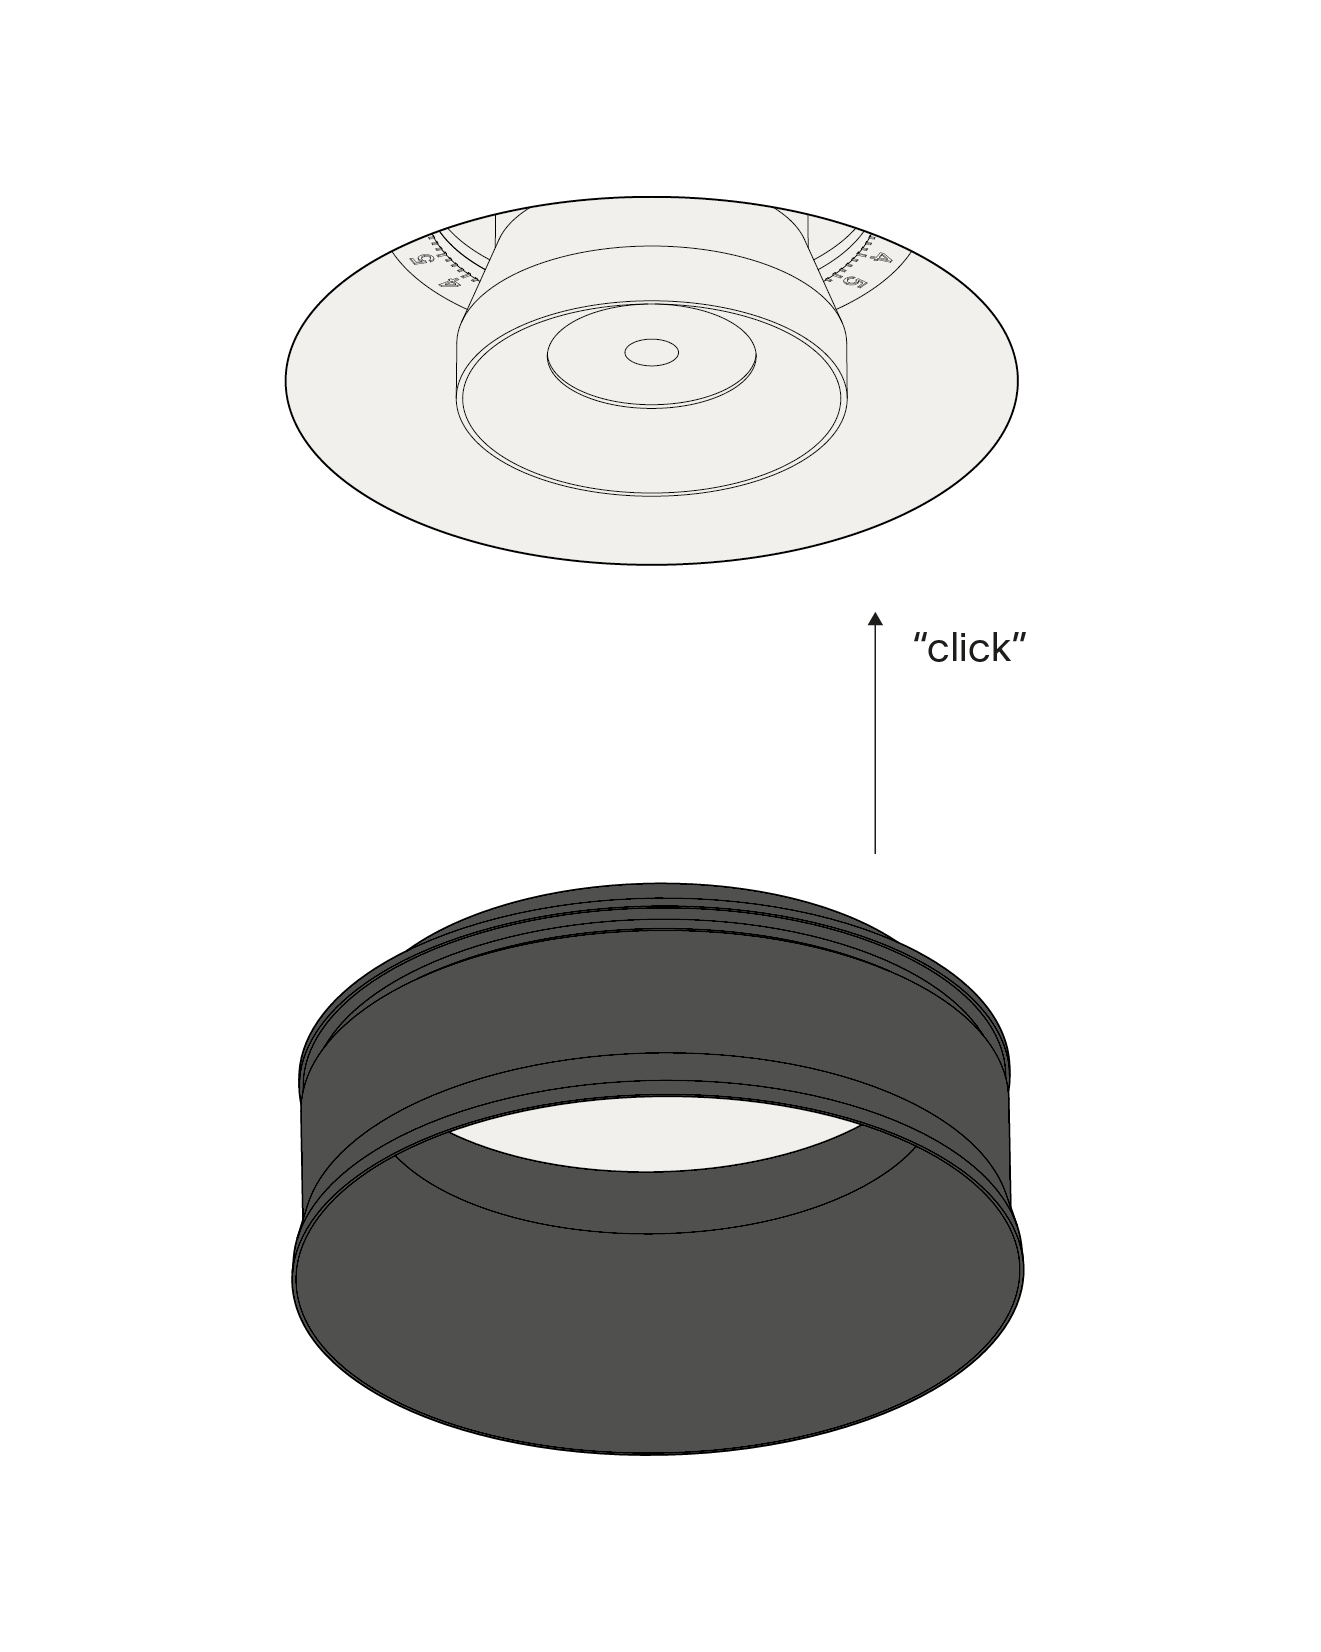
Insert the design ring to lock the ventilation valve.
Step 8 / 8
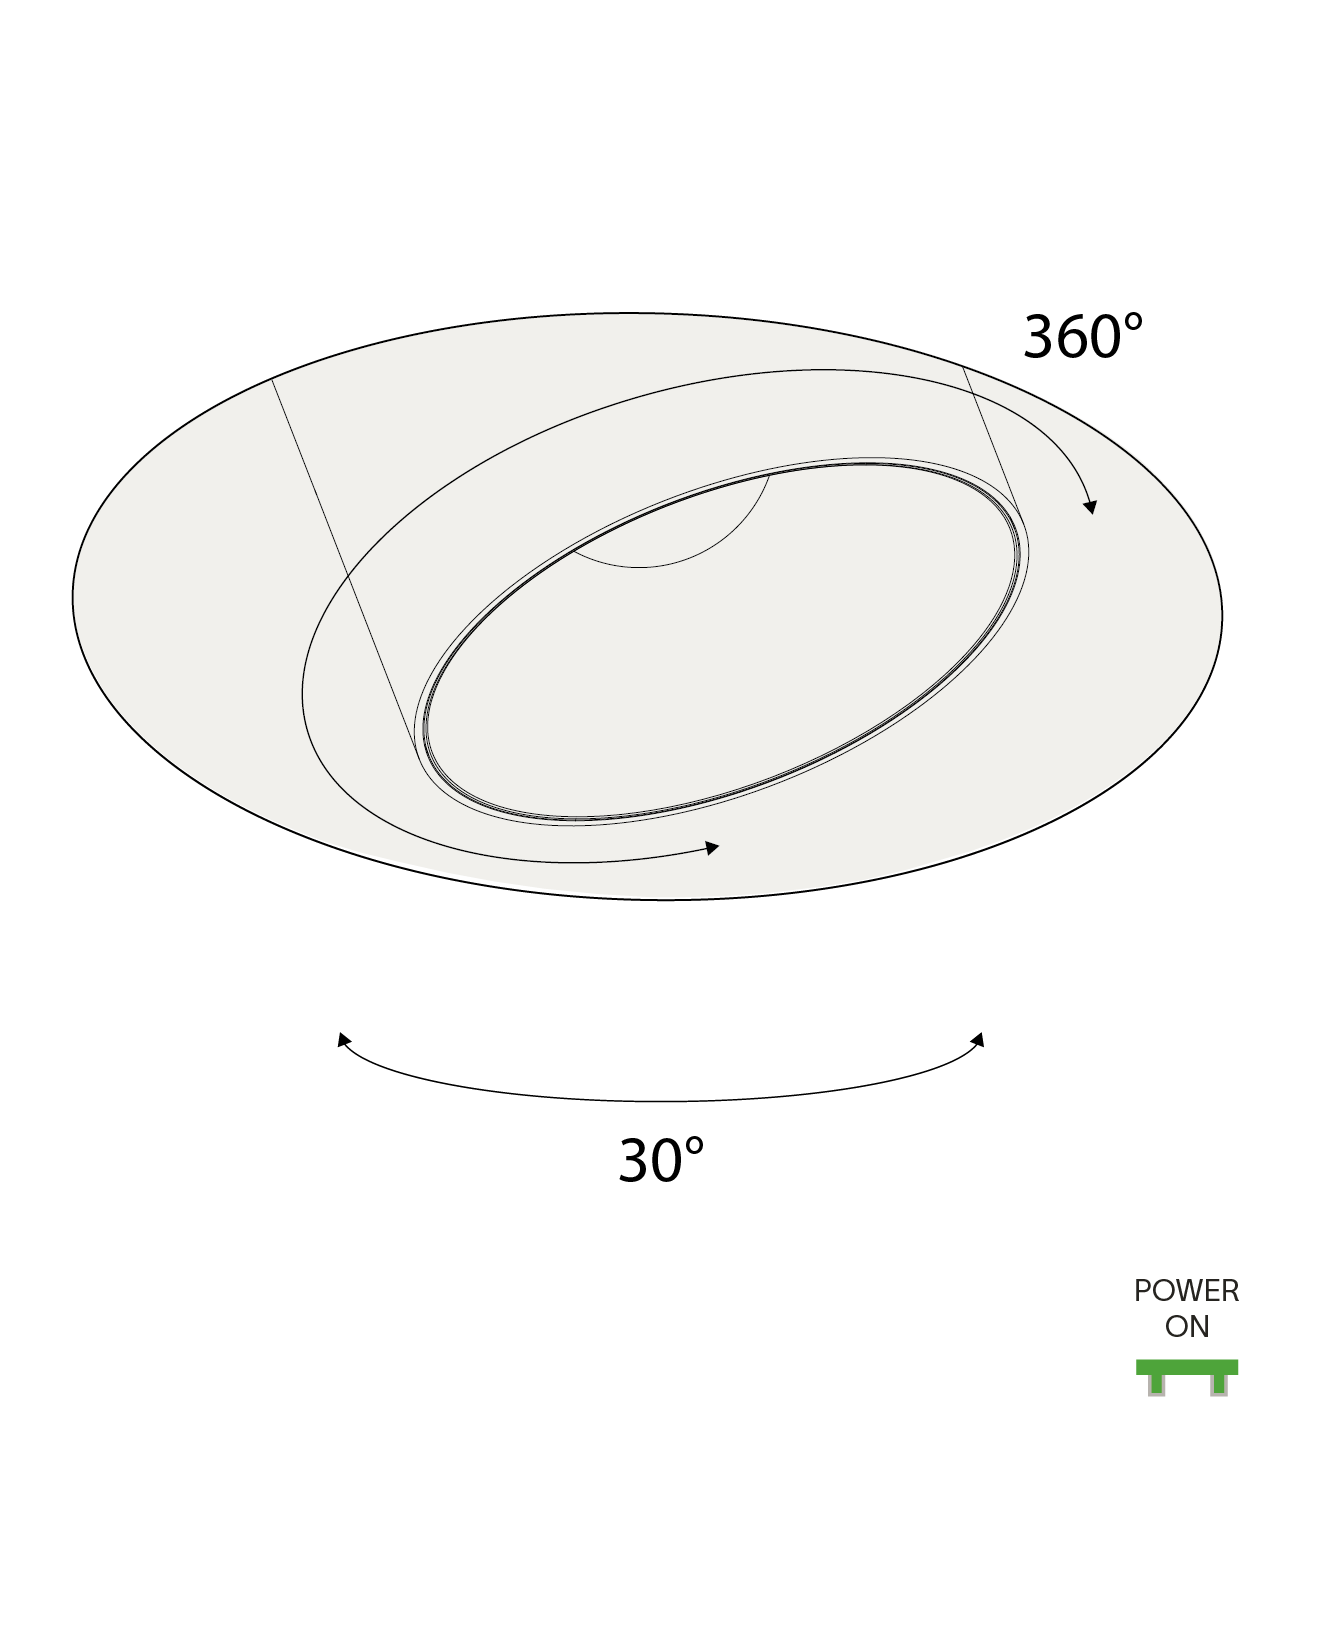
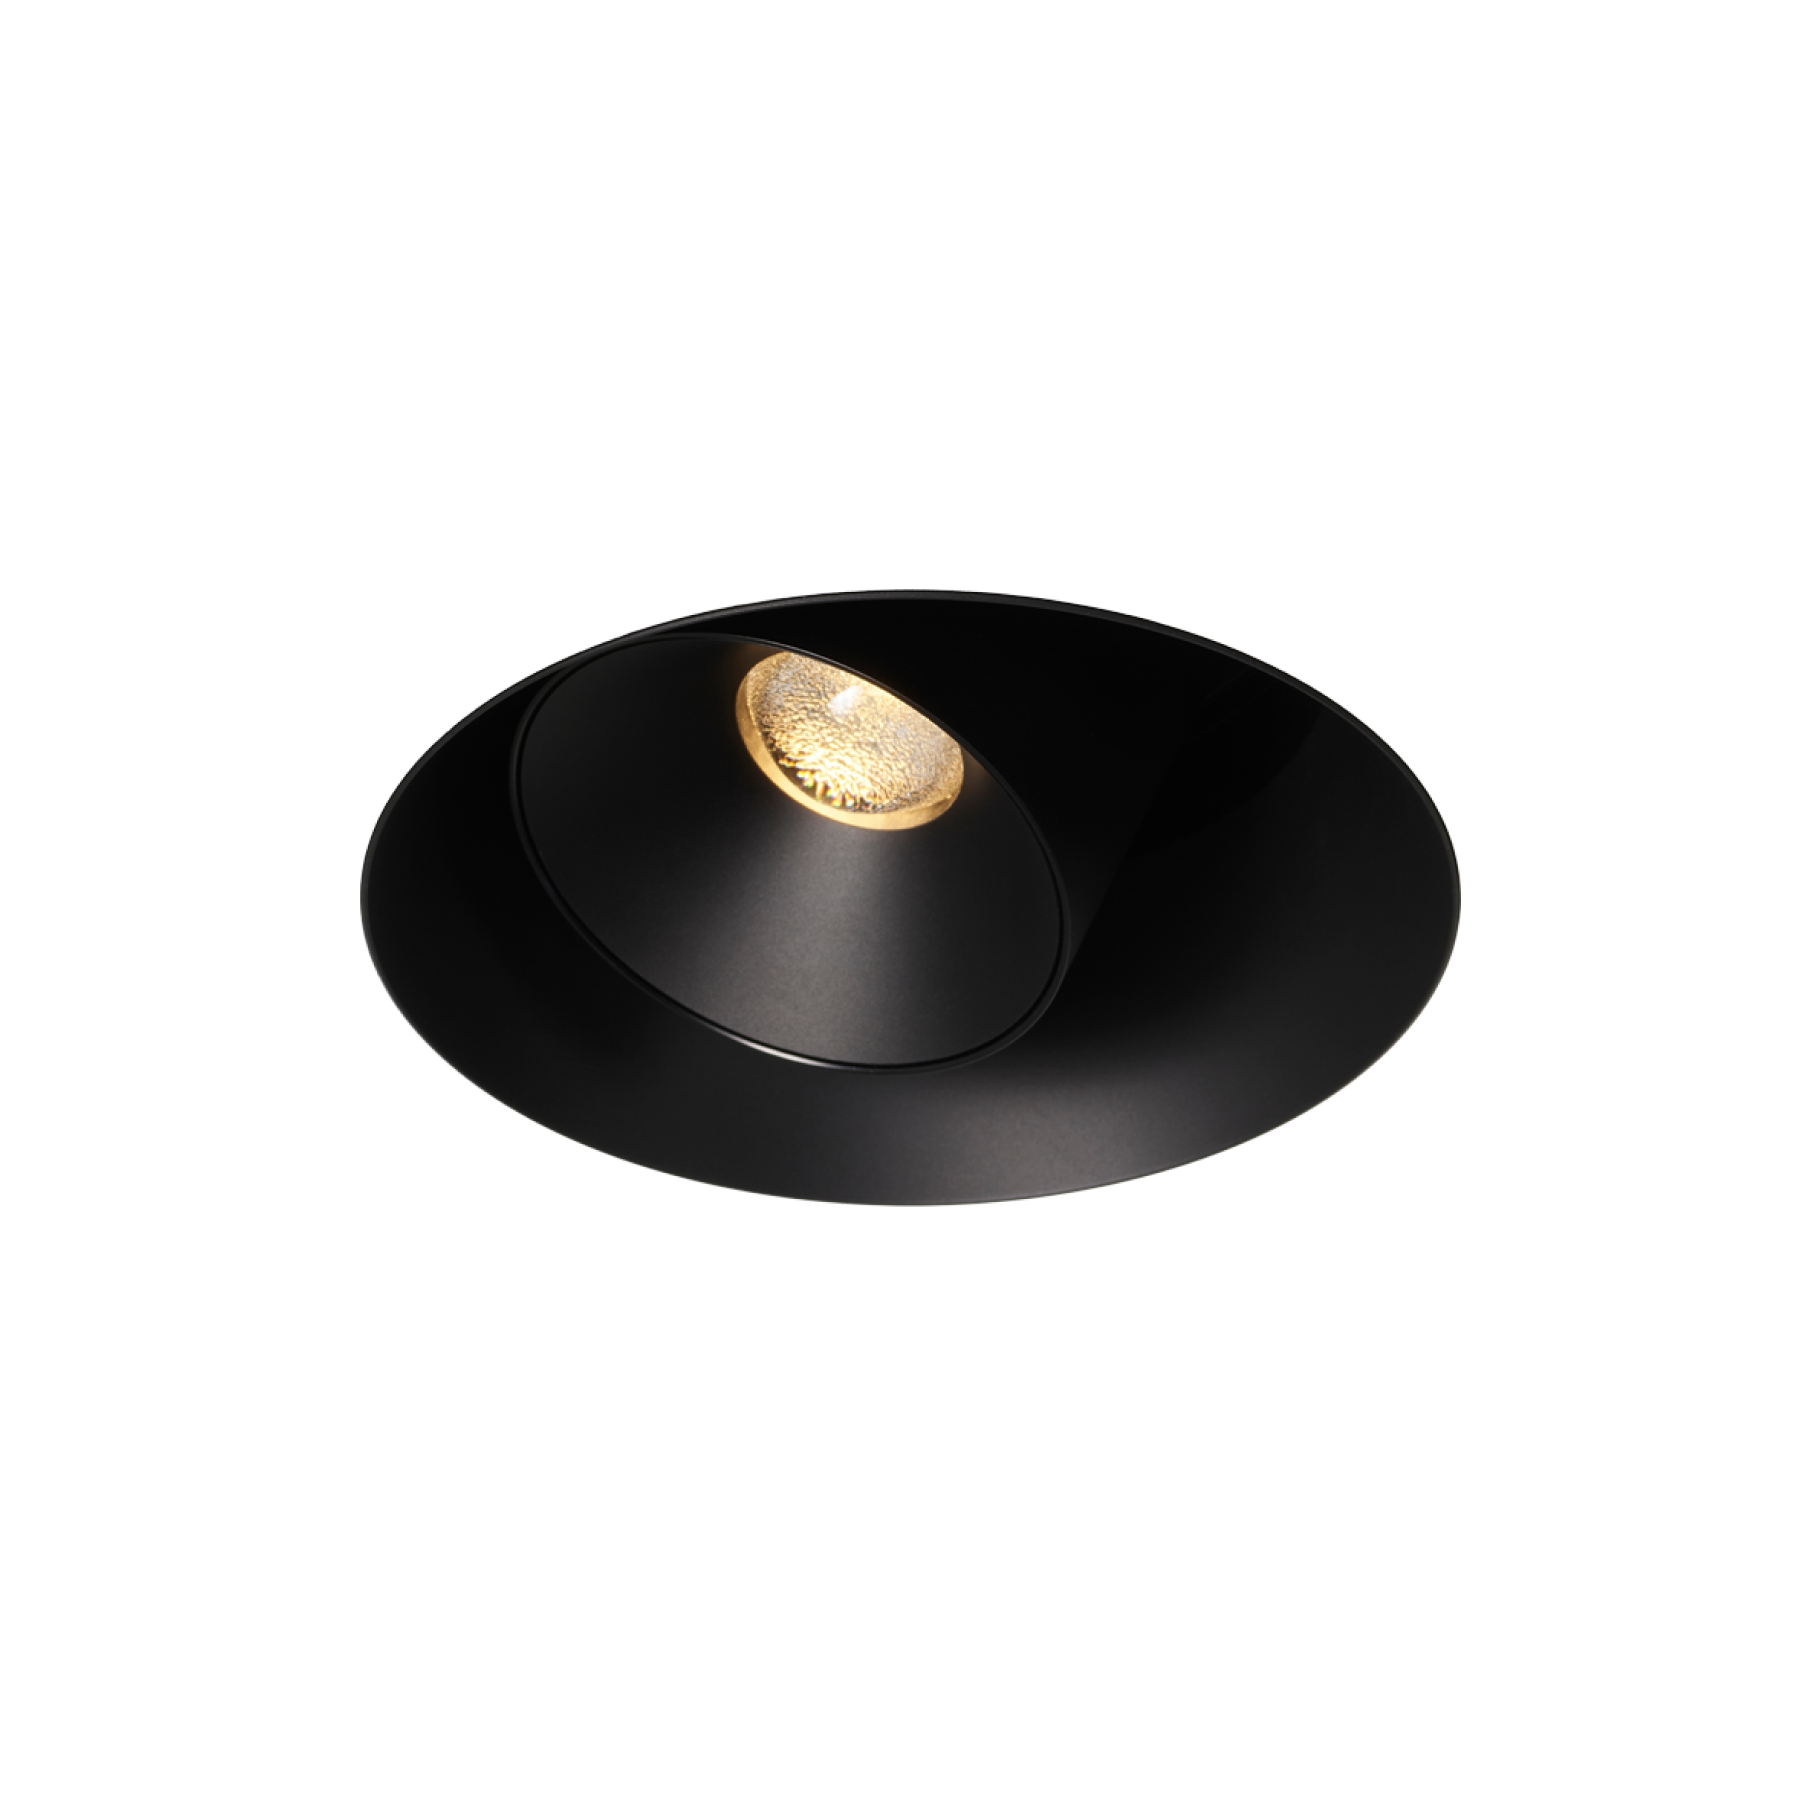
Twist the luminaire as desired.
-

-

-

-

-

-

-
Replace glass lens when broken.
Luminaire shall only be used together with glass lens.
The light source in this luminaire shall only be replaced by the manufacturer or a similar qualified person. Warranty will not apply in case of wrongful use or if unskilled personnel attempts to repair the product.