Step 1 / 10
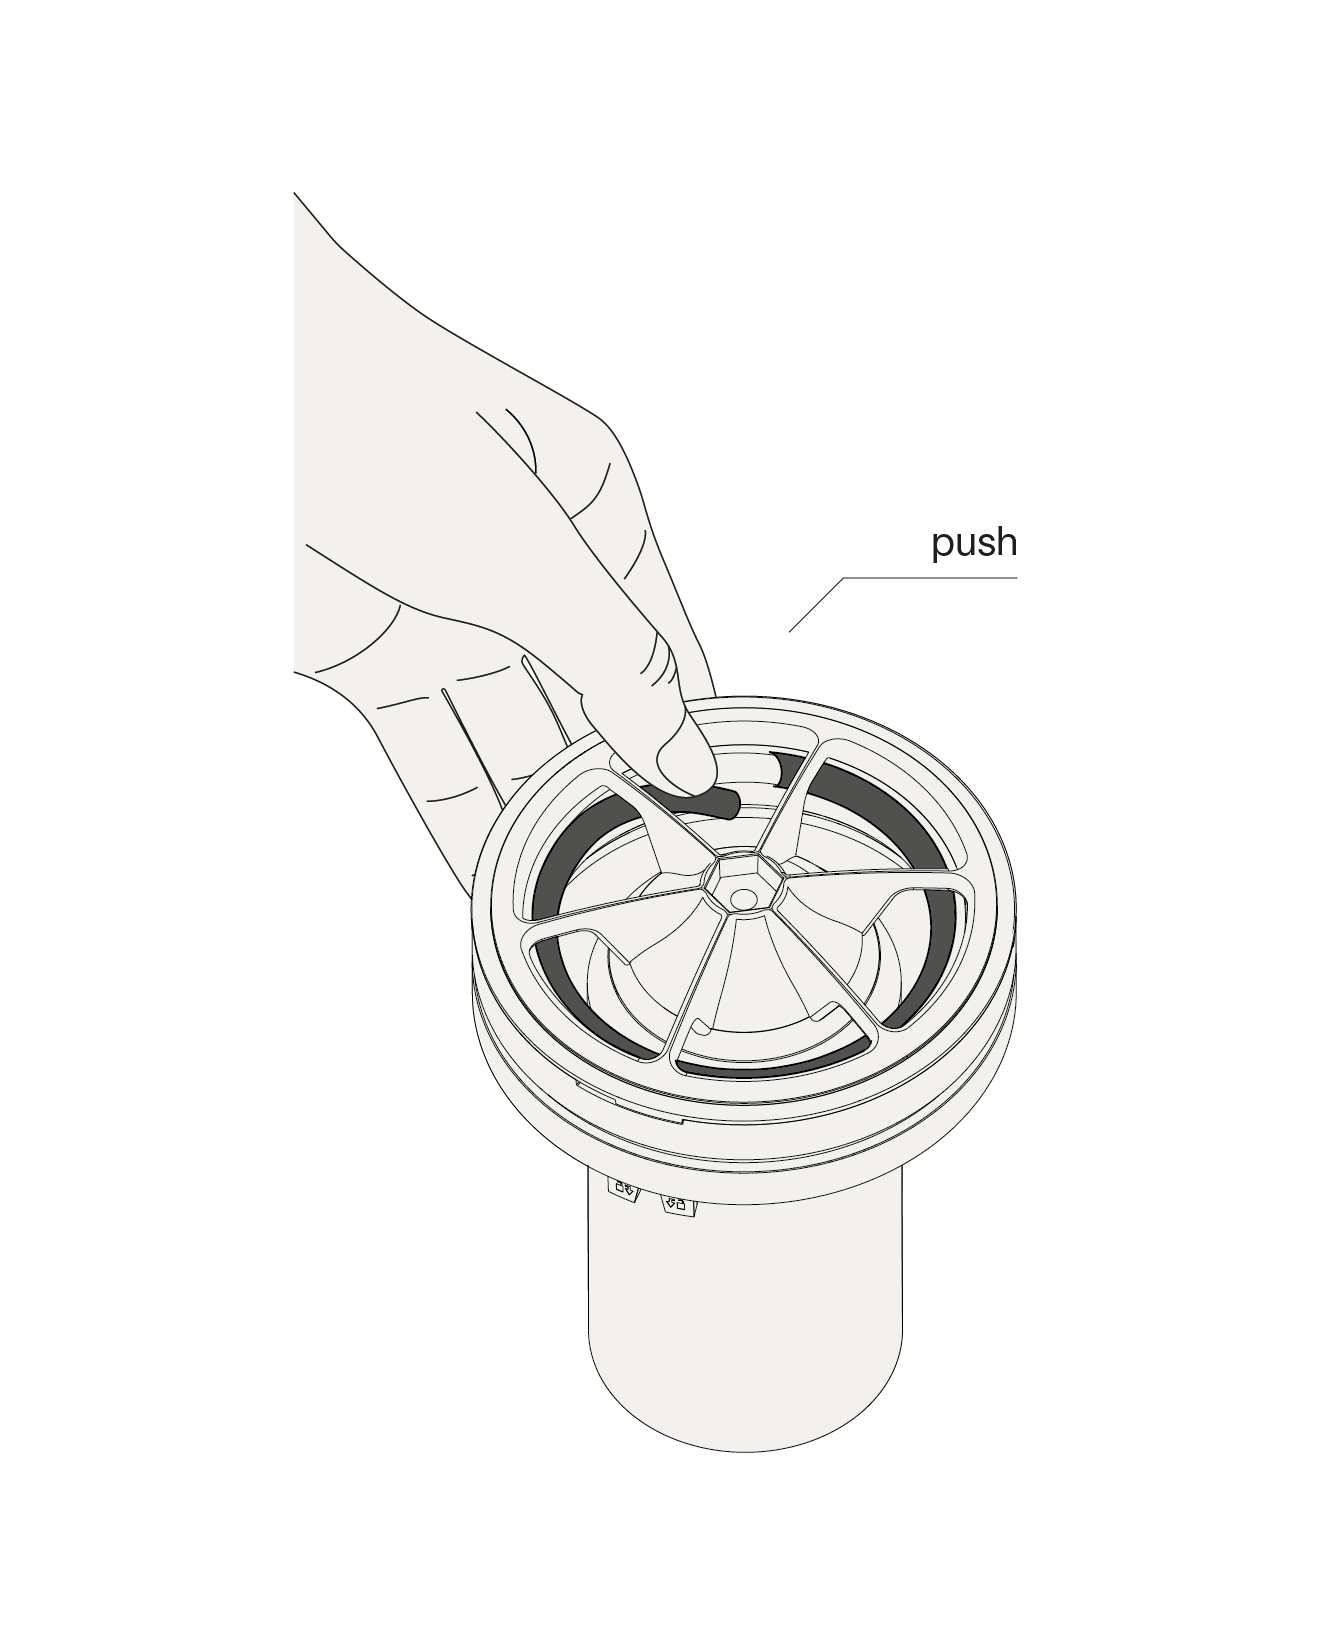
If 50m3/h is required remove the 25m3/h ring like shown above. If 25m3/h is required do not remove the 25m3/h ring like shown above.
Step 2 / 10
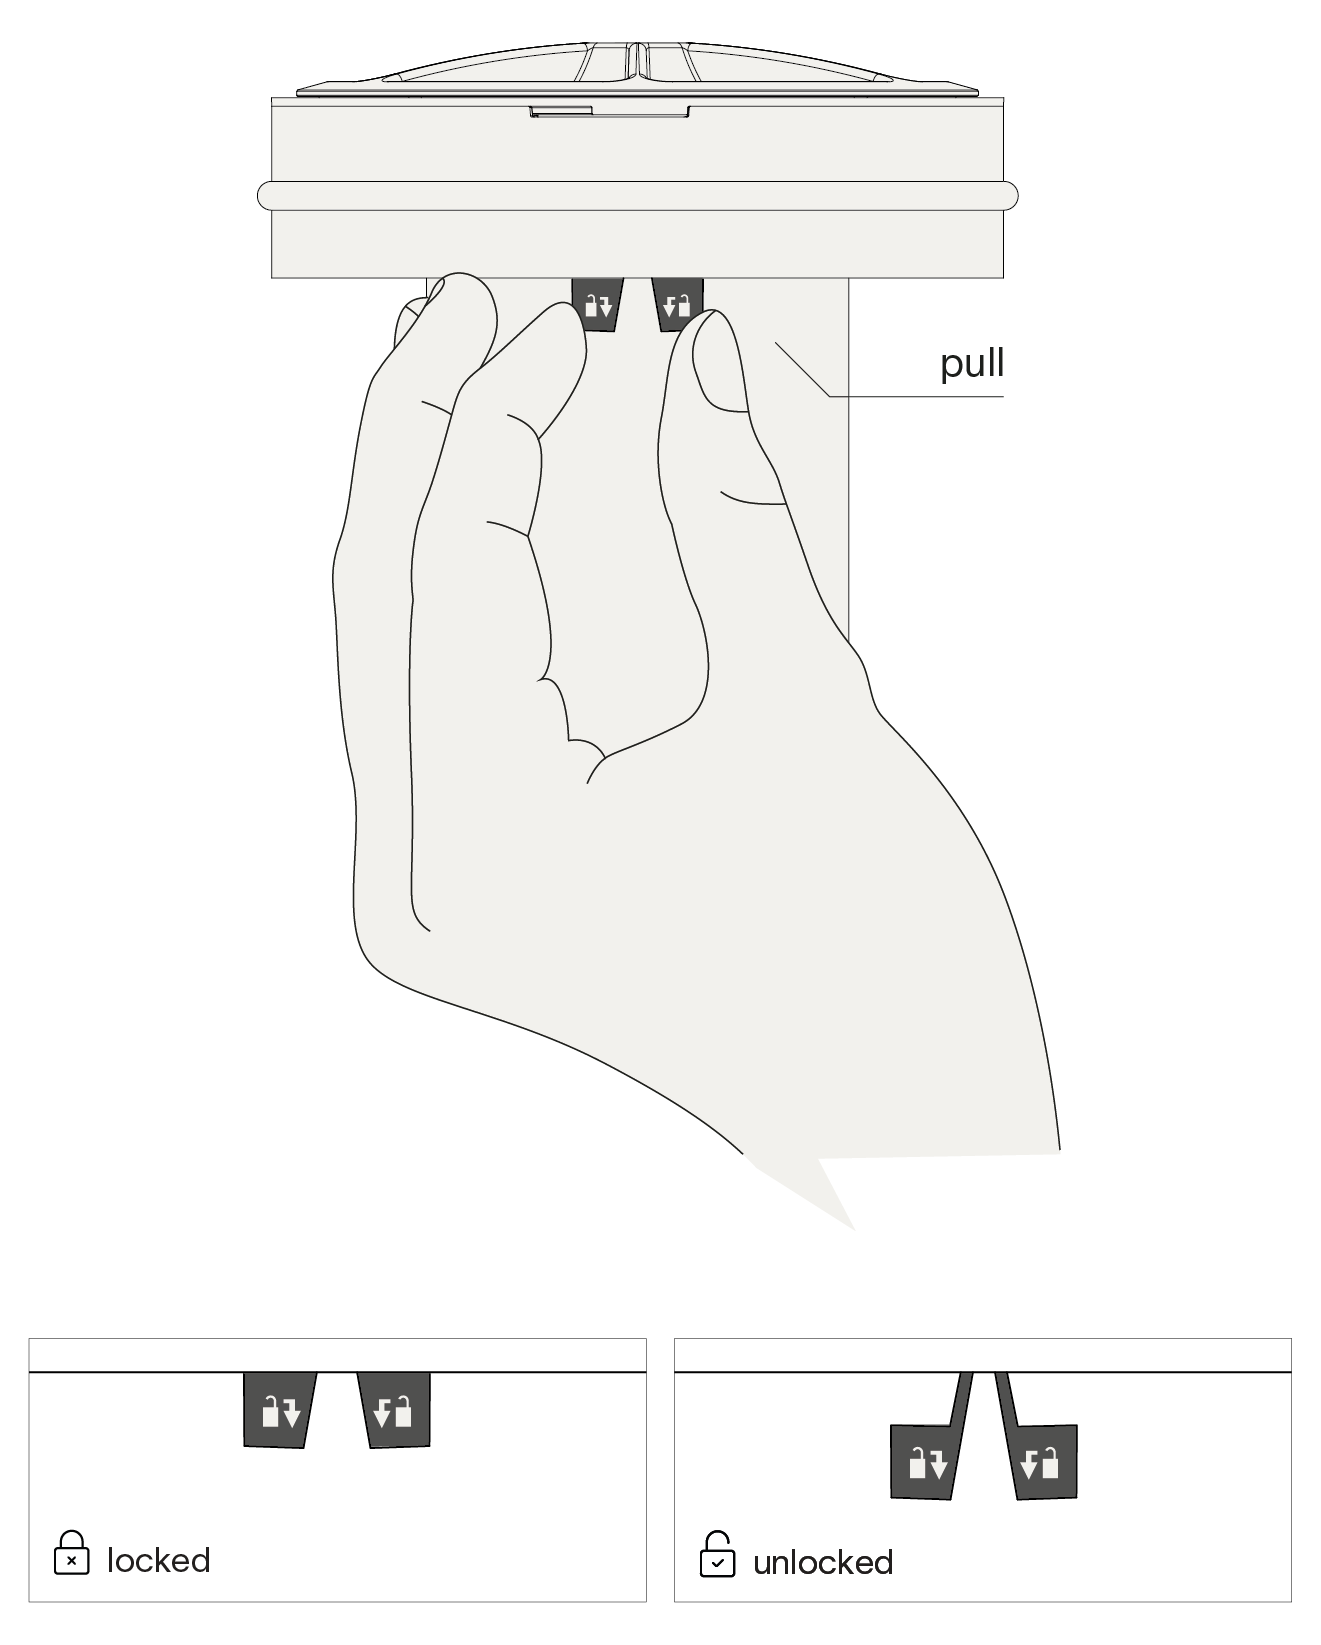
Gently pull the lock out before adjusting the air flow.
Step 3 / 10
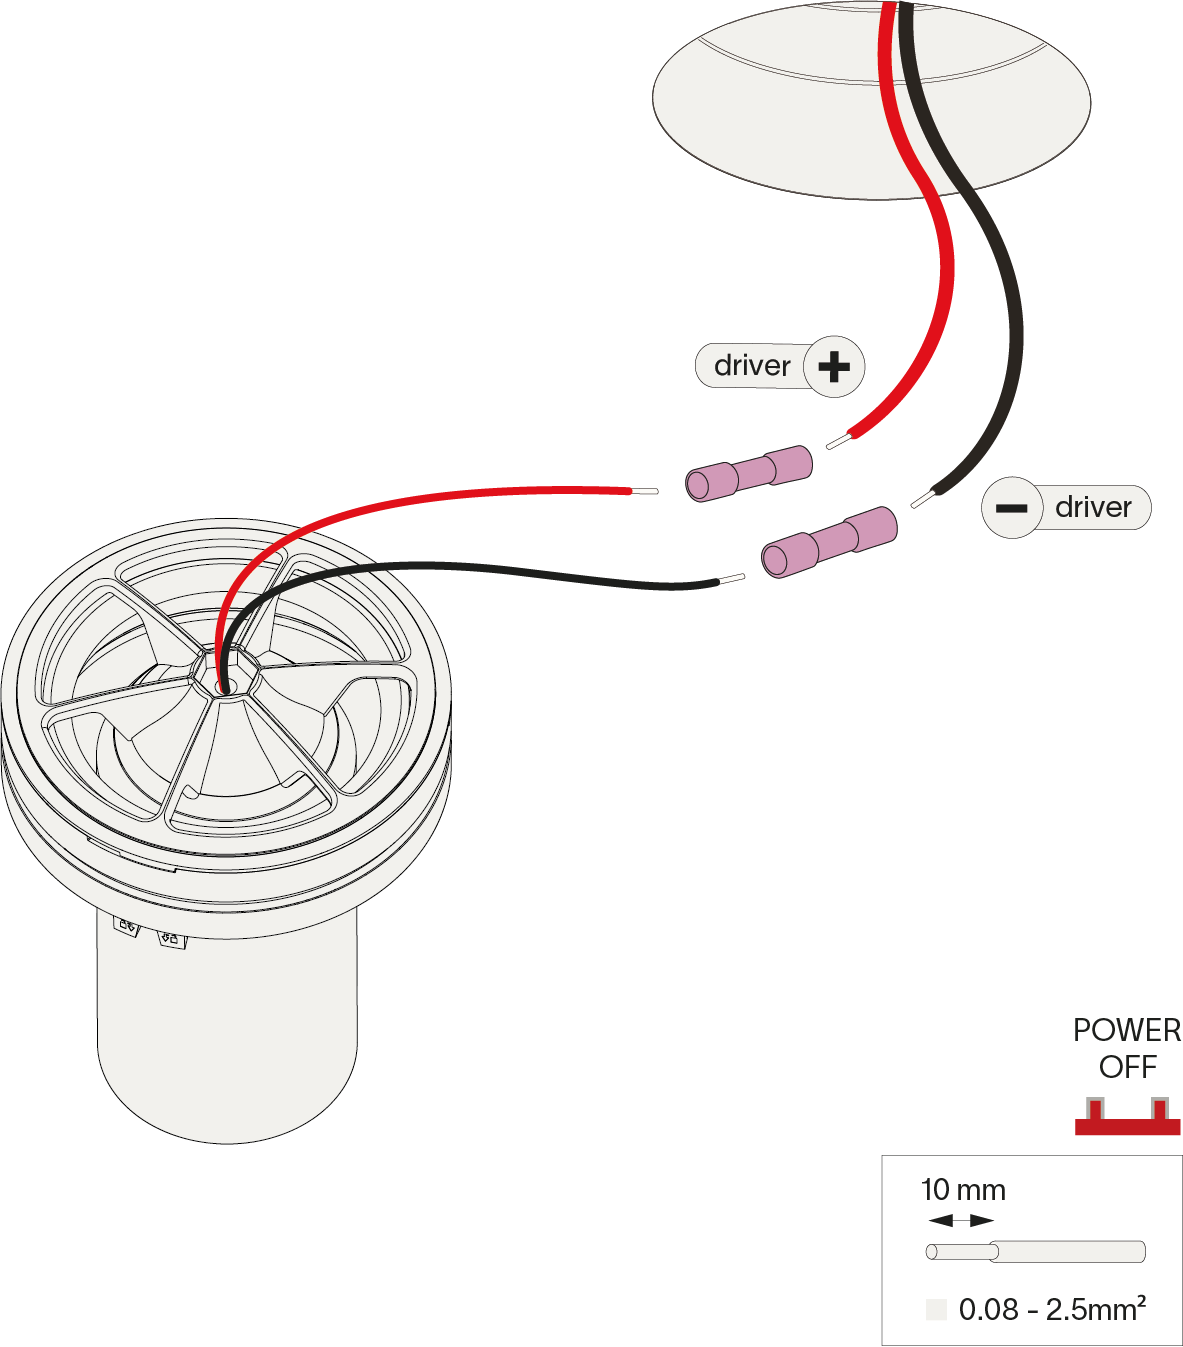
Connect the wires with waterproof connectors for parallel connection, respect polarity combine with prado LED-driver.
Step 4 / 10
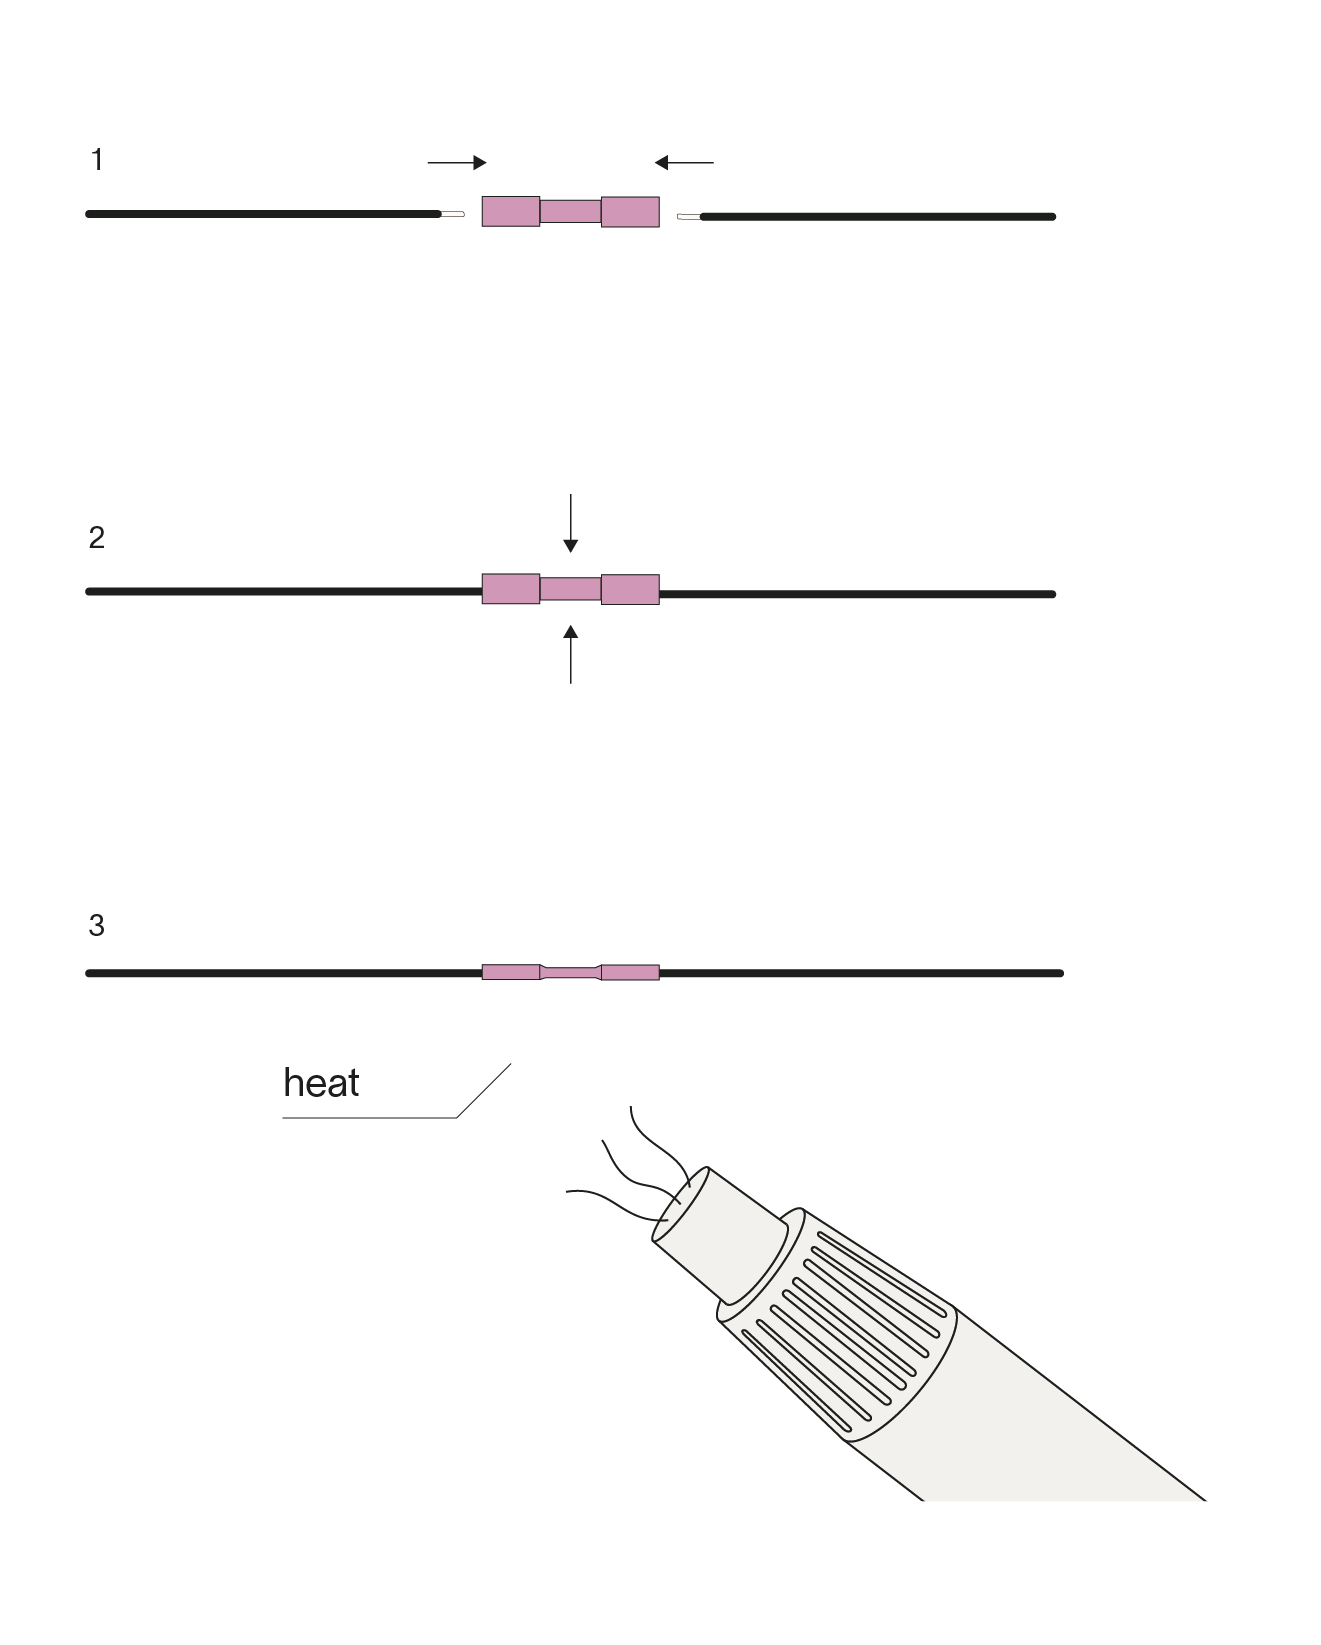
1. Insert the wires into the connector
2. Compress the middle part
3. Seal with a heater
2. Compress the middle part
3. Seal with a heater
Step 5 / 10
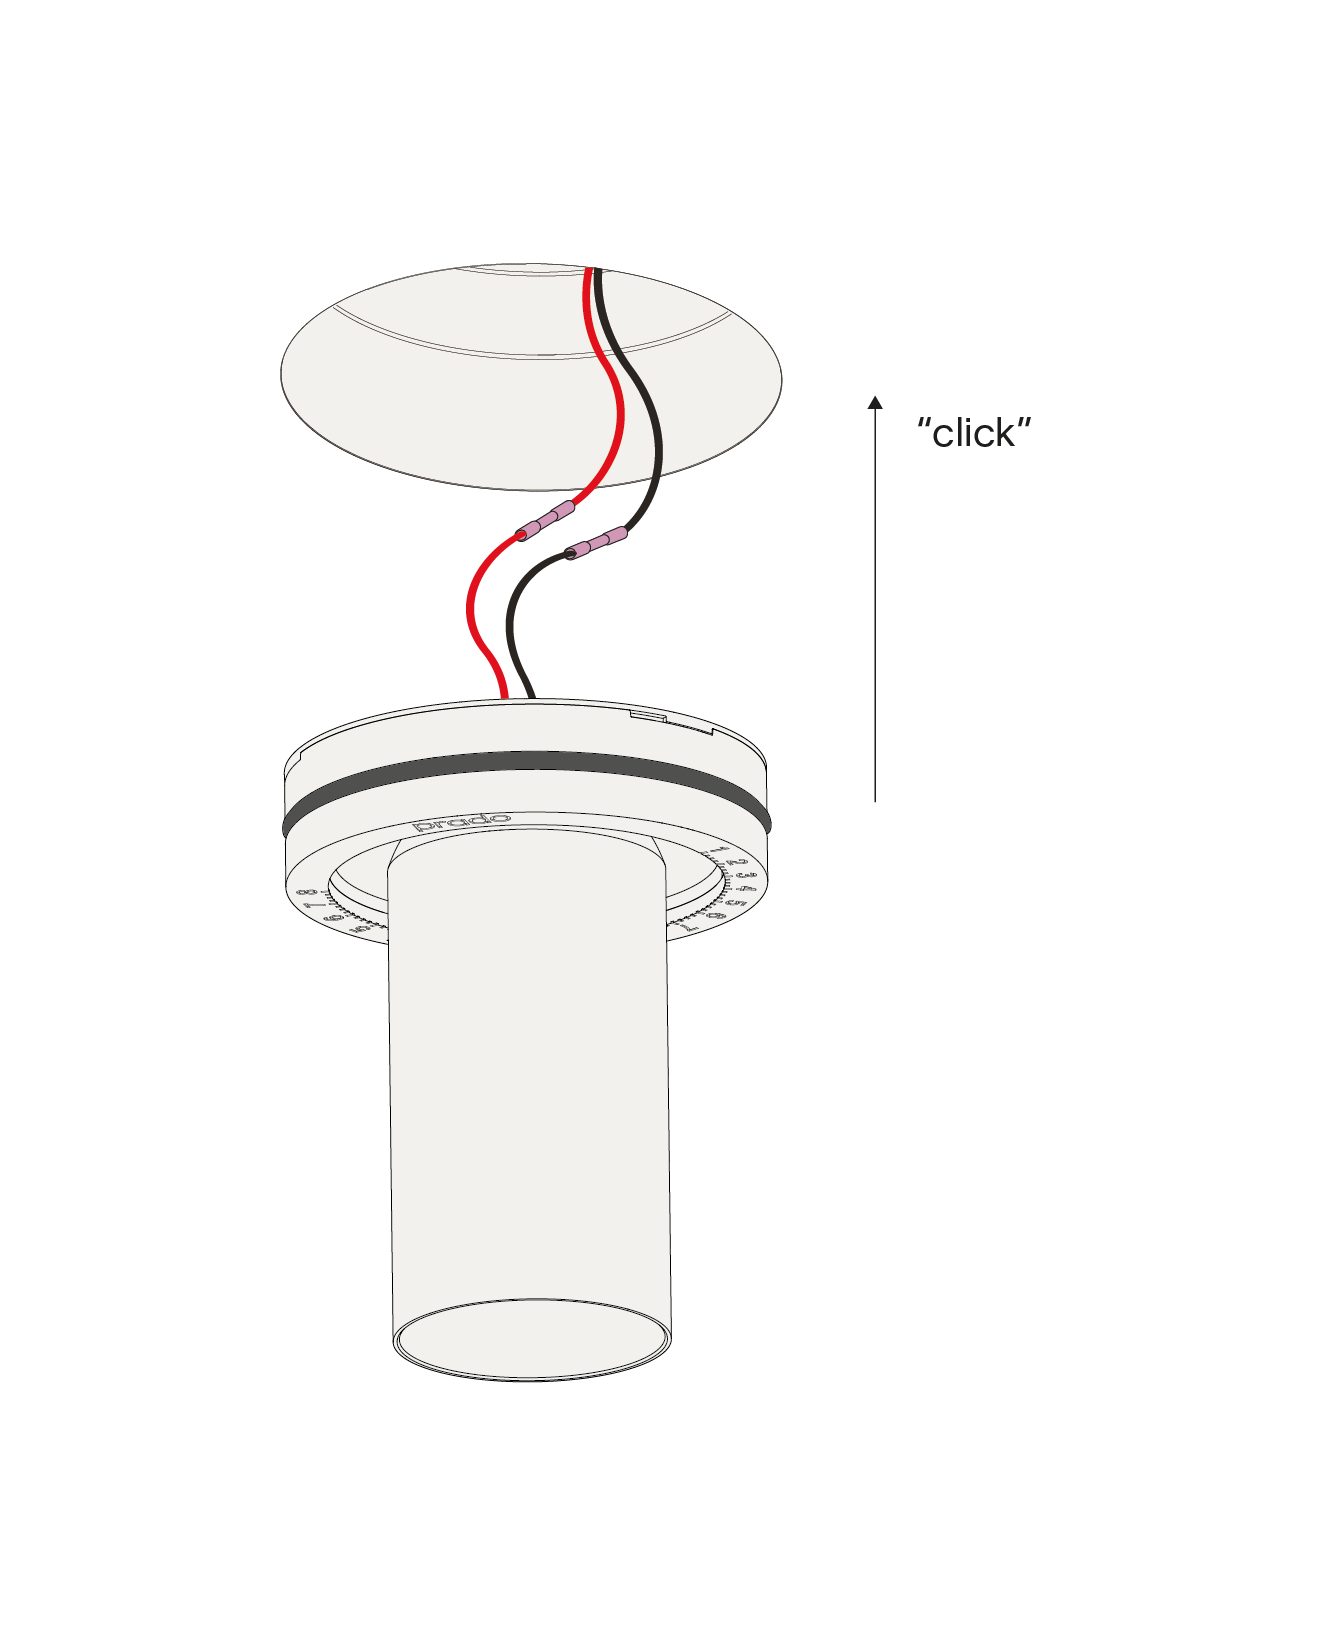
Gently insert the fixture into the kit until it “clicks”.
Step 6 / 10
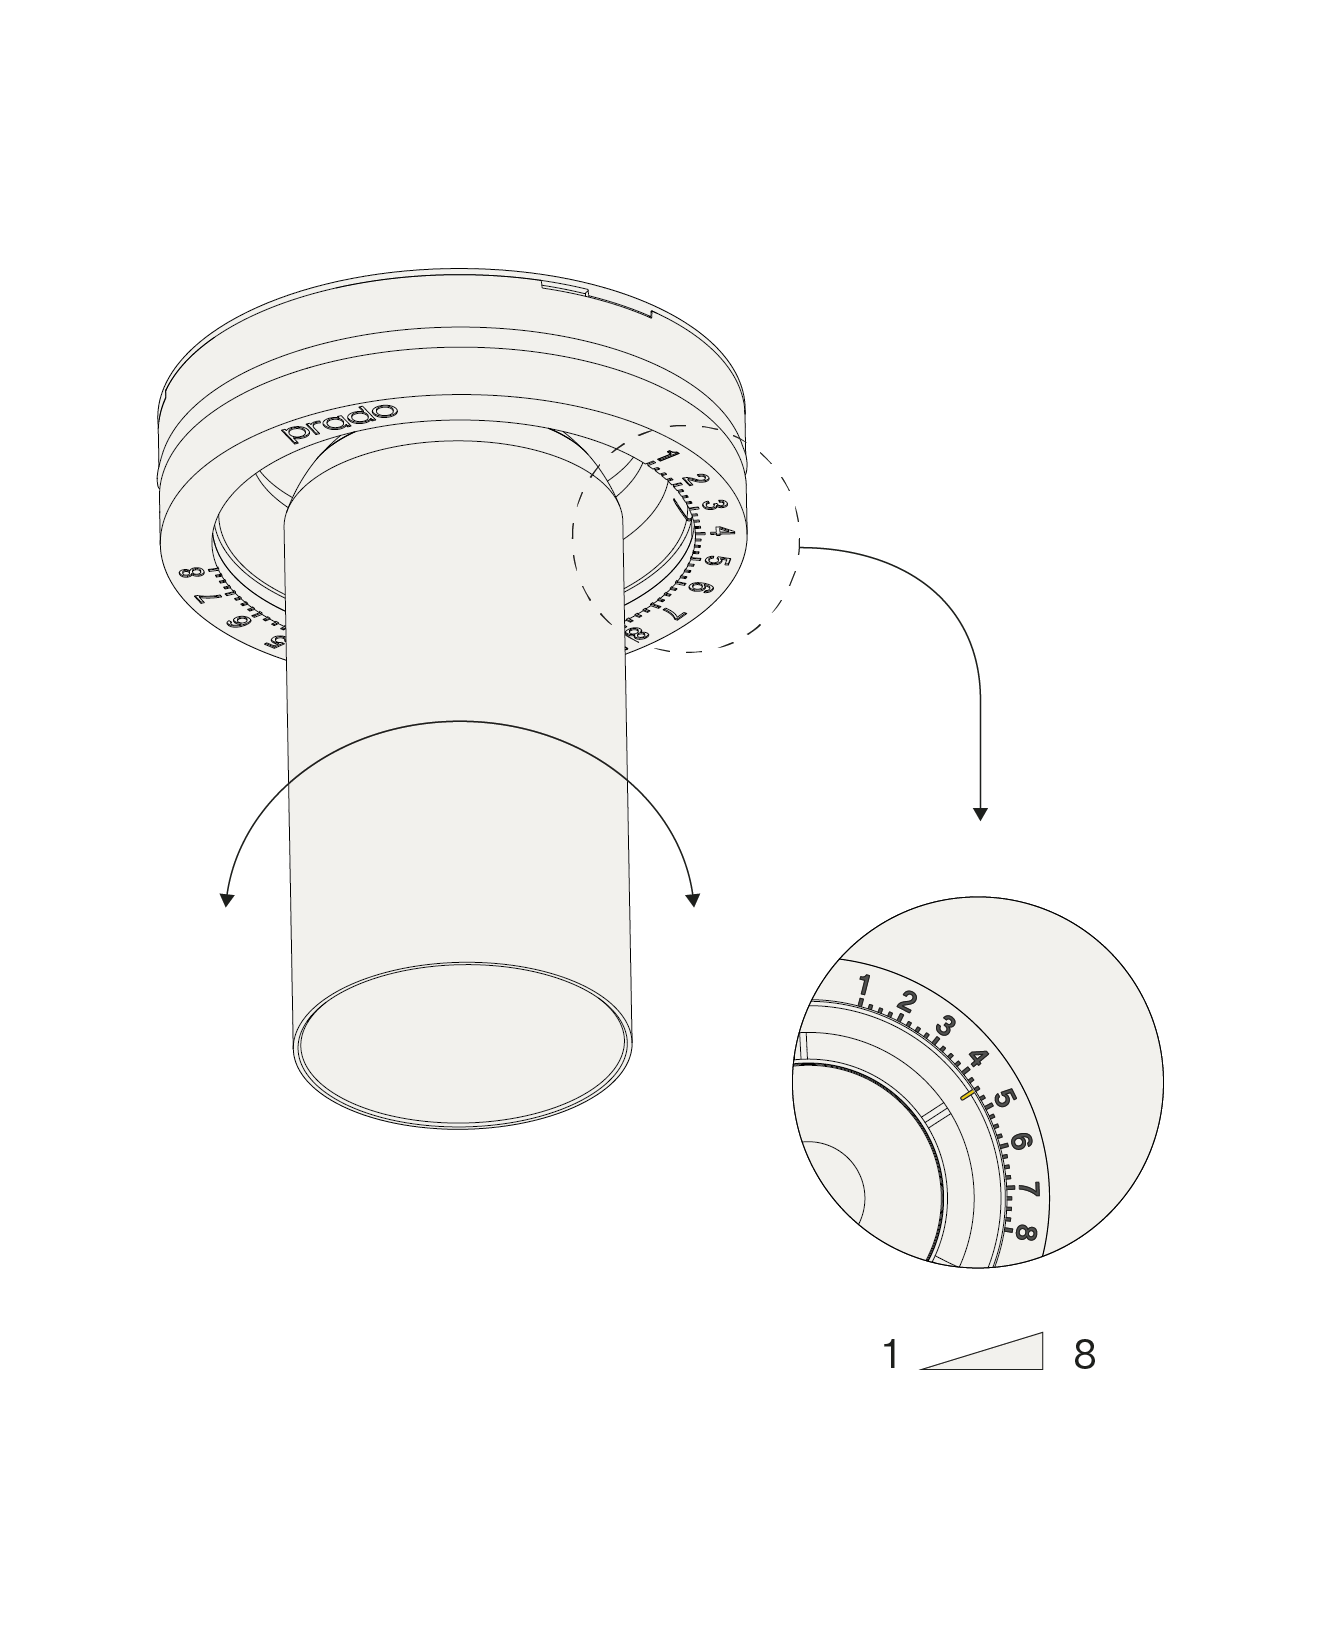
Twist the luminaire to adjust the ventilation flow level.
Step 7 / 10
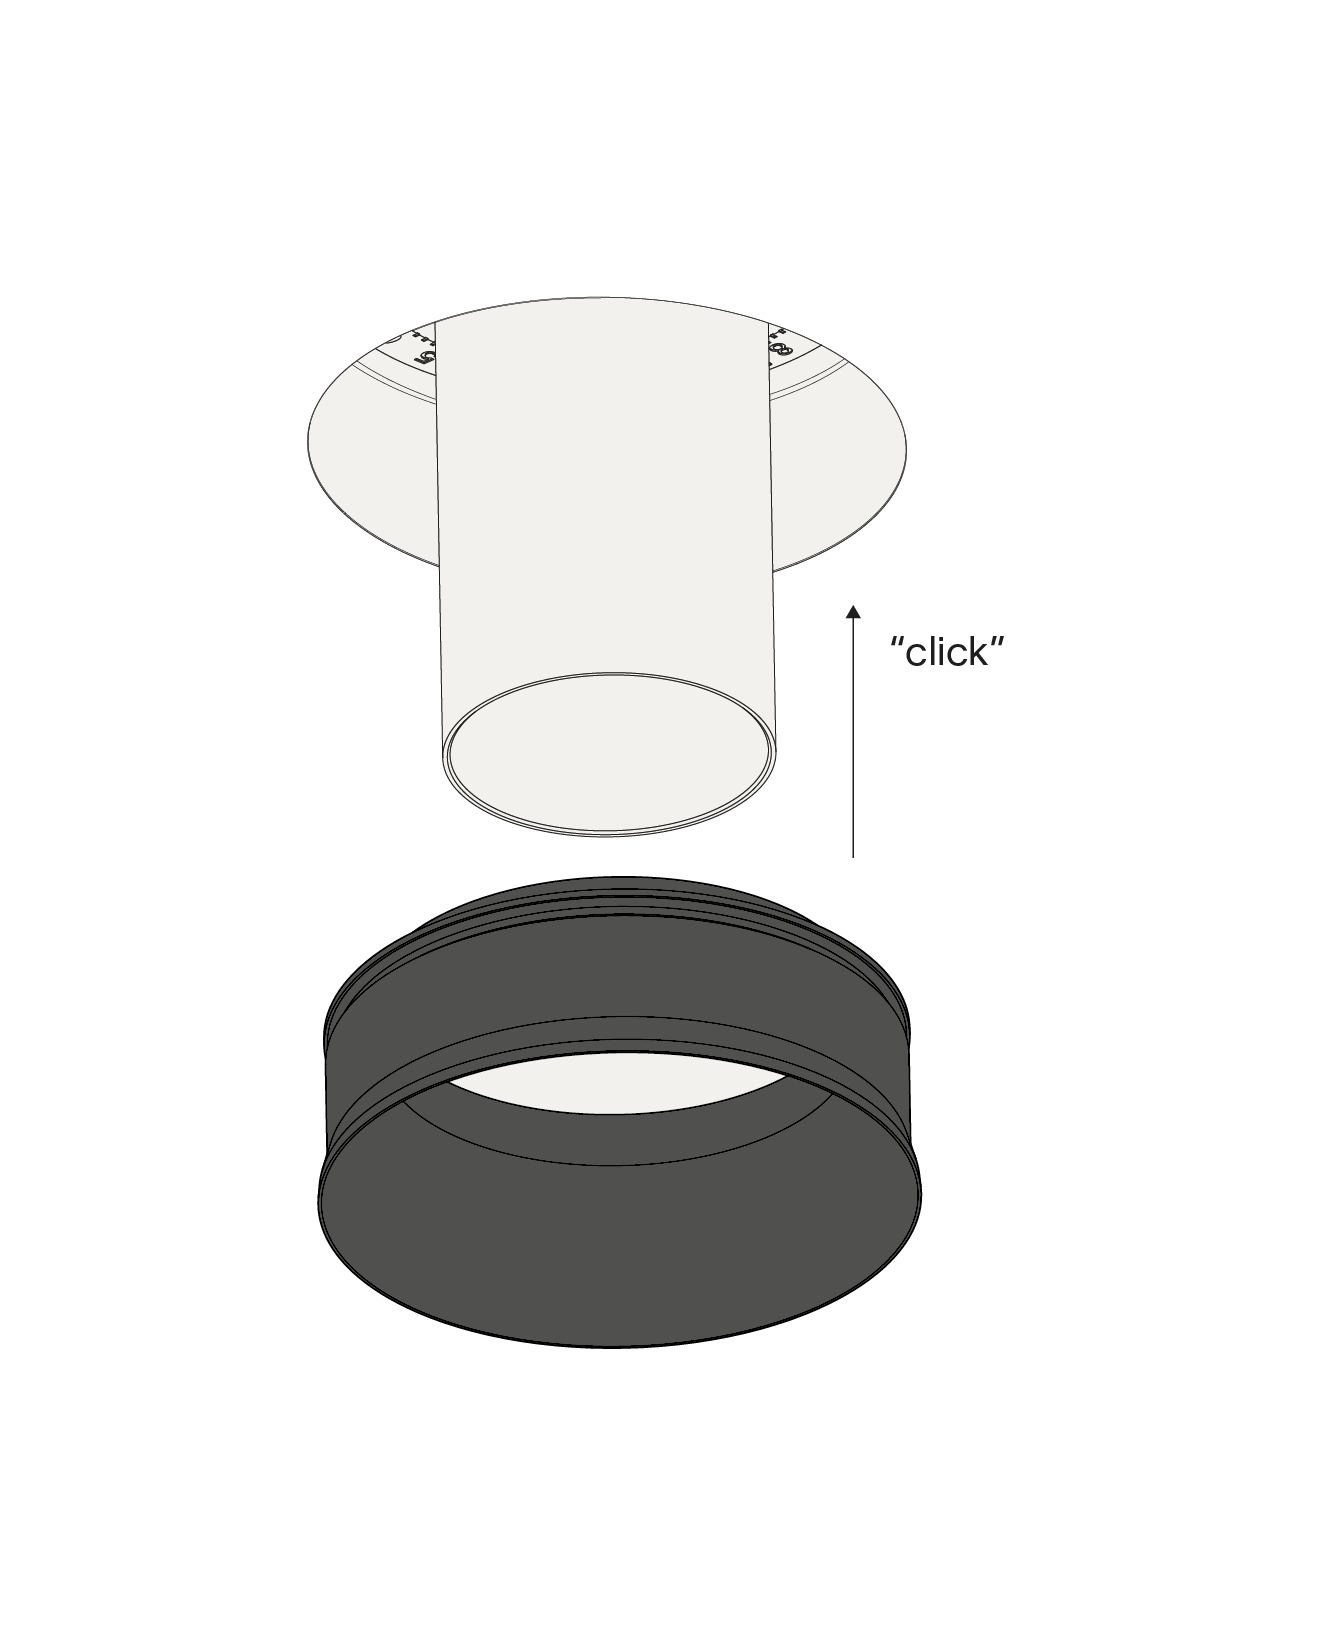
Insert the design ring to lock the ventilation valve.
Step 8 / 10
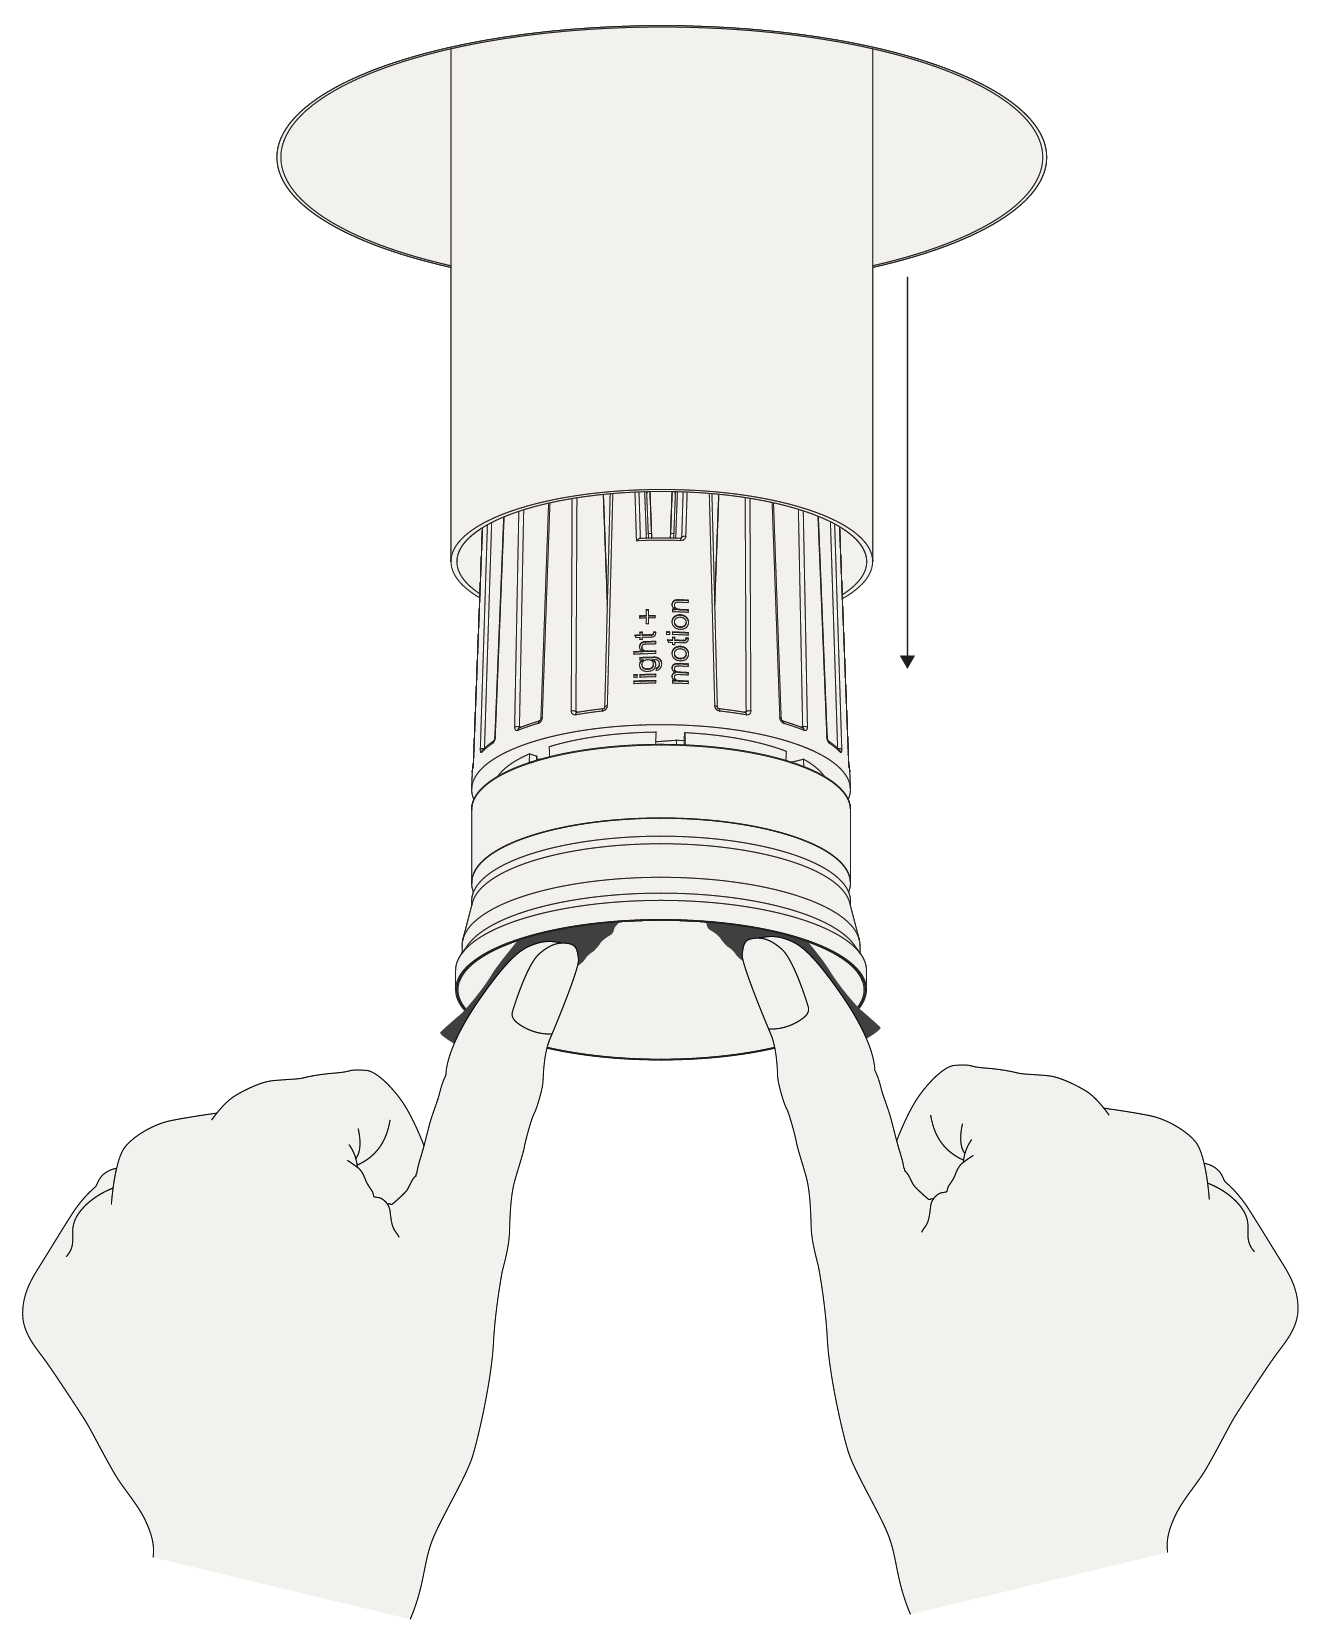
For both maintenance and the adjustment of settings, the luminaire can be removed from the housing using duct tape.
Step 9 / 10
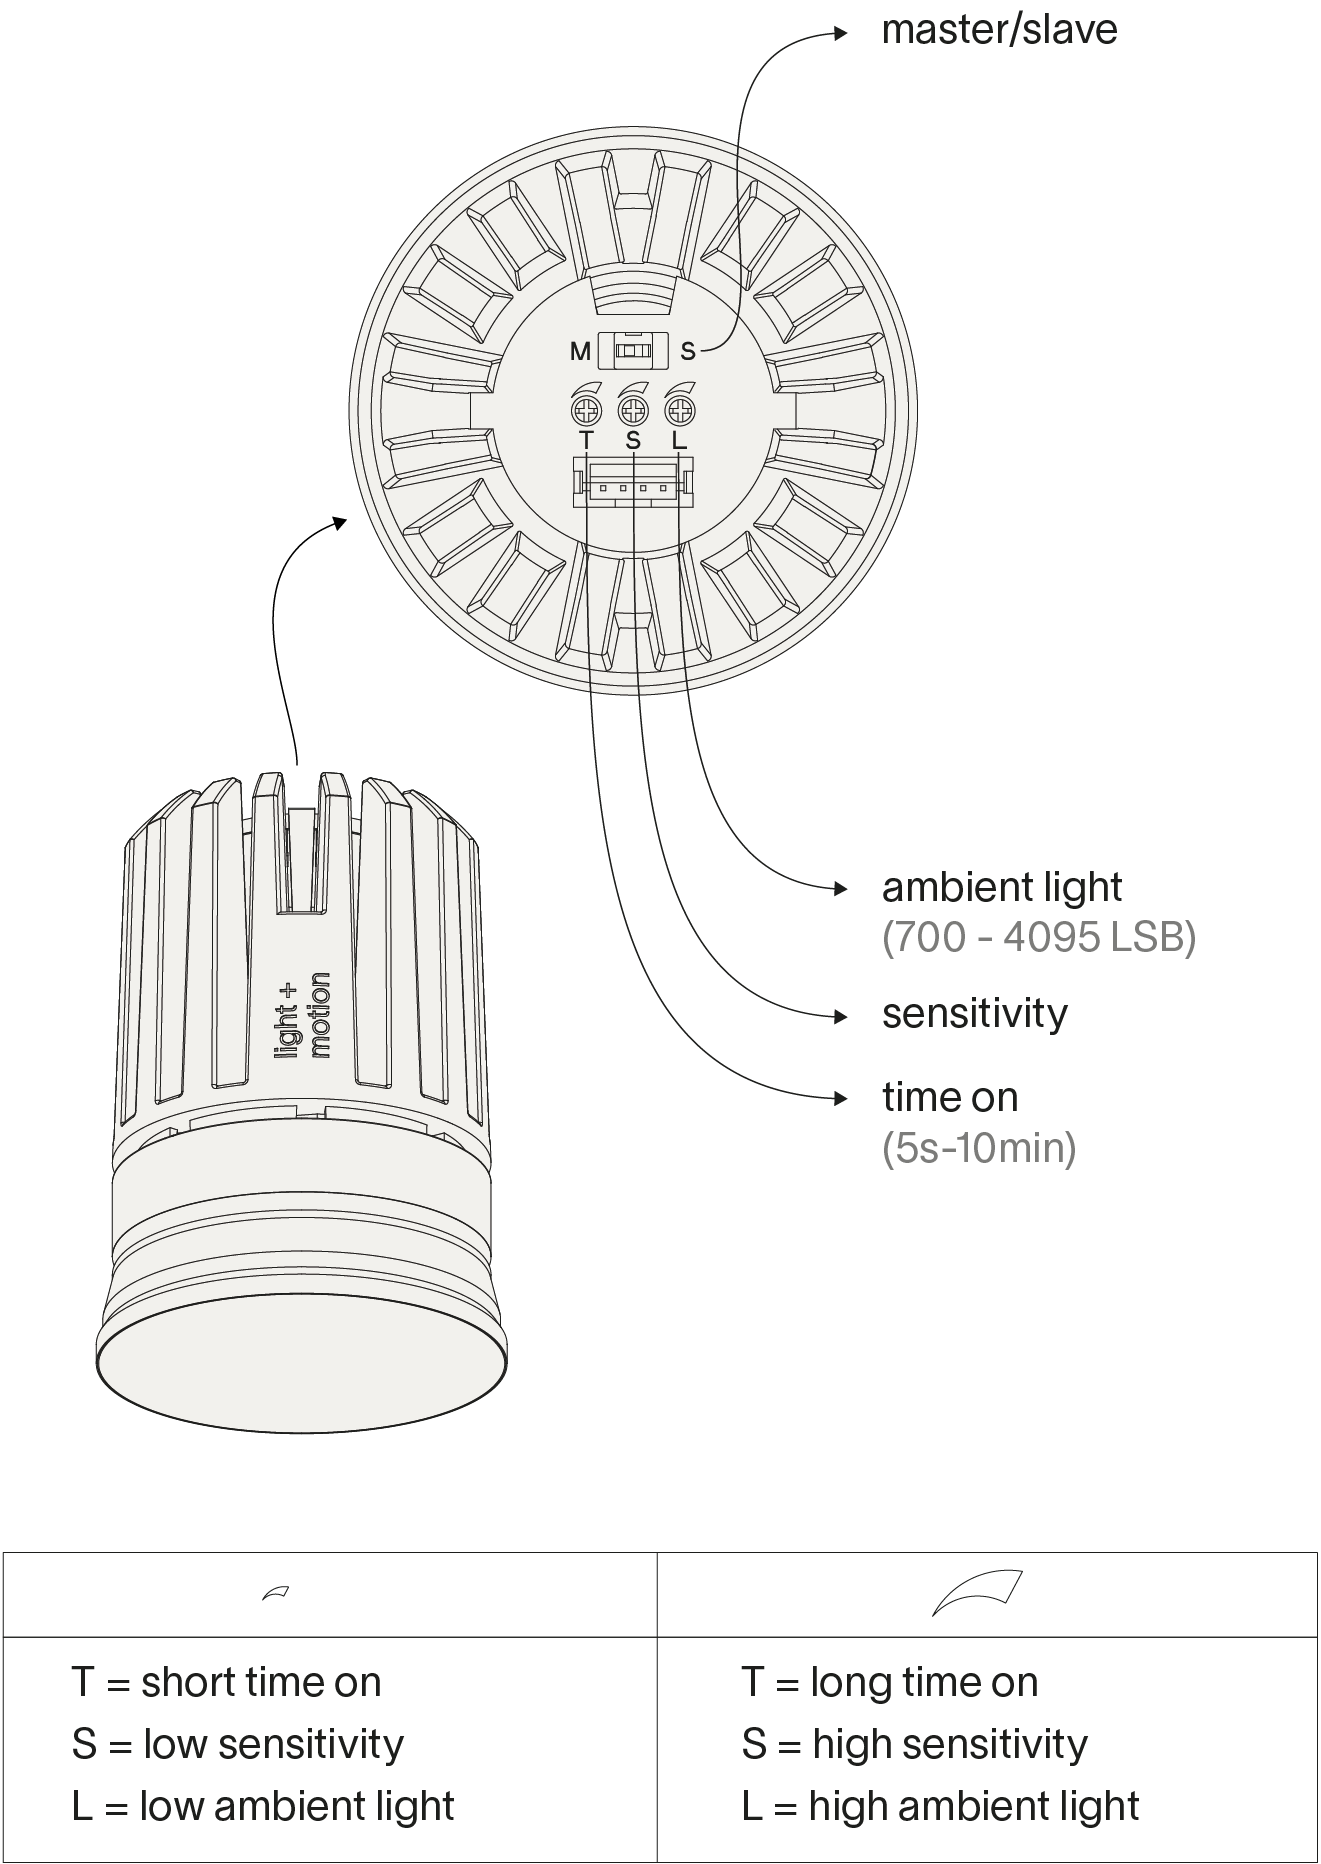
If desired update standard settings with a screwdriver.
Standard settings
- Ambient light: 1700 LSB
- Sensitivity: no pets detectable
- Time on: 5min
Standard settings
- Ambient light: 1700 LSB
- Sensitivity: no pets detectable
- Time on: 5min
Step 10 / 10
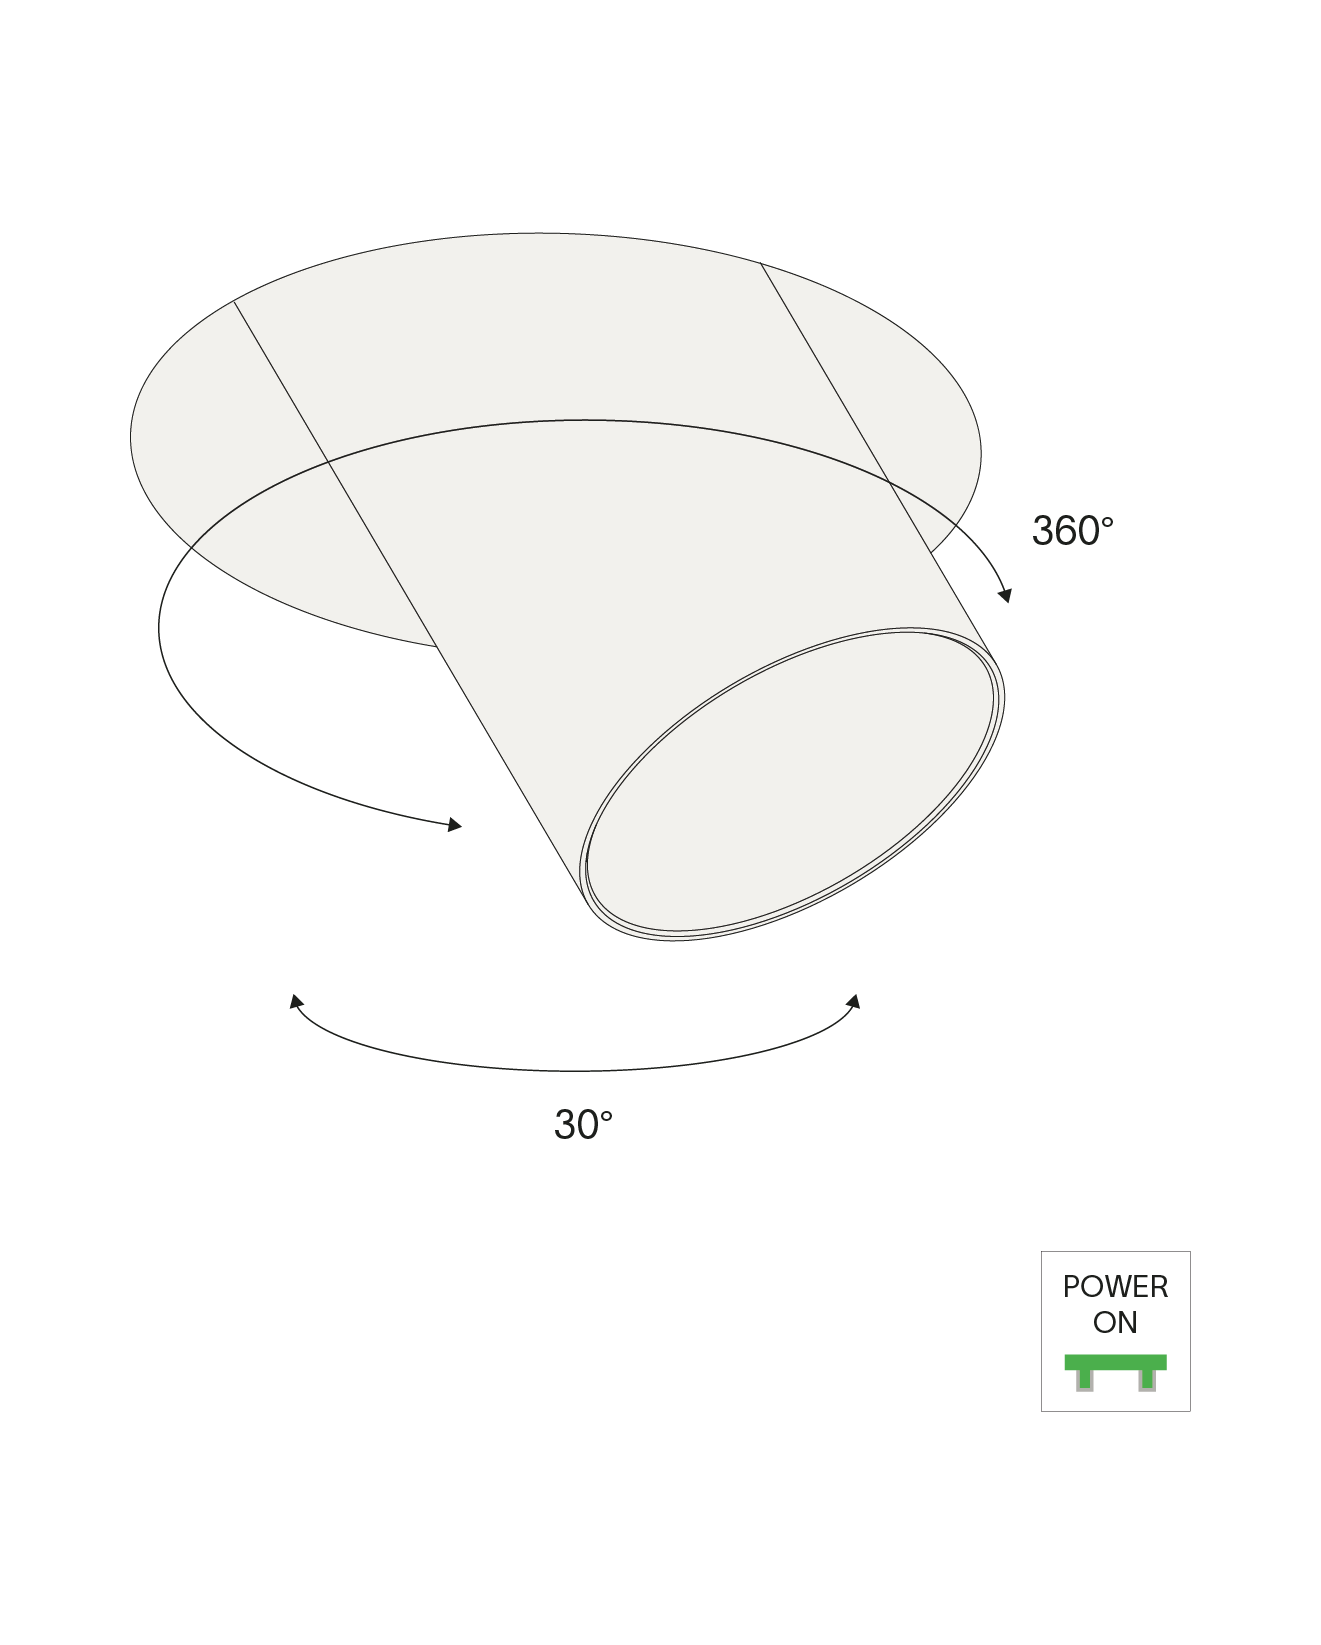
Twist the luminaire as desired.
The light source or electronics in this fixture shall only be replaced by the manufacturer. Warranty will not apply in case of wrongful use or if unskilled personnel attempts to repair the product.

